Crispy Tater Tot Chili Cheese Bites
This post might have affiliate links. For full details please see my disclosure policy.
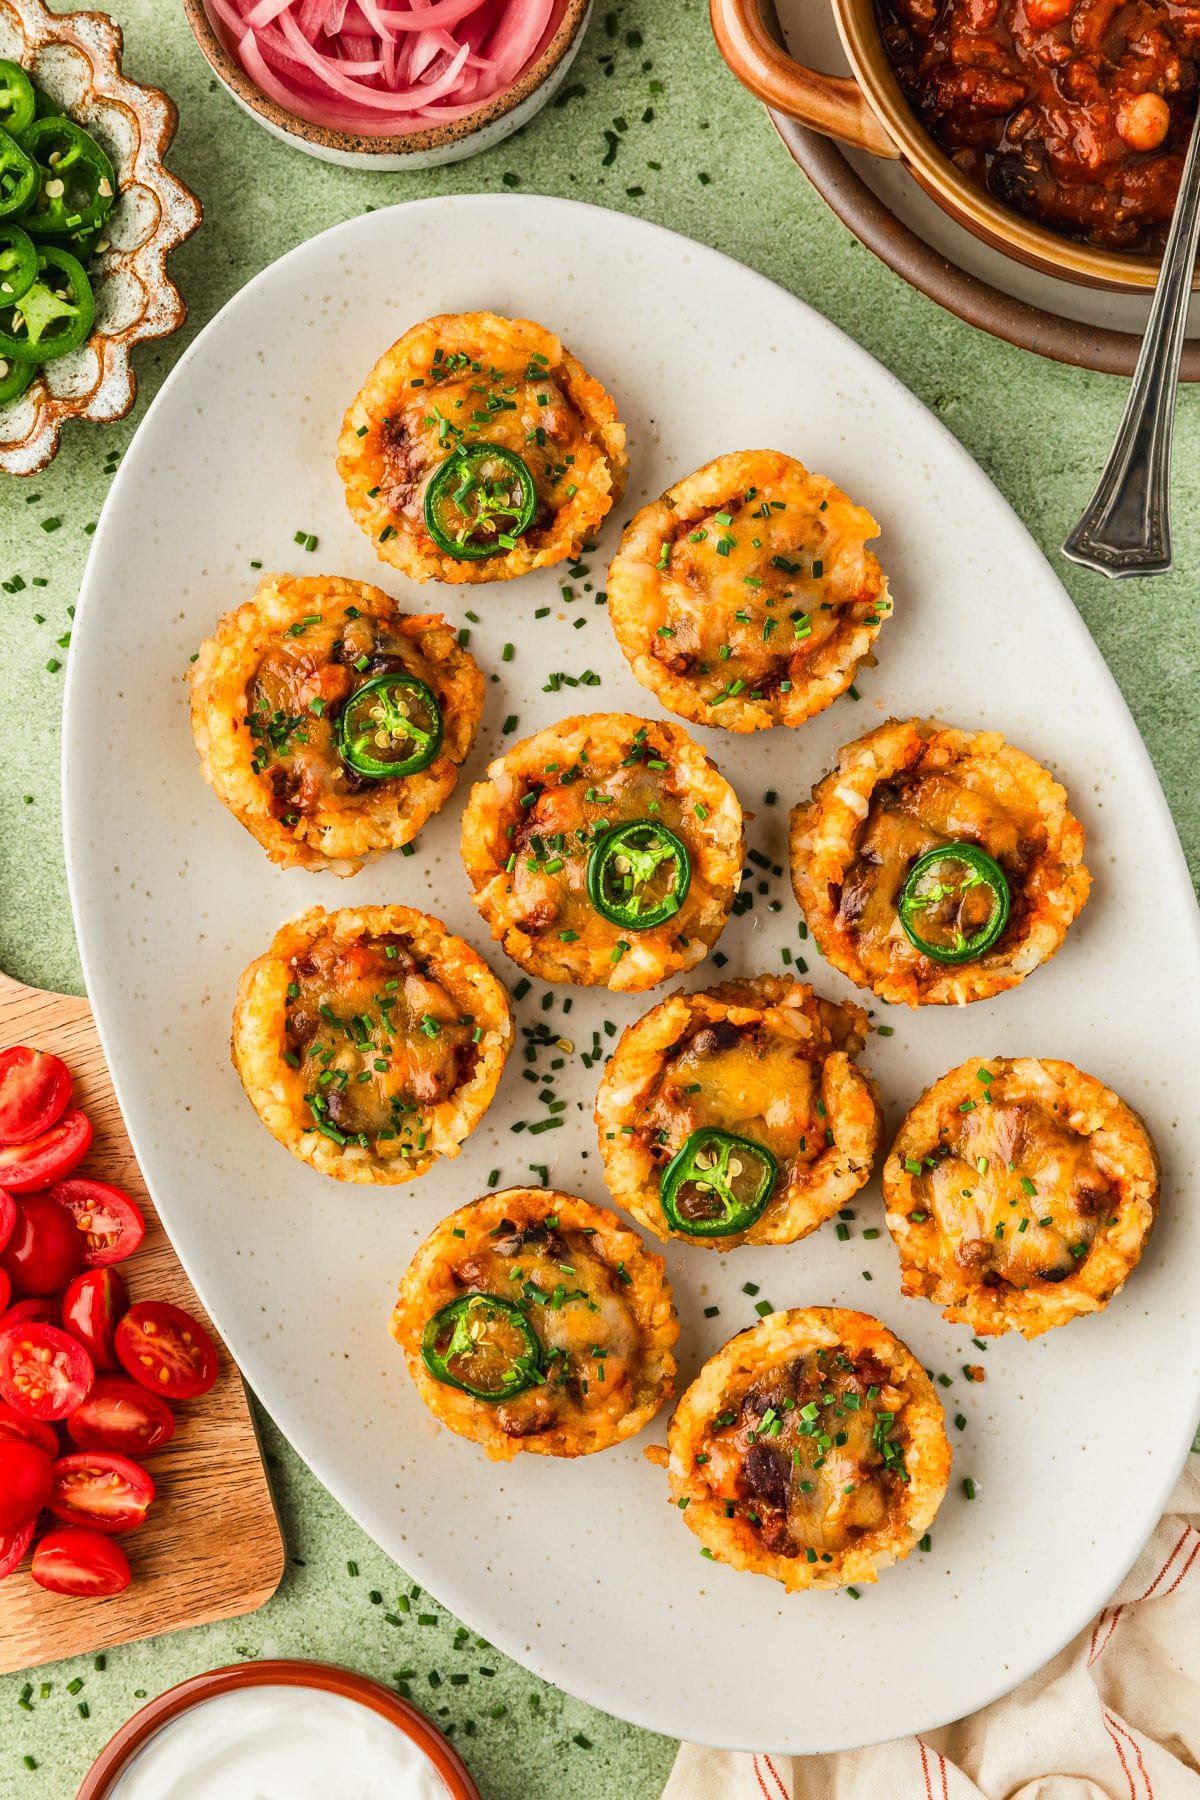
These tater tot chili cheese bites are basically just handheld chili fries. Like, you won’t believe how good they are! They have crispy tots, homemade chili, and gooey cheddar for an easy game day appetizer. Serve them with all of your favorite toppings like jalapeños, sour cream, pickled onions, and more!
Any time my mom made chili when I was a kid, we would use the leftovers to make either chili tots or nachos. Honestly, it was the best part of chili night, because what’s better than snacks-for-dinner? And the tots version was always my favorite because ya know I’m a potato + cheese girl at heart.
With this appetizer, I really wanted to recreate that situation but bite-sized since it’s way easier to serve at a party. And now that the winter Olympics are here, we’ve been having lots of watch parties with our friends! This app has been absolutely clutch because I have so much leftover chili from the chili “charcuterie” board I set up for Super Bowl lol.
Of course, if you’re feeling a little more casual, store-bought chili will 100% work here. Just pick something thick and good-quality so the cups don’t get soggy! I like classic chili with beans, but you can use bean-less or even a vegetarian version if you like.
Frozen tots
This recipe starts off with classic frozen tots, no need to defrost them! I like to use the Extra Crispy tots because, obviously, they crisp up better haha. But you can use whatever you like best. Even sweet potato tots would be delicious!
Shot glass
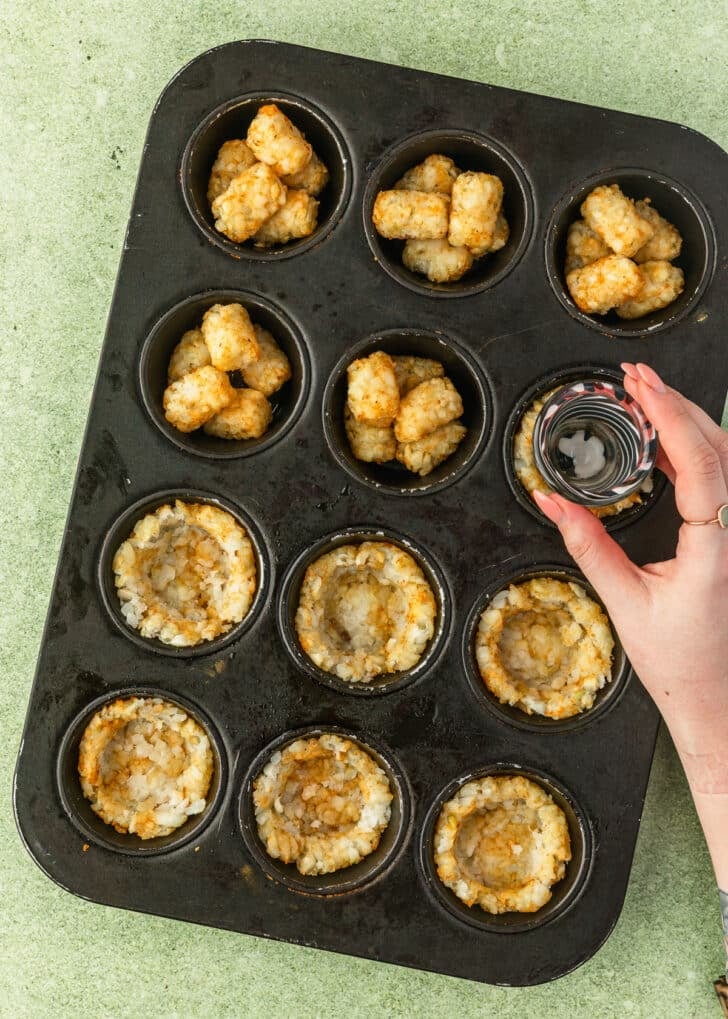
To create that “cup” shape, I found that a shot glass (or any small small cup contraption) works best. You can also use a spoon to create divots, but a shot glass is quicker and easier.
When you’re making the cups, don’t be afraid to really press them! You want the bottoms to be somewhat thin so they crisp up, but not so thin that they fall apart.
Step by step directions
The total bake time will depend on how crispy you want the potatoes to be! I like extra crispy bites, so I bake them for longer. But if you want a more potato-y texture, feel free to bake them for less time.


If you make this recipe, I would love it if you left a star rating and review! I read every single comment and love hearing what you think about my recipes. Thank you for supporting Sunday Table!

Spicy Tater Tot Chili Cheese Bites
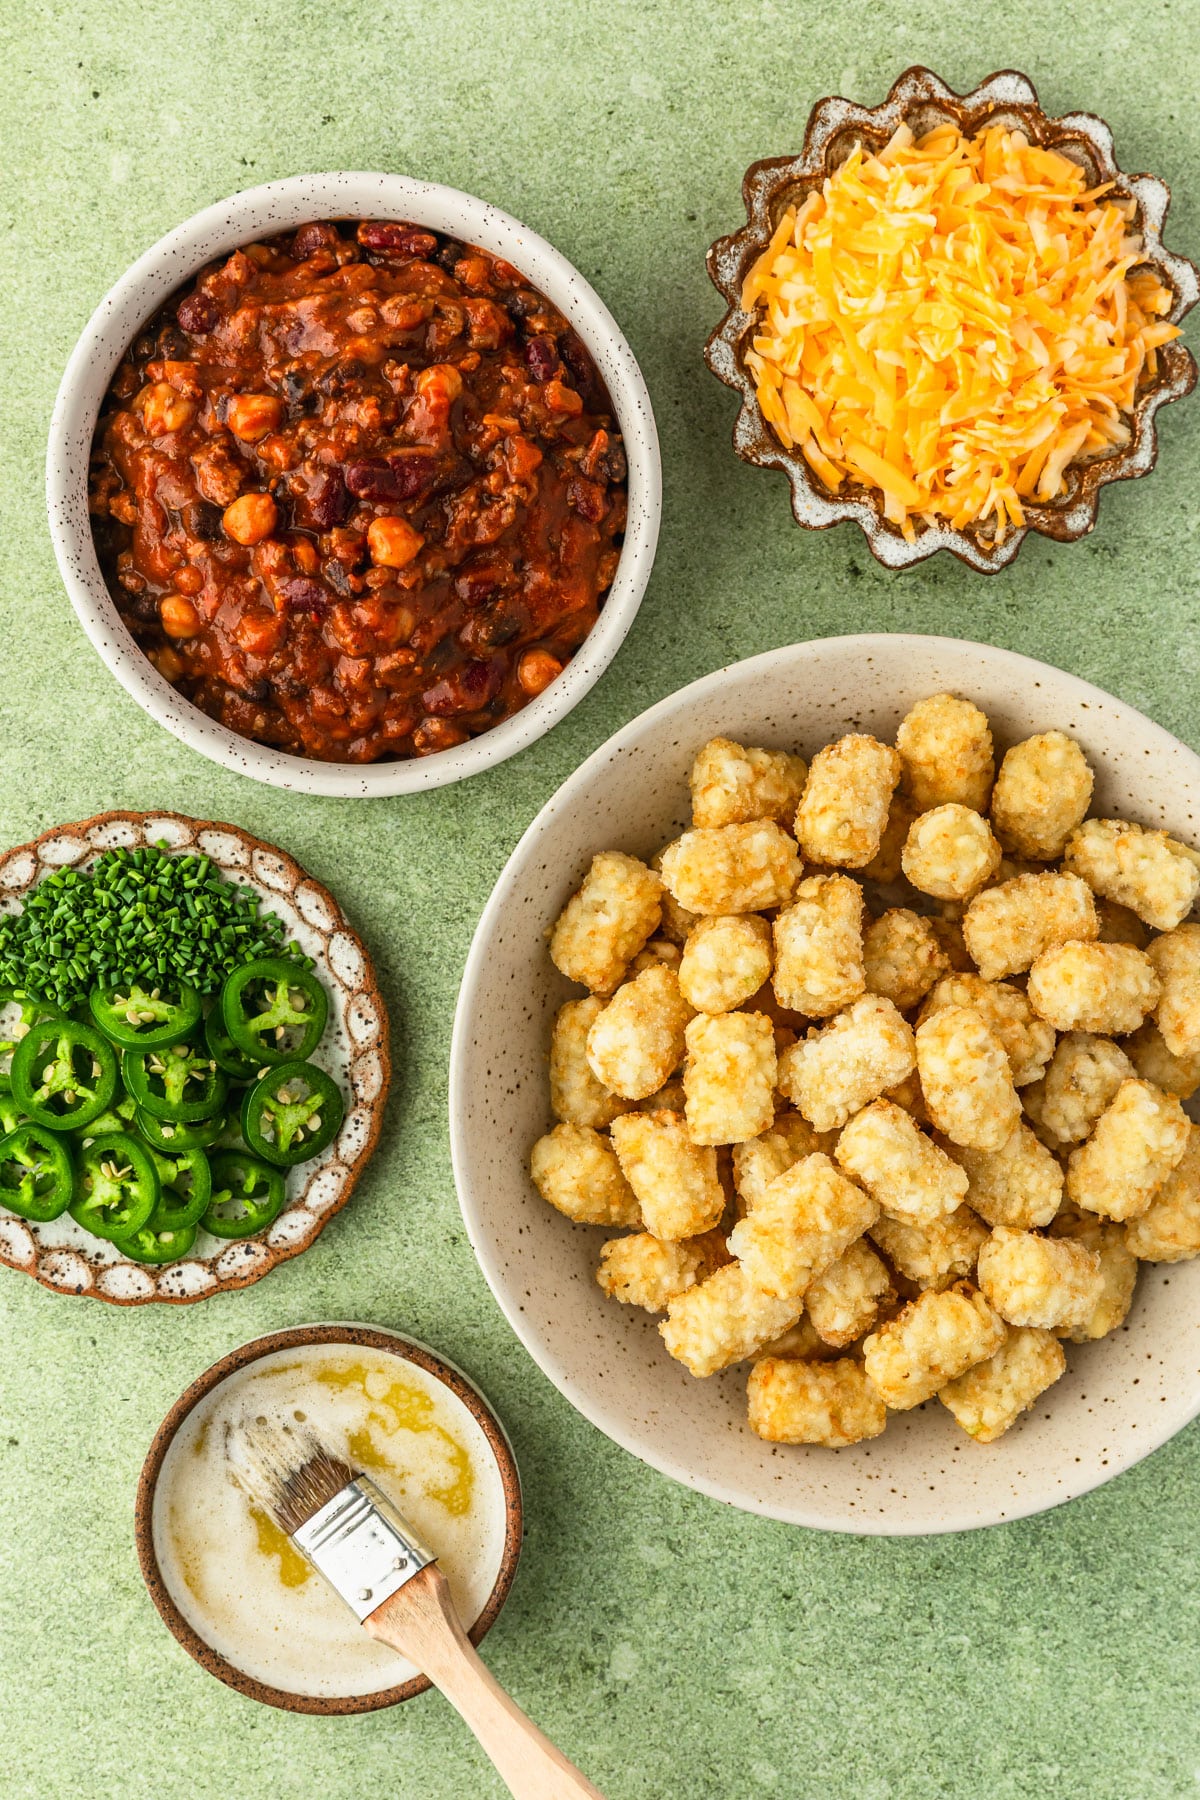
Ingredients
- 60 frozen tater tots
- 1 Tablespoon unsalted butter, melted (15 grams)
- 1 cup freshly-shredded sharp cheddar cheese, divided (80 grams)
- 1 1/2 cups homemade chili or store-bought (375 grams)
- Sliced jalapeños, for garnish
- Chopped chives or green onions, for garnish
- Sour cream, pickled onions, tomatoes, etc. for serving
Equipment
- Standard cupcake pan
- Shot glass or spoon
Instructions
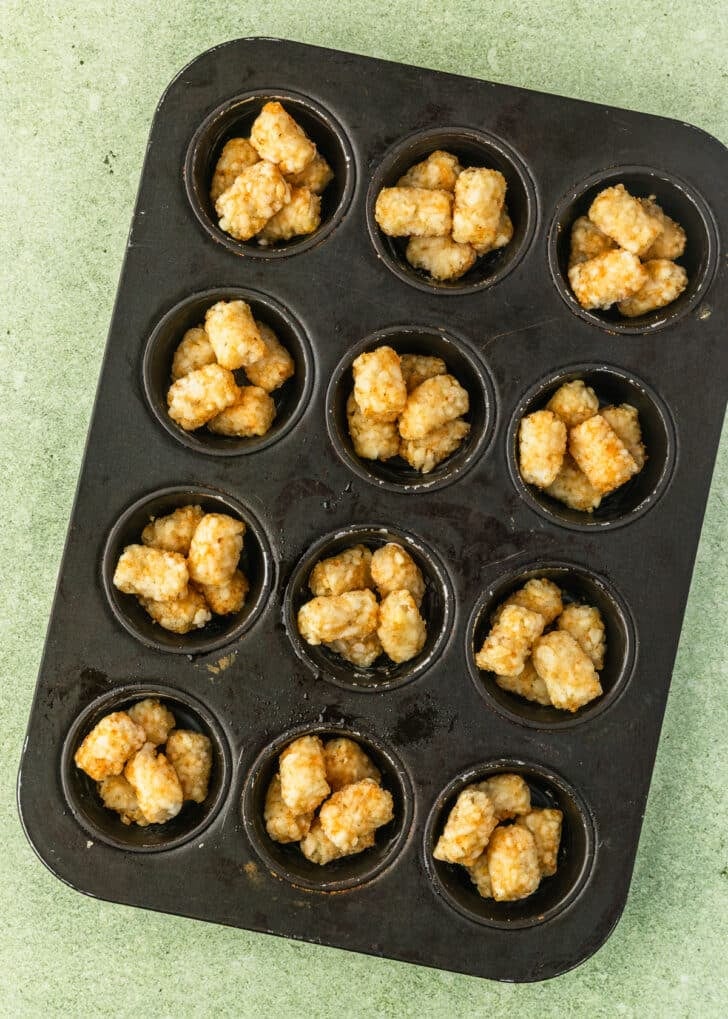
- Preheat the oven to 425°F (218°C). Place 5 frozen tater tots in each cup of a standard cupcake pan. Bake the tots for 10 minutes, until they're soft enough to smash.
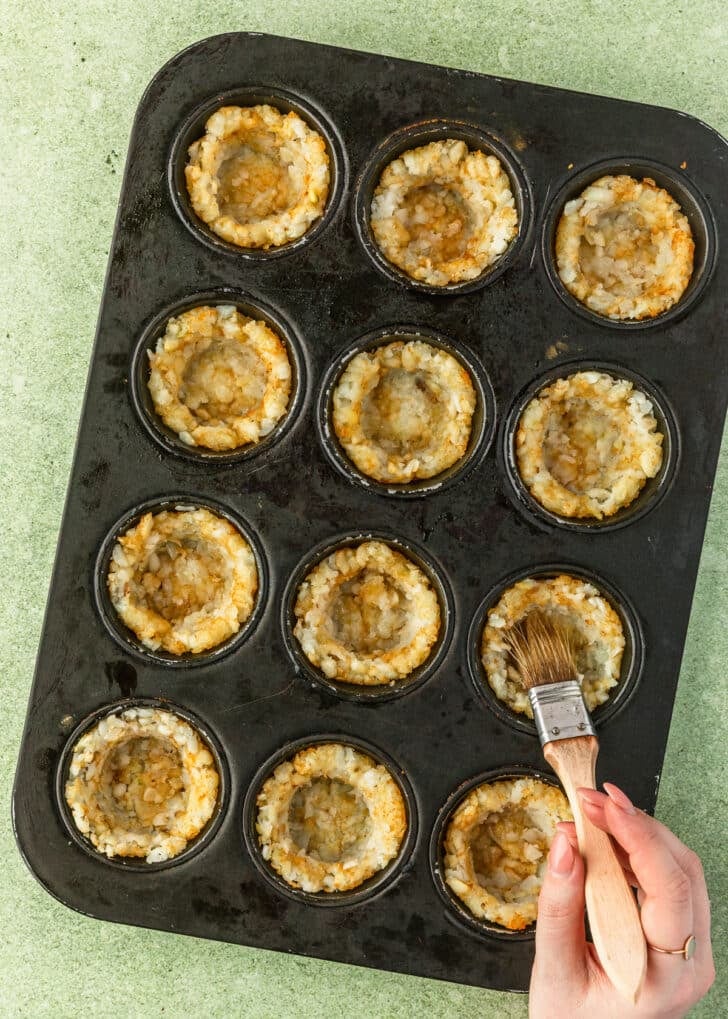
- Use a shot glass or the back of a spoon to gently, but firmly, press the tater tots into cups. Make sure the bottoms and sides are completely covered! You want the bottoms to be fairly thin so they crisp and hold up, but not so thin that they fall apart. Use a pastry brush to brush the sides of the tater tot cups with the melted butter. Bake for 20-22 more minutes, until the cups are nice and crispy, especially on the sides.
- While the tots are baking, gently heat the chili in a saucepan, until it's hot and bubbly. Set aside. Then, turn the oven broiler to HIGH.
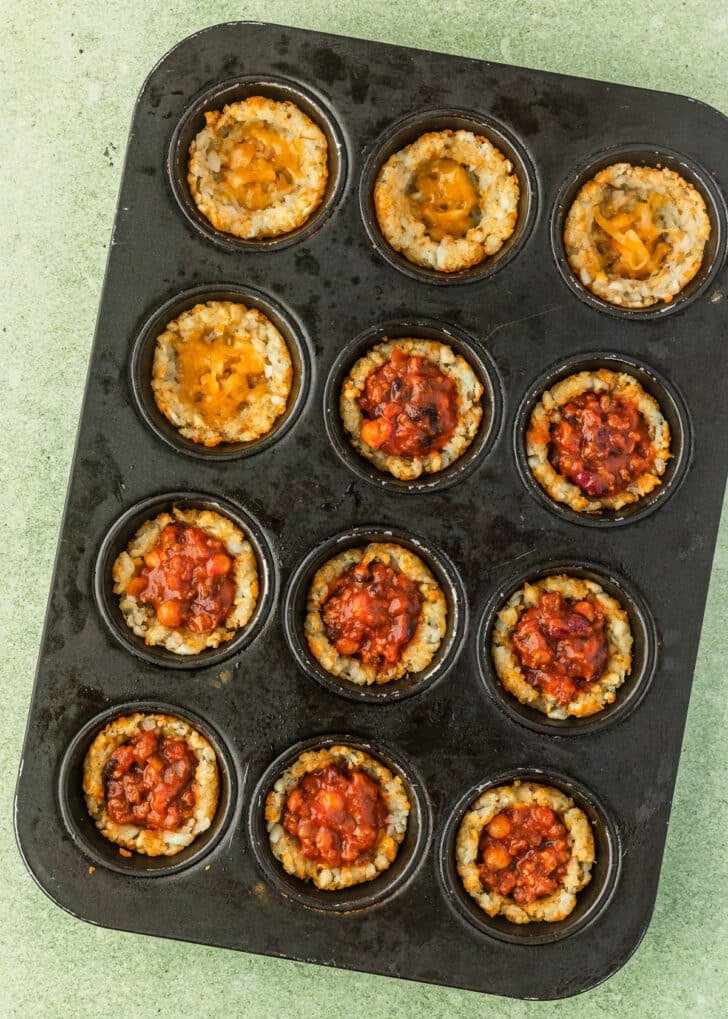
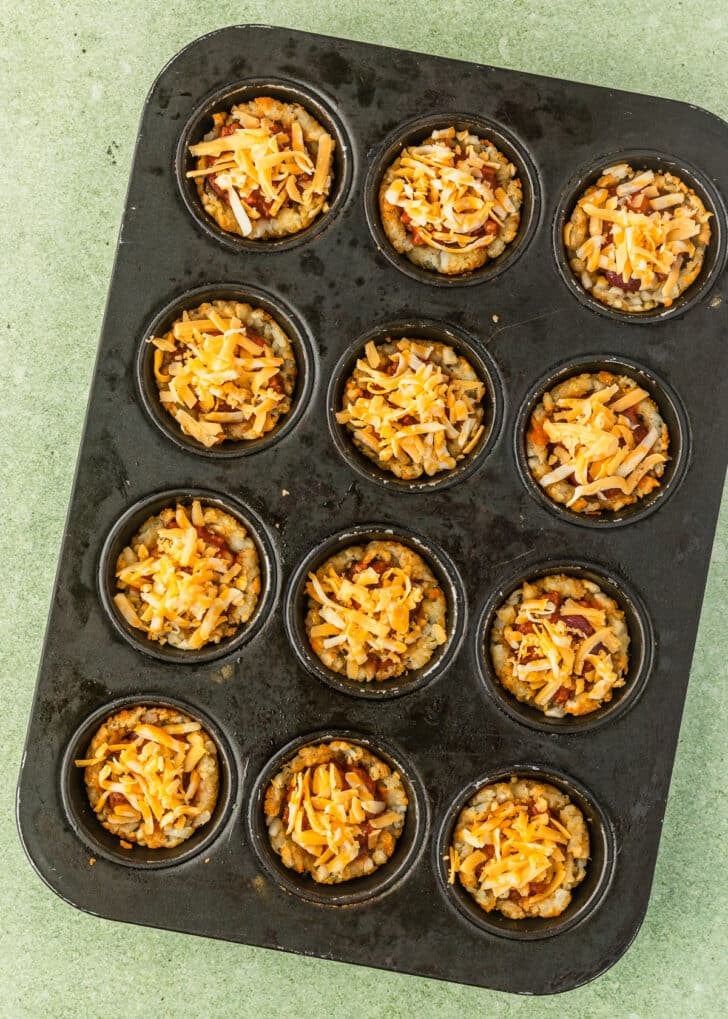
- Sprinkle about 1/2 Tablespoon of shredded cheddar cheese on the bottom of each tater tot cup. Then, spoon about 1 1/2-2 Tablespoons of hot chili into each cup. Evenly sprinkle the rest of the cheese over the chili bites. Place 1-2 slices of jalapeños on top of each cup, if desired.
- Broil the bites for 1-2 minutes, until the cheese is melted and bubbly. Let them set for about 5-10 minutes. Then, use a butter knife or small spoon to gently remove the cups from the cupcake pan. They might be a little soft from the chili, so be careful that they don't fall apart! (I've found that it's easiest to slightly tilt the pan with one hand – don't forget to use an oven mitt – and use a spoon or knife to gently release the tater tot cup from the pan. Don't worry if they fall apart a little though, the cheese will still keep the bites together!)
- Place the bites on a serving platter and sprinkle fresh chives or green onions over the top, if using. Serve the cups right away with sour cream, pickled onions, tomatoes, or other toppings. Enjoy!