Cardamom Orange Crème Brûlée
This post might have affiliate links. For full details please see my disclosure policy.
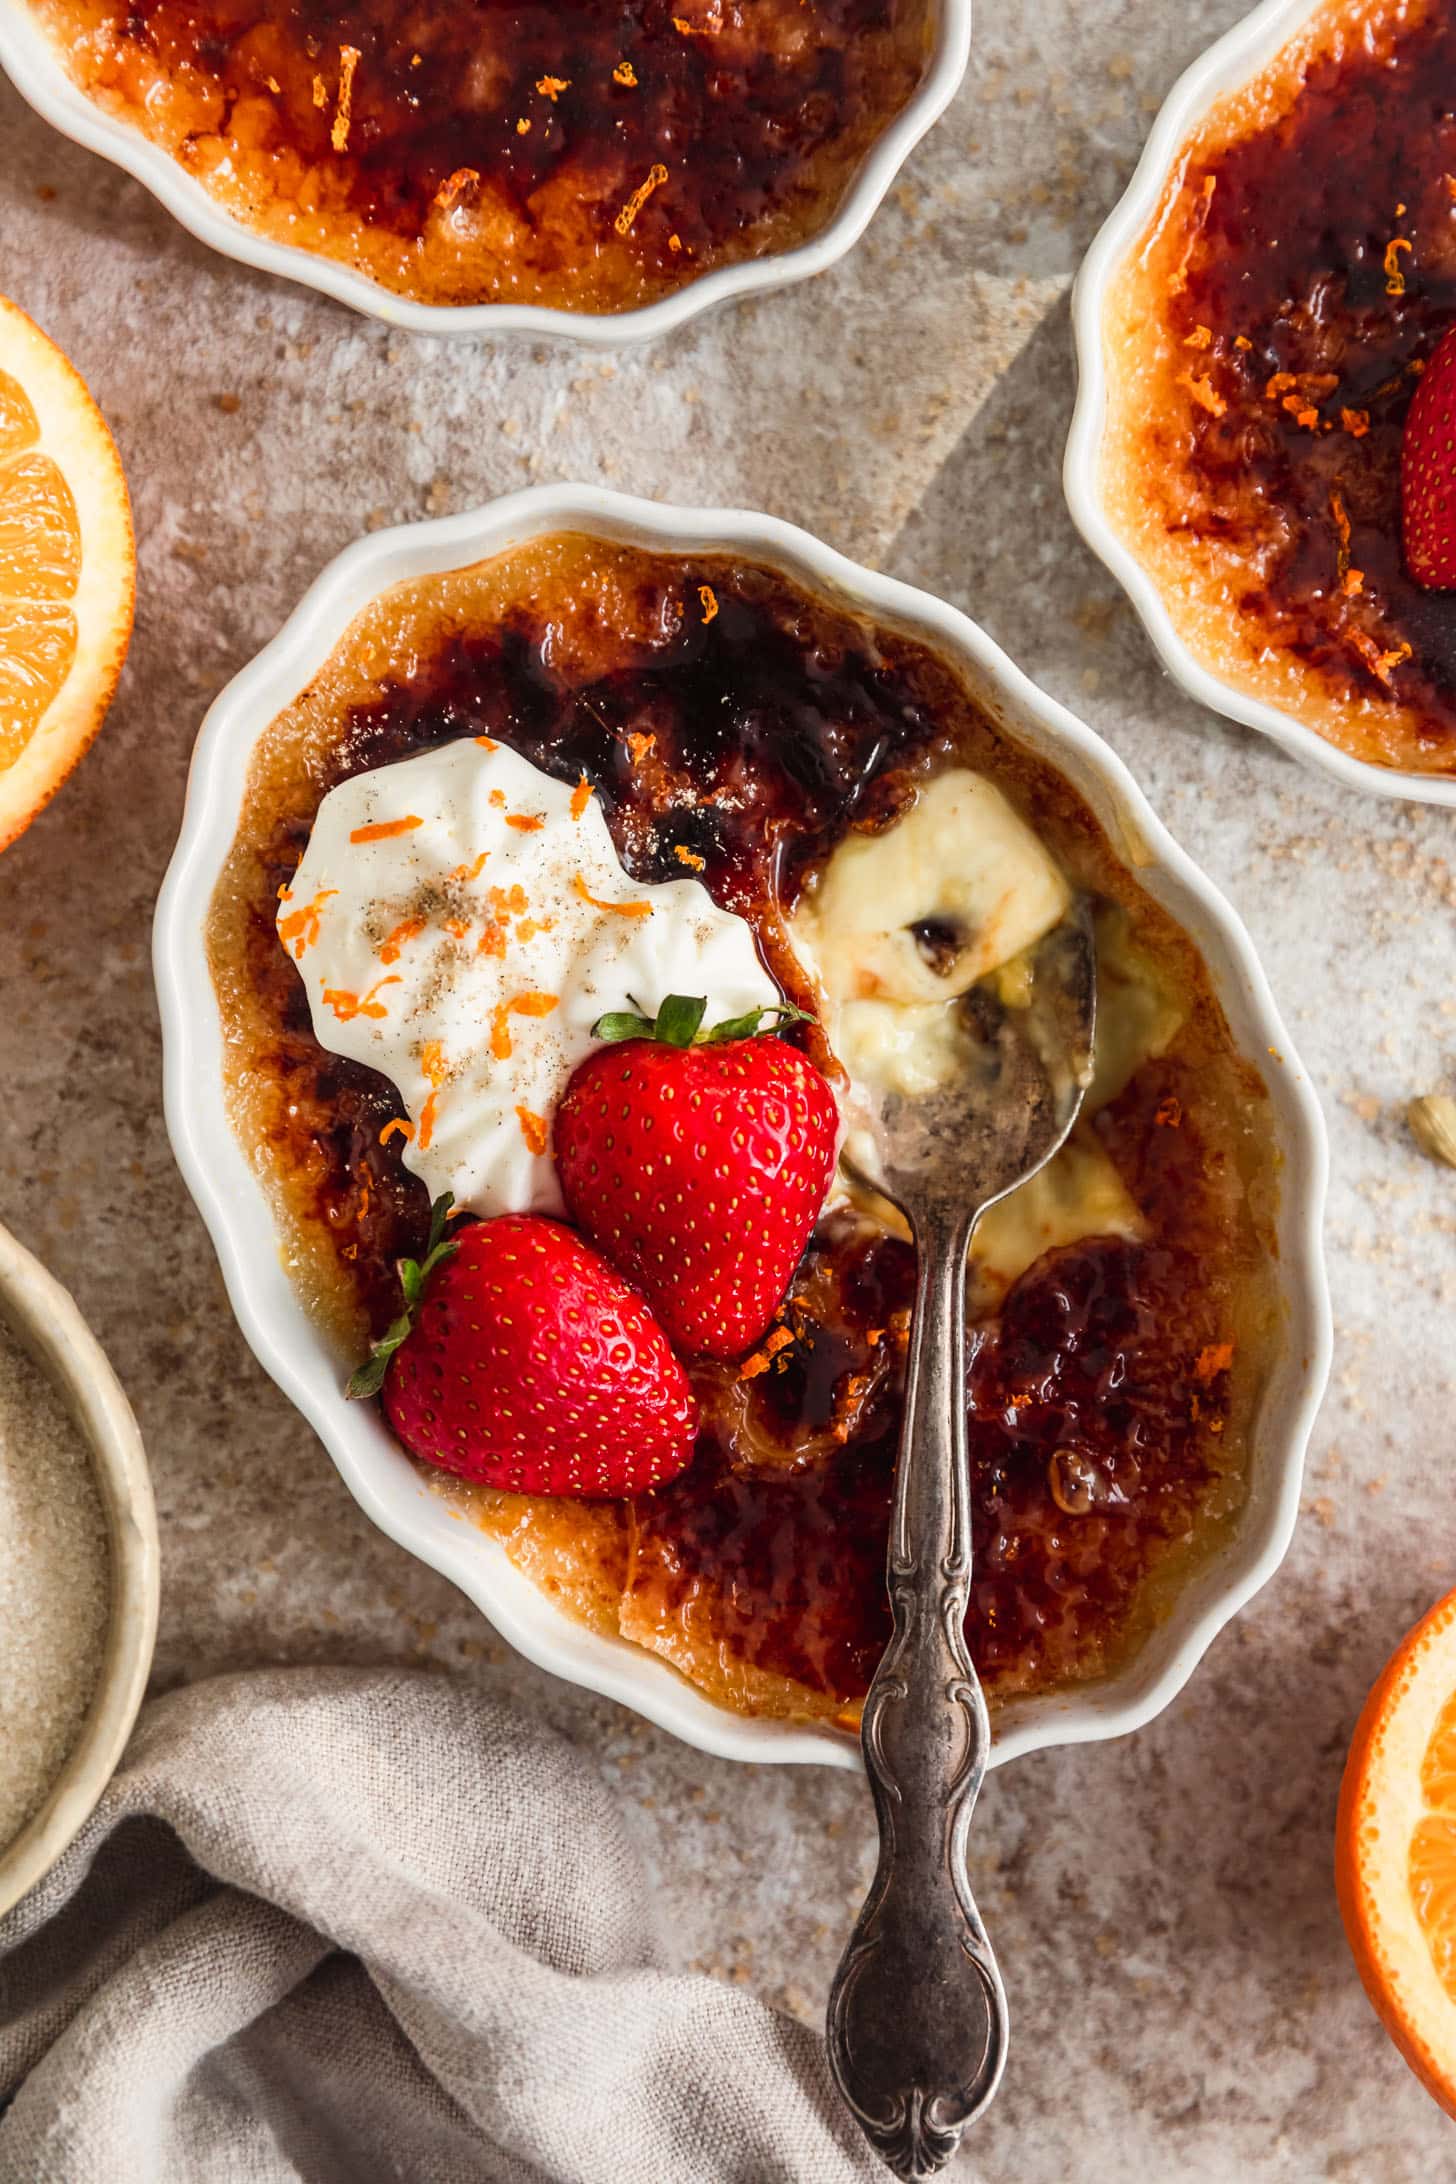
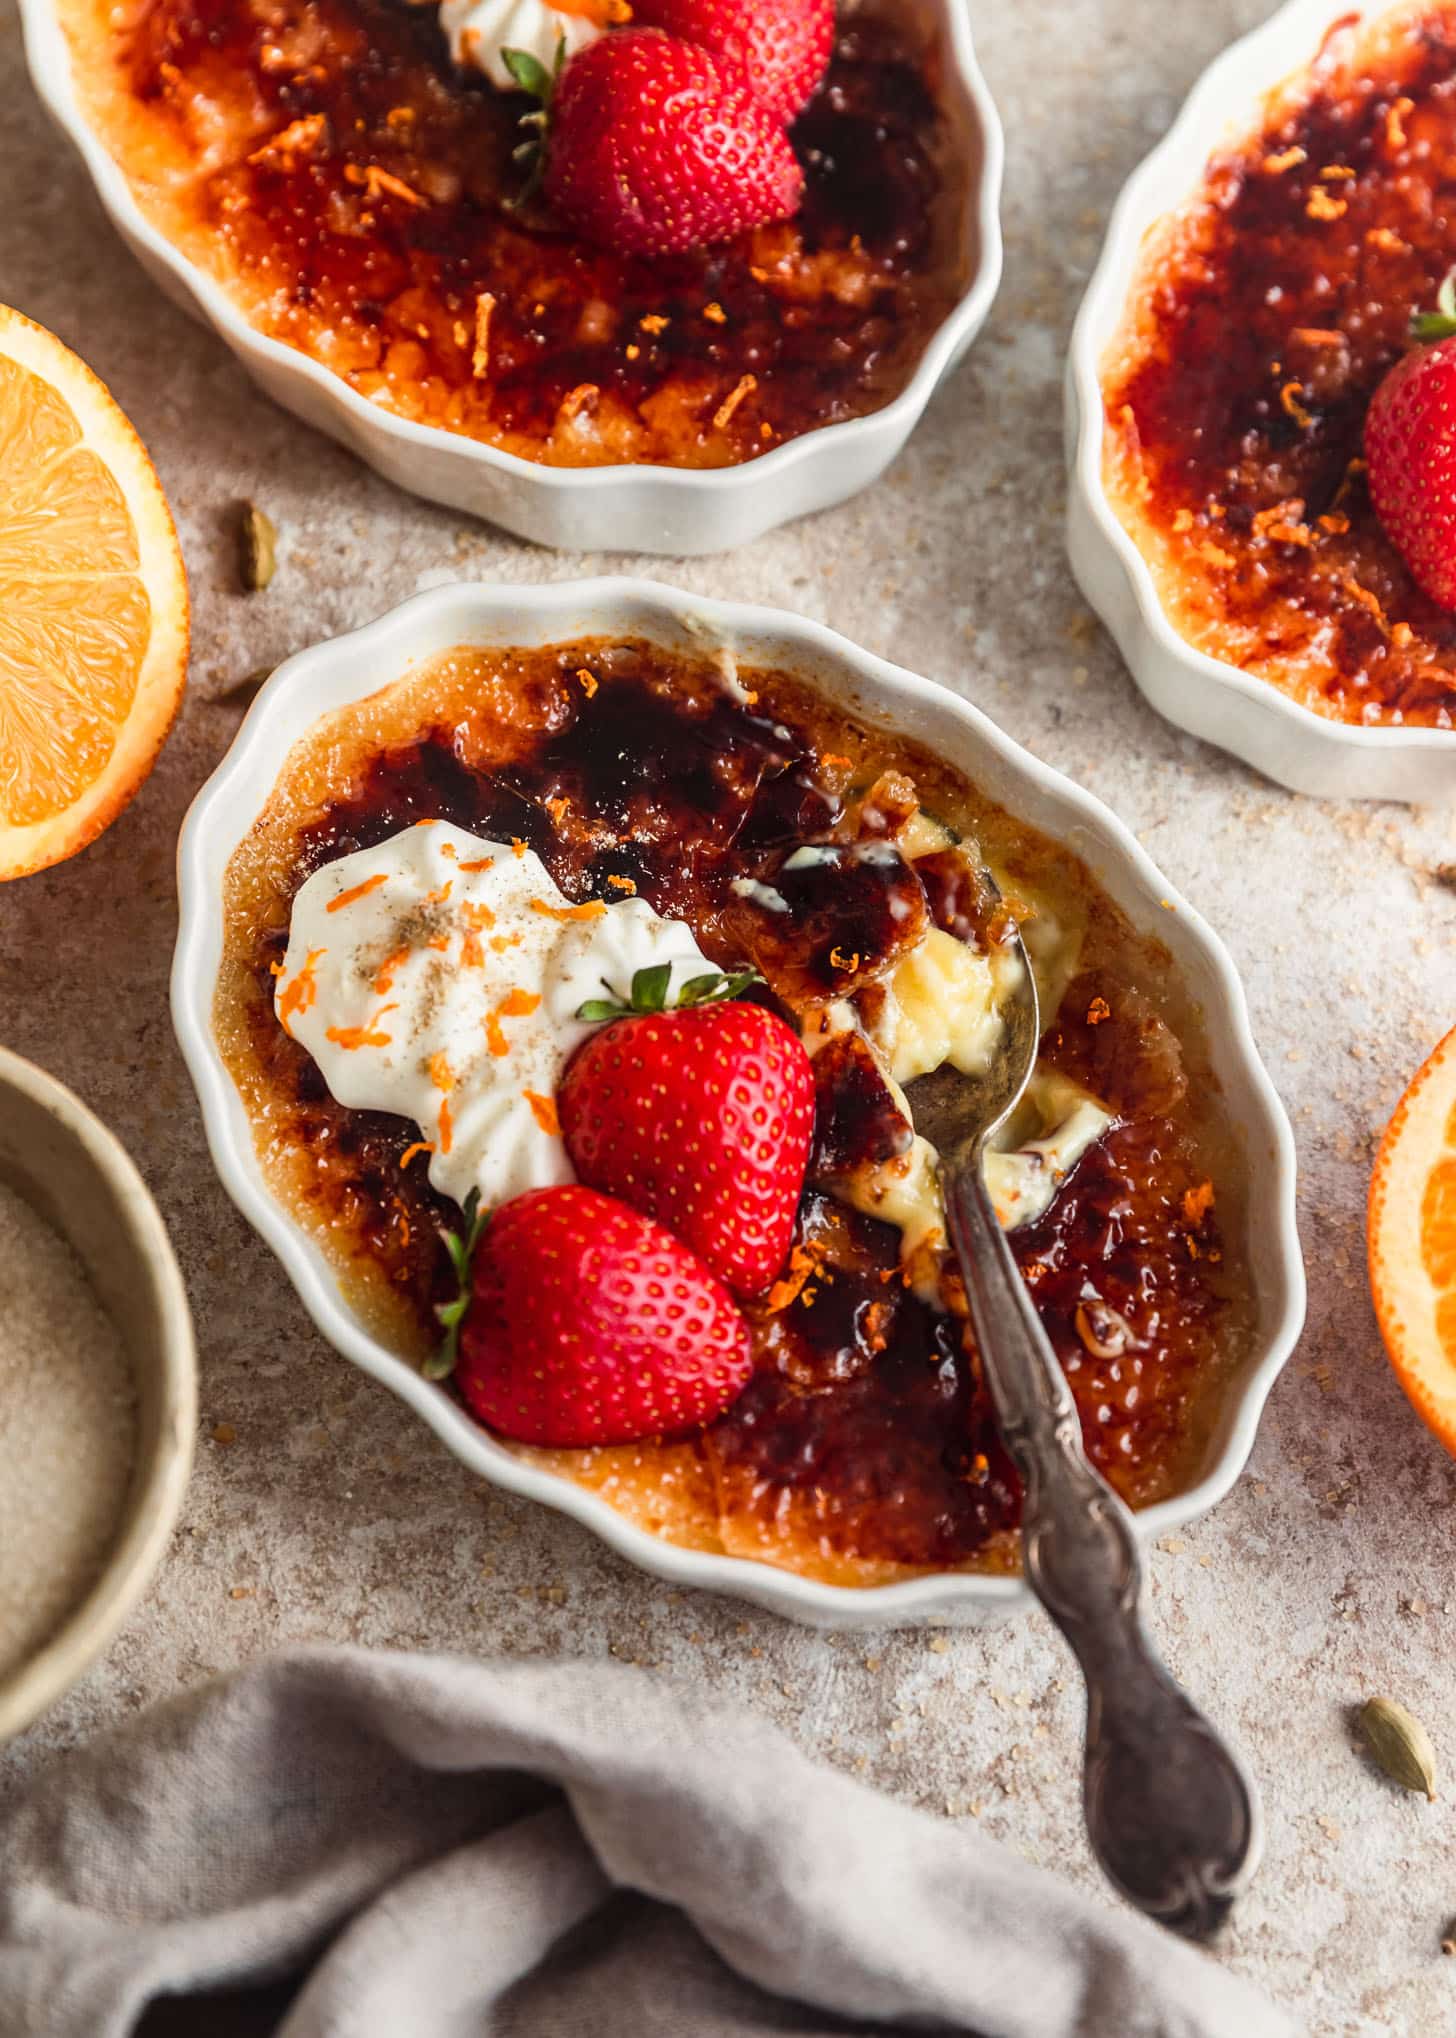
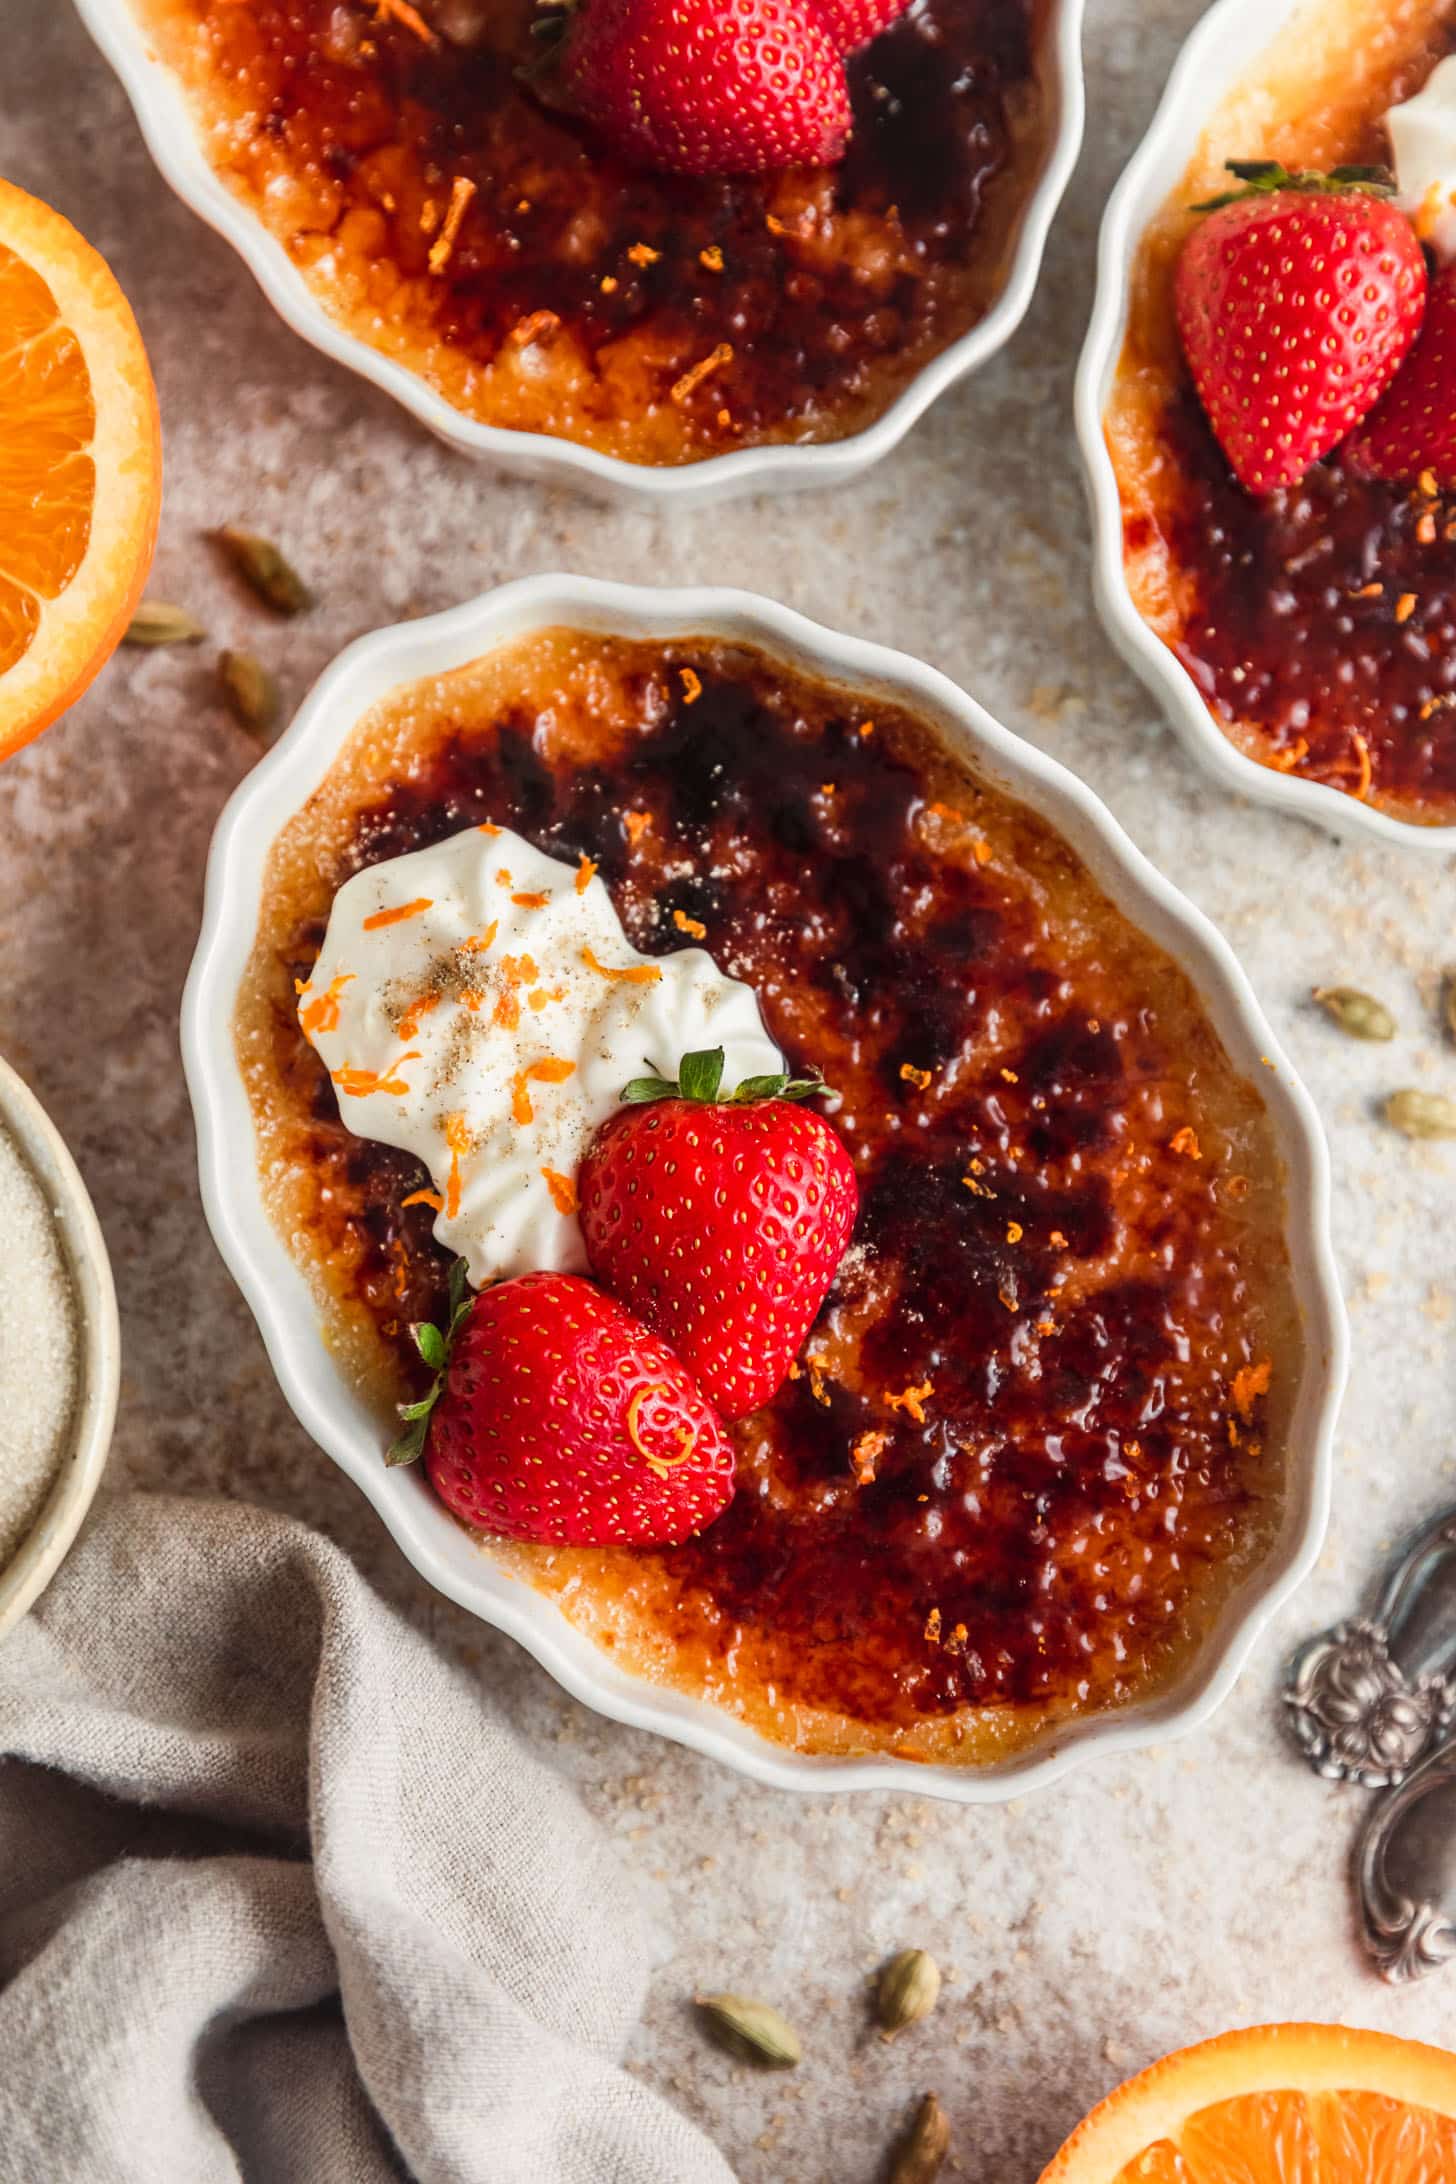
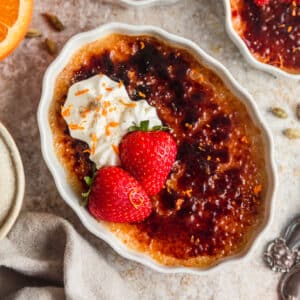
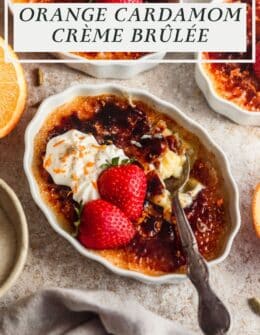
This cardamom orange crème brûlée has vanilla bean paste, orange zest, and a caramelized sugar top for a super easy, but elegant, dessert! This is one of my favorites to serve to a crowd or for a romantic dinner for two. Made from scratch in the oven, this recipe is also make-ahead and the perfect dessert for beginners.
Valentine’s Day is this week!! Marc and I usually don’t do much aside from eating dessert and drinking wine while watching New Girl for the millionth time. But, I’m always looking for an excuse to make a fancy dessert, because well, it’s me. My cheesecake red velvet trifles and this fluffy coffee cardamom cake are usual go-tos, but honestly, nothing beats a good French créme brûlée.
And like, ok, I’m biased because it’s my favorite dessert. But as a trained pastry chef, I have made crème brûlée dozens of times and I have a few tips and tricks to make sure that it comes out amazing every single time. While it’s a fairly simple process, I definitely recommend reading through the recipe twice before you start to make sure you’re hitting every step!
This particular recipe is somewhat based off of the crème brûlée that my mom made for my birthday when I was a kid. (Yes, I was a weird child and always wanted crème brûlée for my birthday “cake”). It has orange liqueur for a bitter, boozy element and a crisp, caramelized sugar top. I also added some cardamom and orange for a little warmth and citrusy flavor.
The ingredients are so simple
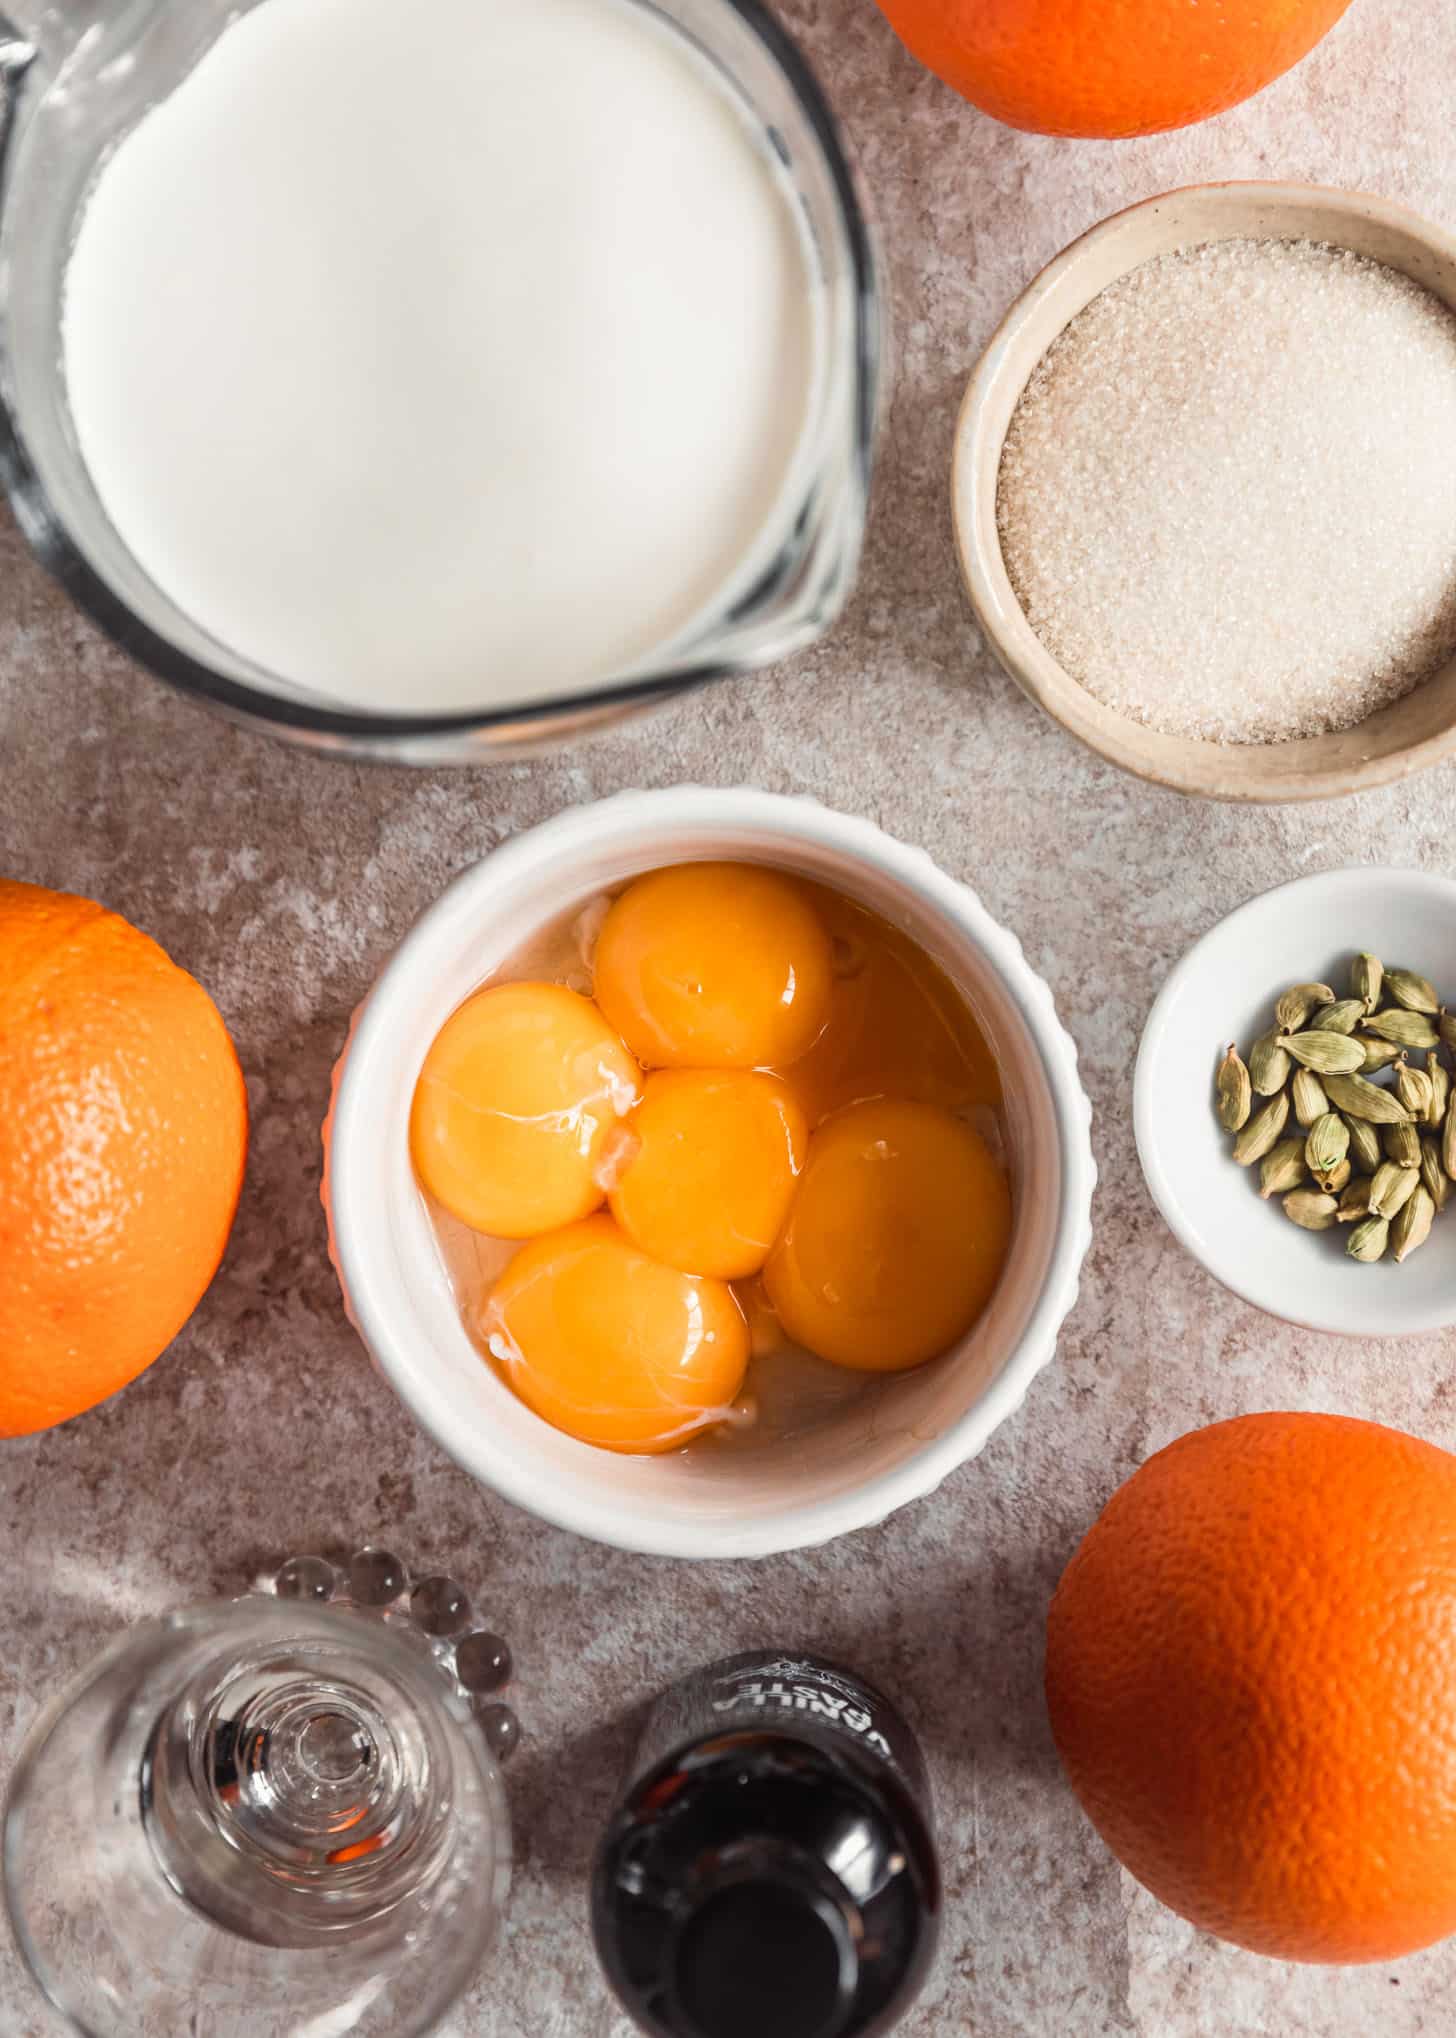
Egg yolks are the key ingredient in créme brûlée. It thickens the custard and makes it rich and decadent. You’ll also need granulated sugar, heavy whipping cream, oranges, vanilla bean paste or extract, orange liqueur, and cardamom. I highly recommend fresh cardamom for the best flavor, but pre-ground will work in a pinch. You can also use cinnamon!
How to make this recipe step-by-step
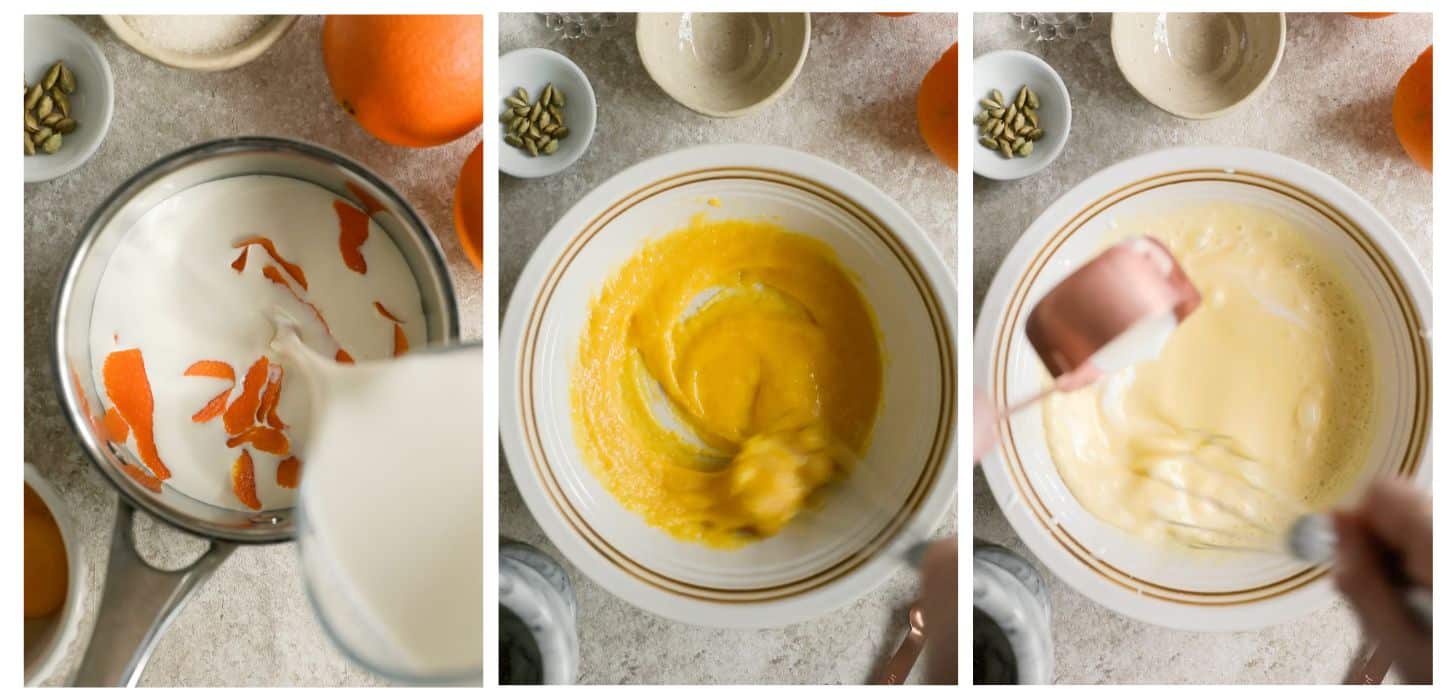
You want to mix everything thoroughly, but don’t overly-whisk the custard. The mixture will have small bubbles but shouldn’t have too much air mixed in. If you don’t want those bubbles to bake into the custard, you can skim them off with a spoon. (It won’t affect the texture that much either way.)
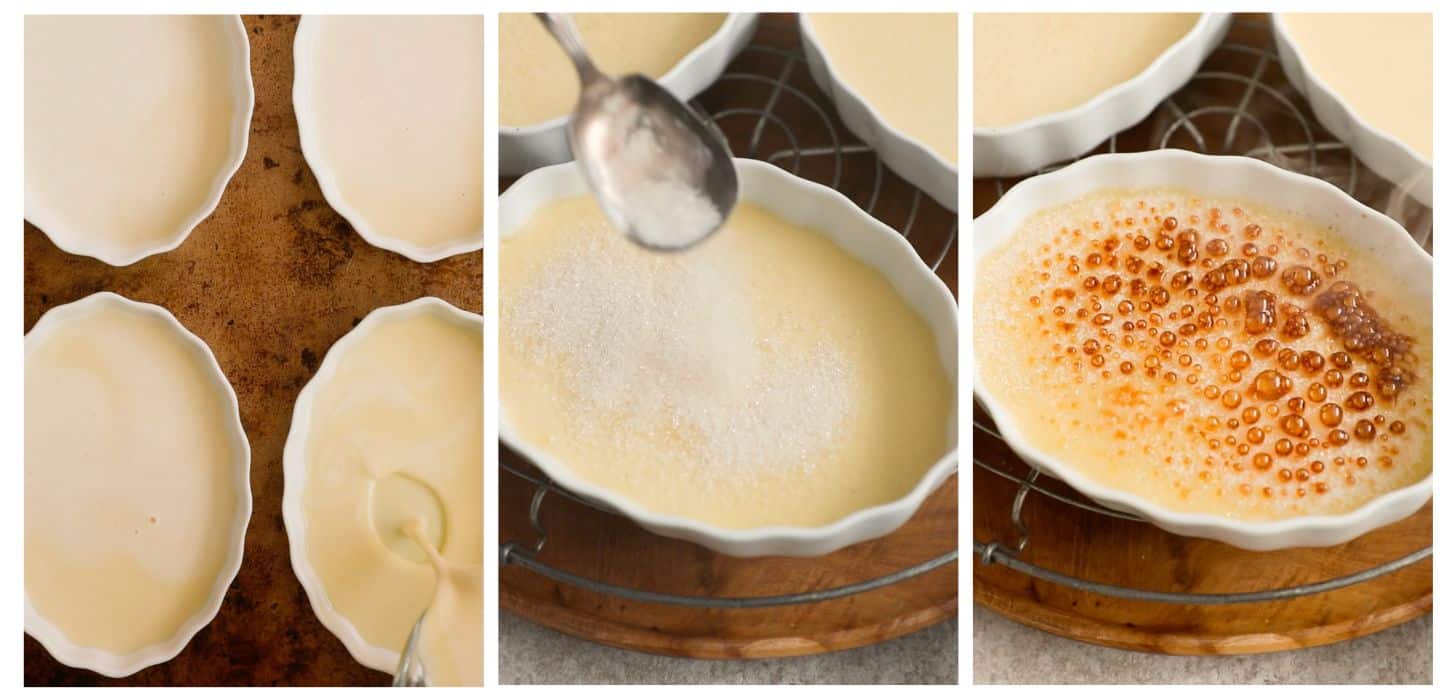
The créme brûlée is done when it’s set but still a bit jiggly. Kind of like Jello or a thick pudding! It should not be liquid-y at all. The custard should never boil, bubble up, or brown.
Refrigerating leftovers
Créme brûlée is best when eaten right away, but you can make the custards without the sugar topping in advance. Cover each ramekin with plastic wrap, gently pressing the wrap to the tops of the custard to prevent a skin from forming. Refrigerate for 2-3 days. When you’re ready to serve, add the sugar, caramelize, and enjoy!
No torch?
If you don’t have a torch, don’t worry. My mom actually never used a torch until I got her one a few years ago. To make this recipe without a torch, place an oven rack as close to the top of your oven as possible. Broil the sugar for about 5 minutes, occasionally rotating the pan, until the sugar is evenly melted and caramelized. Don’t overcook or it will affect the texture of the custard!
If you make this recipe, I would love it if you left a star rating and review! I read every single comment and love hearing what you think about my recipes. Thank you for supporting Sunday Table!
Cardamom Orange Crème Brûlée
Ingredients
- 1 large orange
- 1 pint heavy whipping cream
- 5 egg yolks, room temperature
- 1 cup white sugar, divided
- 1/2 teaspoon freshly-ground cardamom
- 2 Tablespoons orange liqueur
- 1 teaspoon vanilla bean paste (or 2 teaspoons vanilla extract)
- Whipped cream and berries, for serving (optional)
Equipment
- 6 ramekins
- Cooking torch (optional)
Instructions
- Preheat the oven to 300°F. Then, start boiling a large kettle (or pot) of water.
- Peel the orange with a vegetable peeler, avoiding the bitter pith as much as possible. Place the orange peels in a pot, and add the heavy whipping cream. Simmer over medium heat, stirring often, until the mixture comes to a simmer. Gently simmer for 2 minutes and remove from the heat. Cover with a lid and infuse for 5-10 minutes.
- Meanwhile, whisk egg yolks and 1/3 cup of the sugar in a large bowl until the mixture is thick and pale yellow, about 3 minutes.
- Once the cream is infused, remove the orange peels from the heavy cream with the tines of a fork, and discard. While whisking vigorously, pour about a 1/2 cup of the orange-cream to the egg mixture to temper the eggs. Once tempered, slowly whisk in the remaining orange-cream until combined. Add the cardamom, orange liqueur, and vanilla bean paste (or extract).
- Strain the custard through a fine mesh sieve and into a liquid measuring cup to remove any lumps or larger chunks of cardamom.
- Then, divide the custard evenly between six ramekins. Place the ramekins in a 9×13 cake pan or on a deep baking sheet. Place in the pre-heated oven and immediately pour the boiling water in the pan/baking sheet around the ramekins to create a water bath. Avoid pouring any water inside the actual crème brûlée! You will want the water to come about halfway up the ramekins.
- Bake, checking for doneness around 30-40 minutes. The crème brûlée is done when it's set but still a bit jiggly. Do not let the custard boil or brown! When they are finished baking, remove the crème brûlées from the oven by sliding a large spatula under each ramekin. Let them cool at room-temperature for about 1 hour, and then refrigerate for at least one hour to chill.
- Right before serving, sprinkle each custard with about 1-2 Tablespoons of the remaining sugar. Using a torch, caramelize the sugar until it's melted and golden-brown with some darker spots (I personally like mine extra caramelized).
- Serve immediately with whipped cream and berries, if desired. Enjoy!
Notes
Originally posted October 10, 2018.


Oh heck yes I am all over this!! I love your gorgeous series of photos. Pinning this now (:
Thank you! <3
The amount of Vanilla Extract is the same as the Vanilla Bean Paste?
Hey there! It’s either 1 teaspoon of vanilla bean paste OR 2 teaspoons of vanilla extract. 🙂 There’s more details in the recipe card as well!