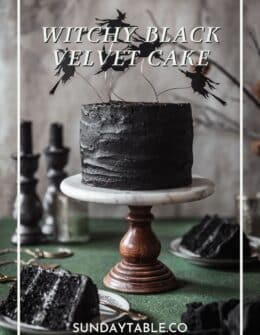
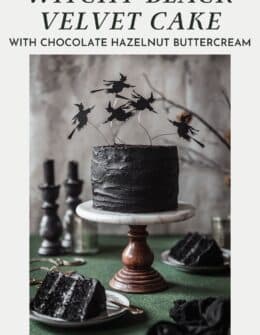
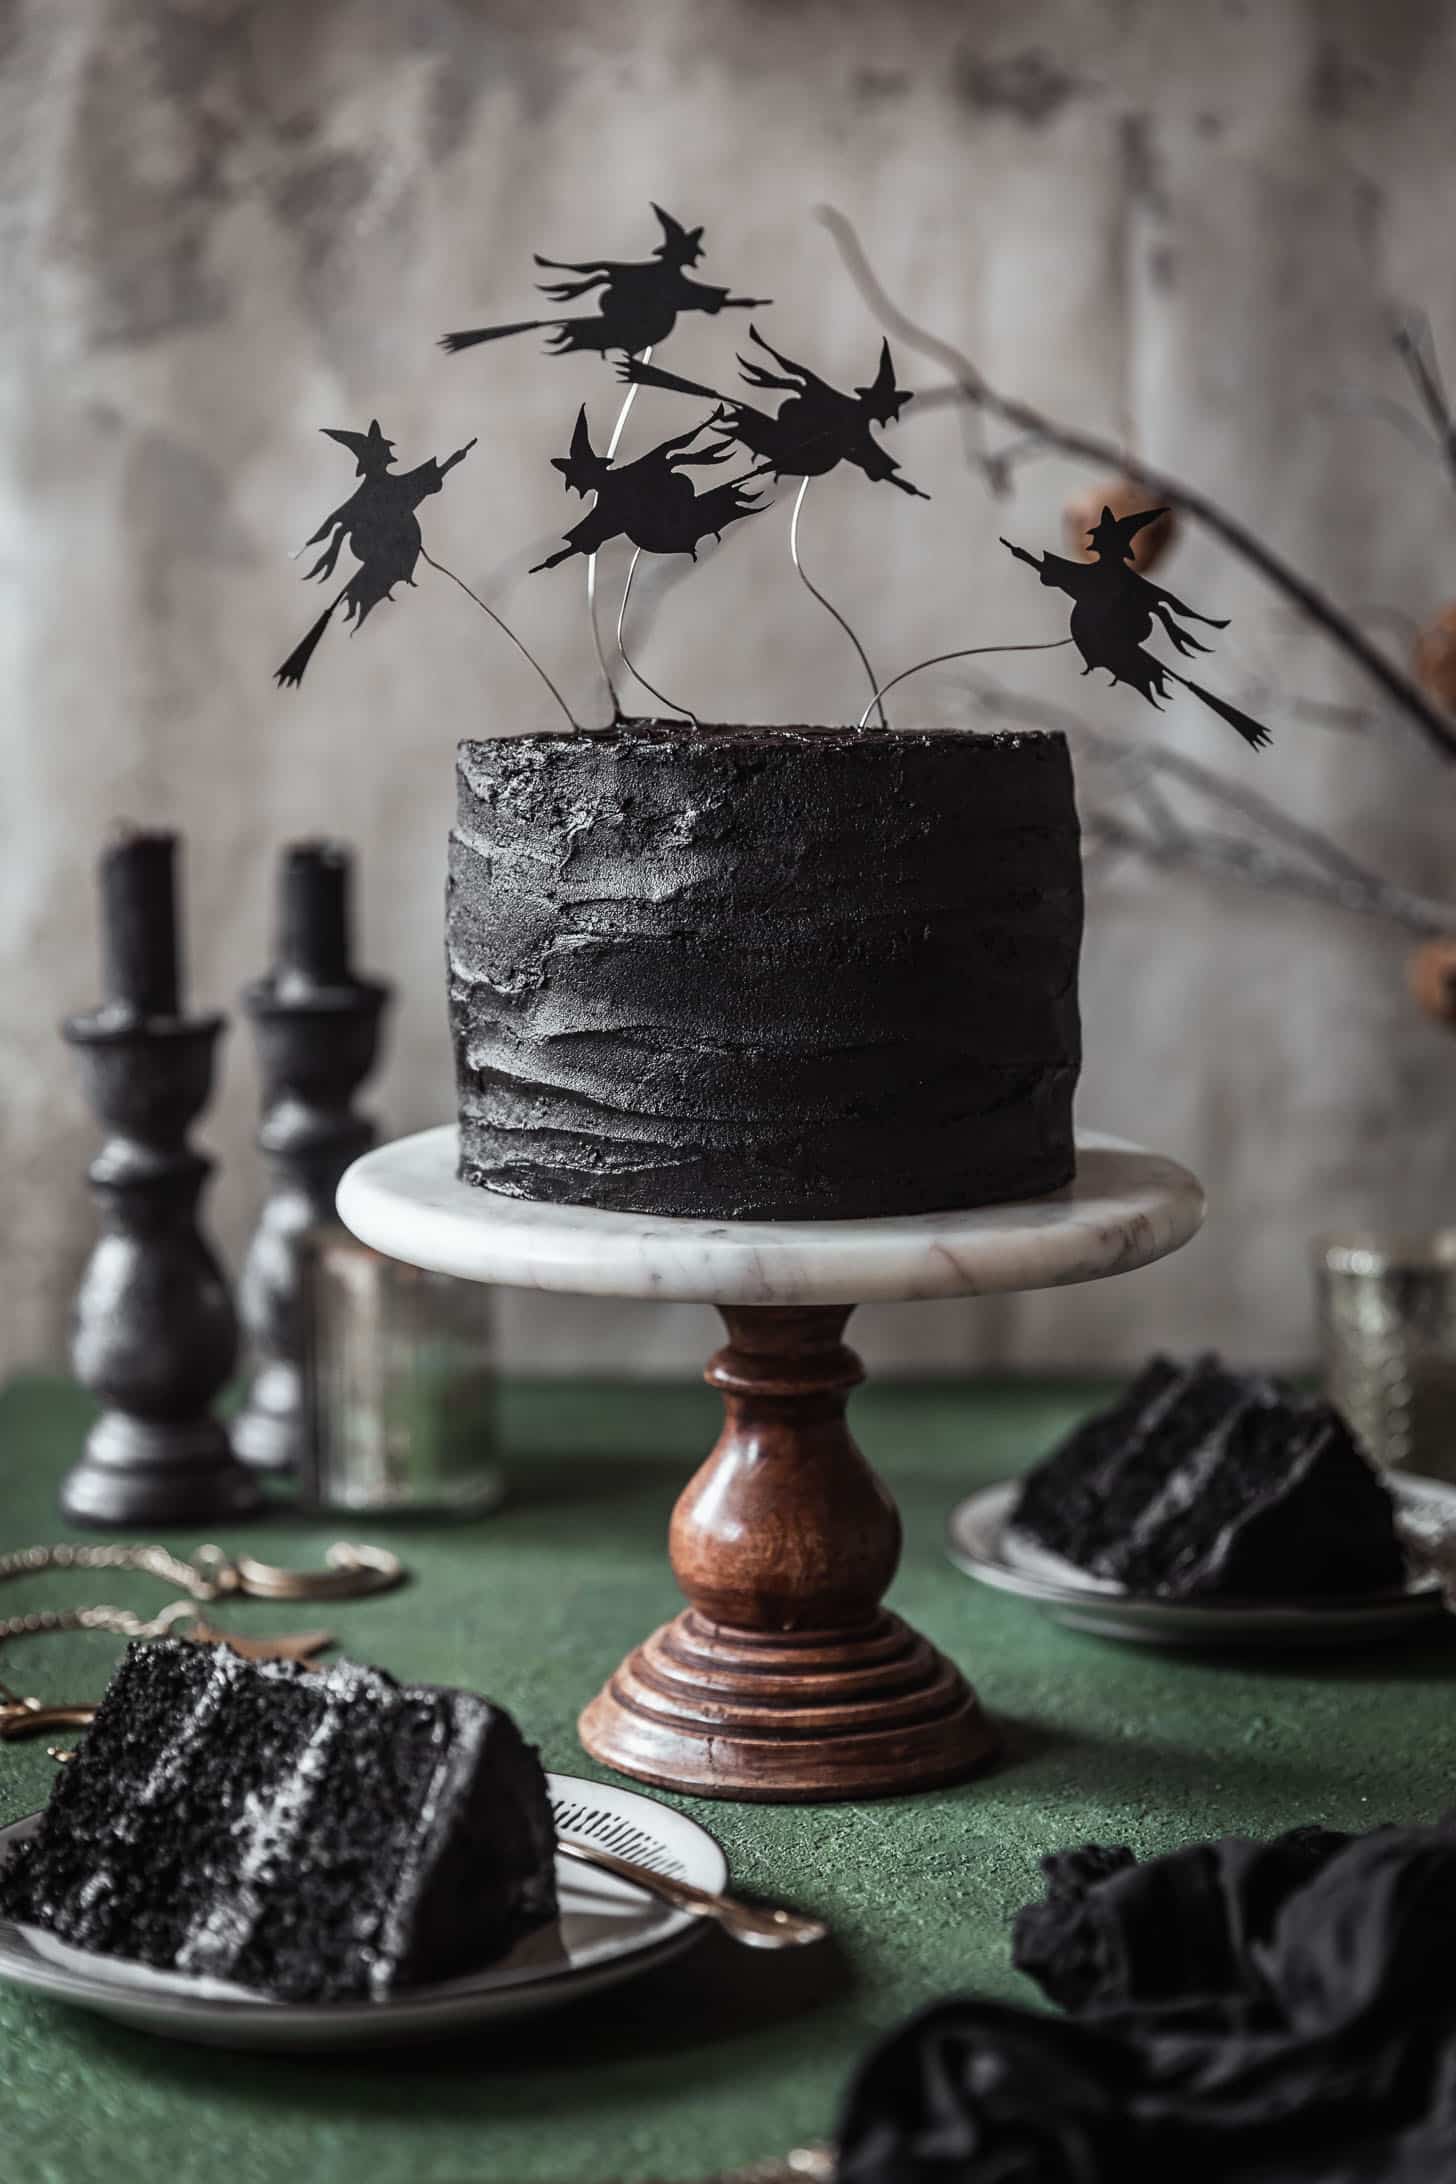
Halloween Black Velvet Cake
This post might have affiliate links. For full details please see my disclosure policy.
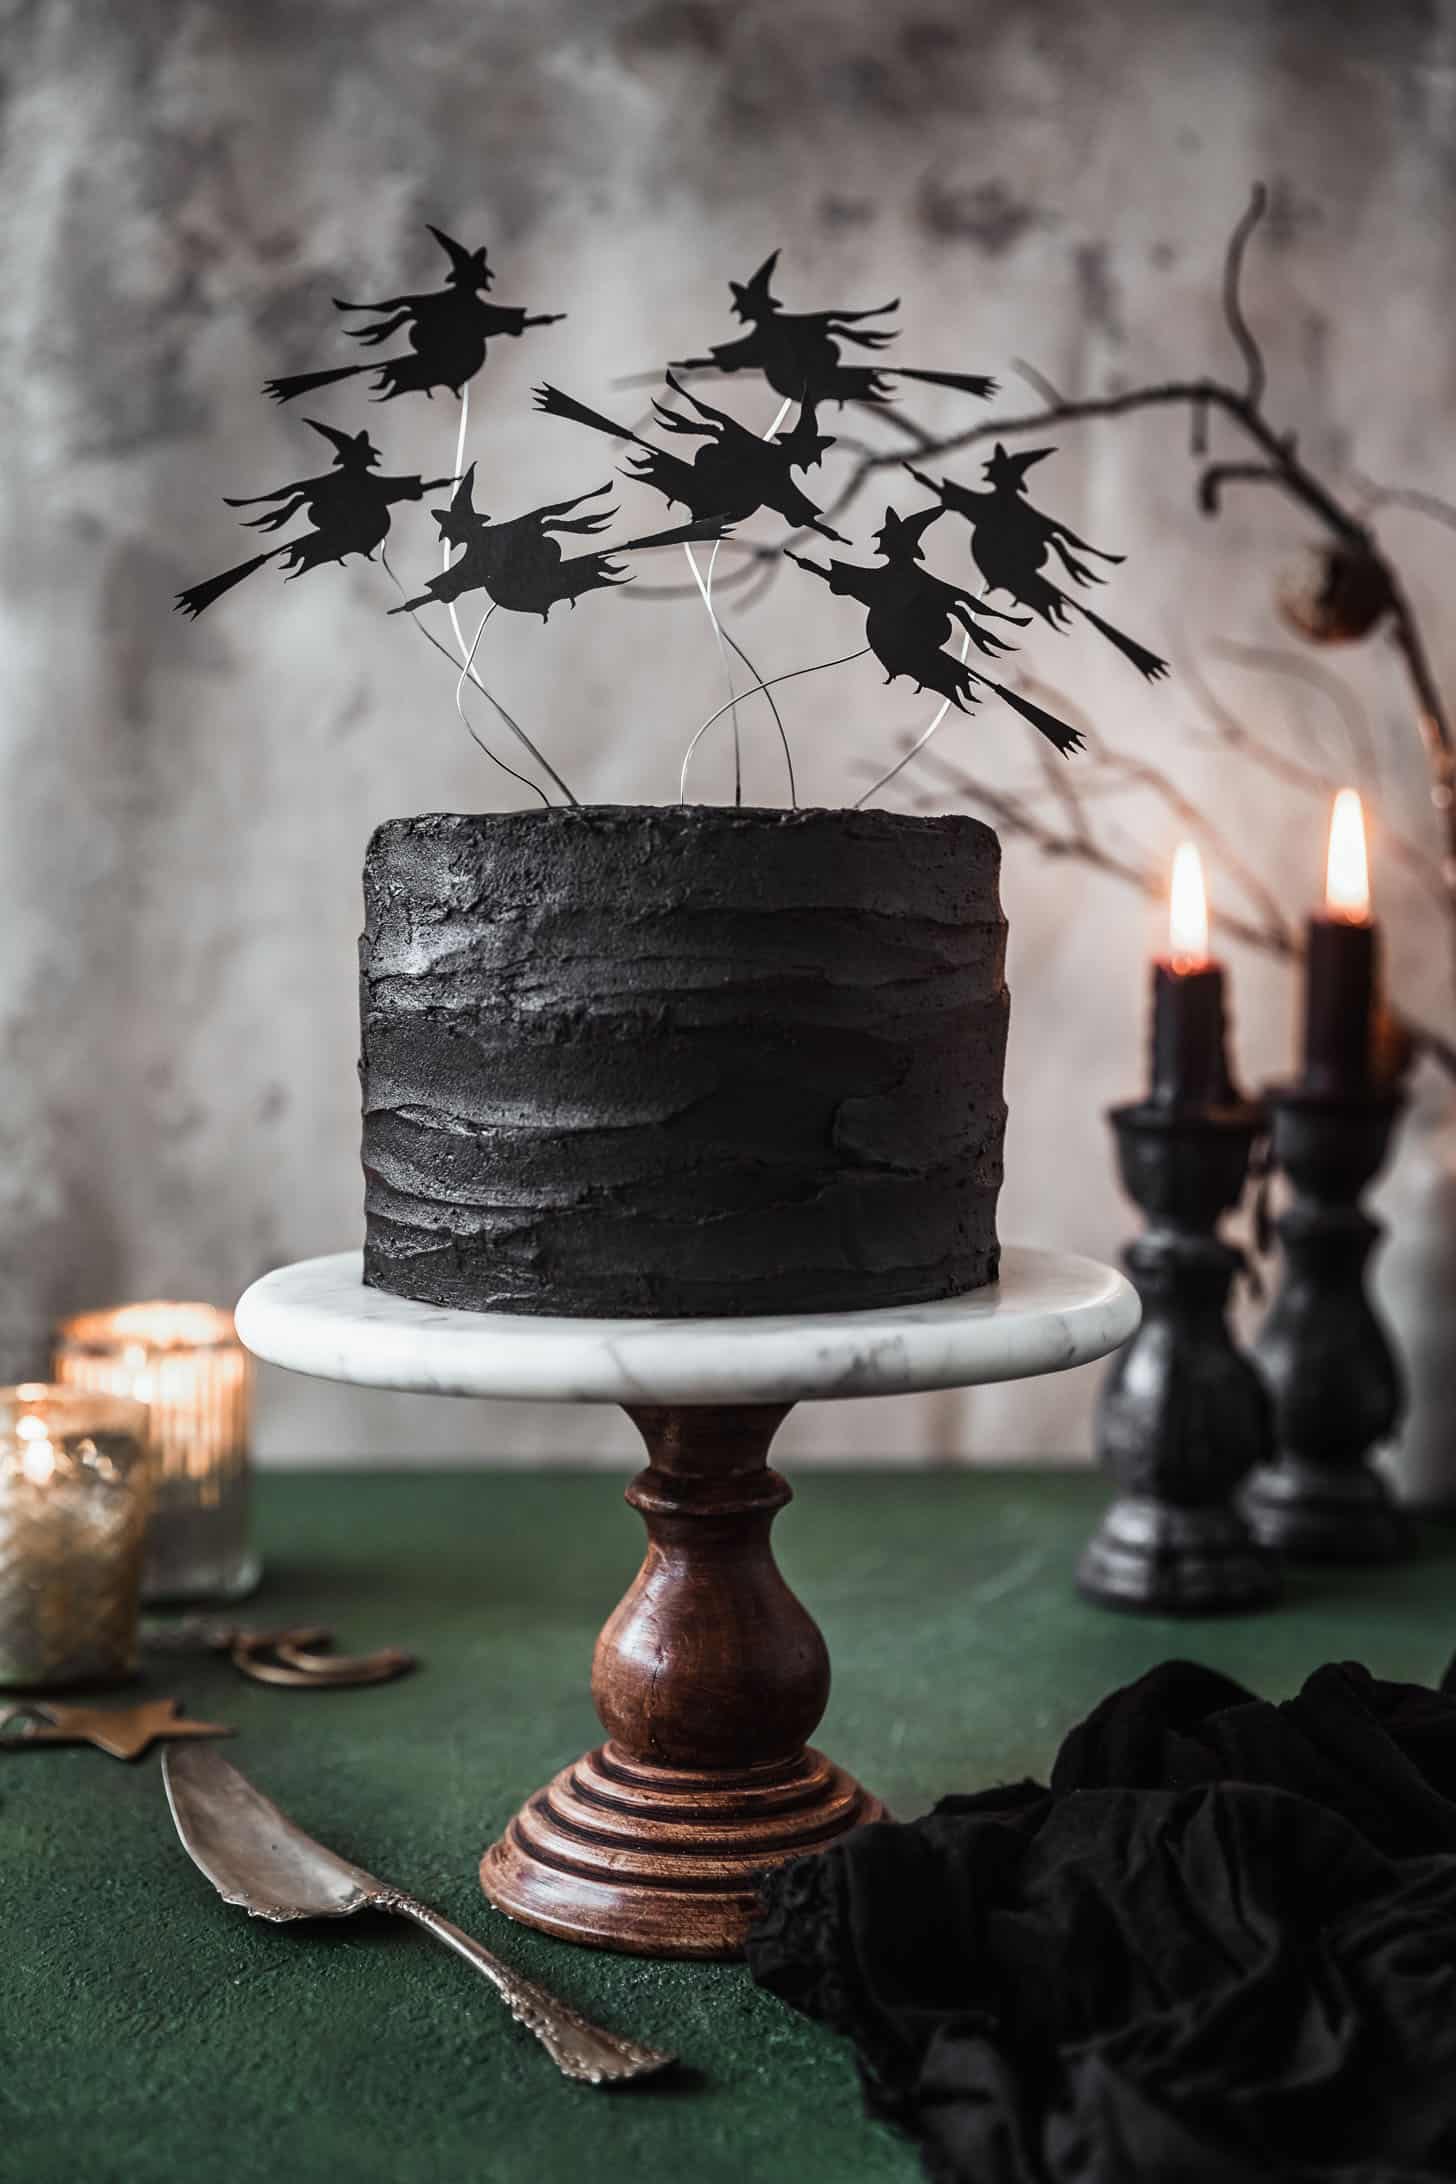
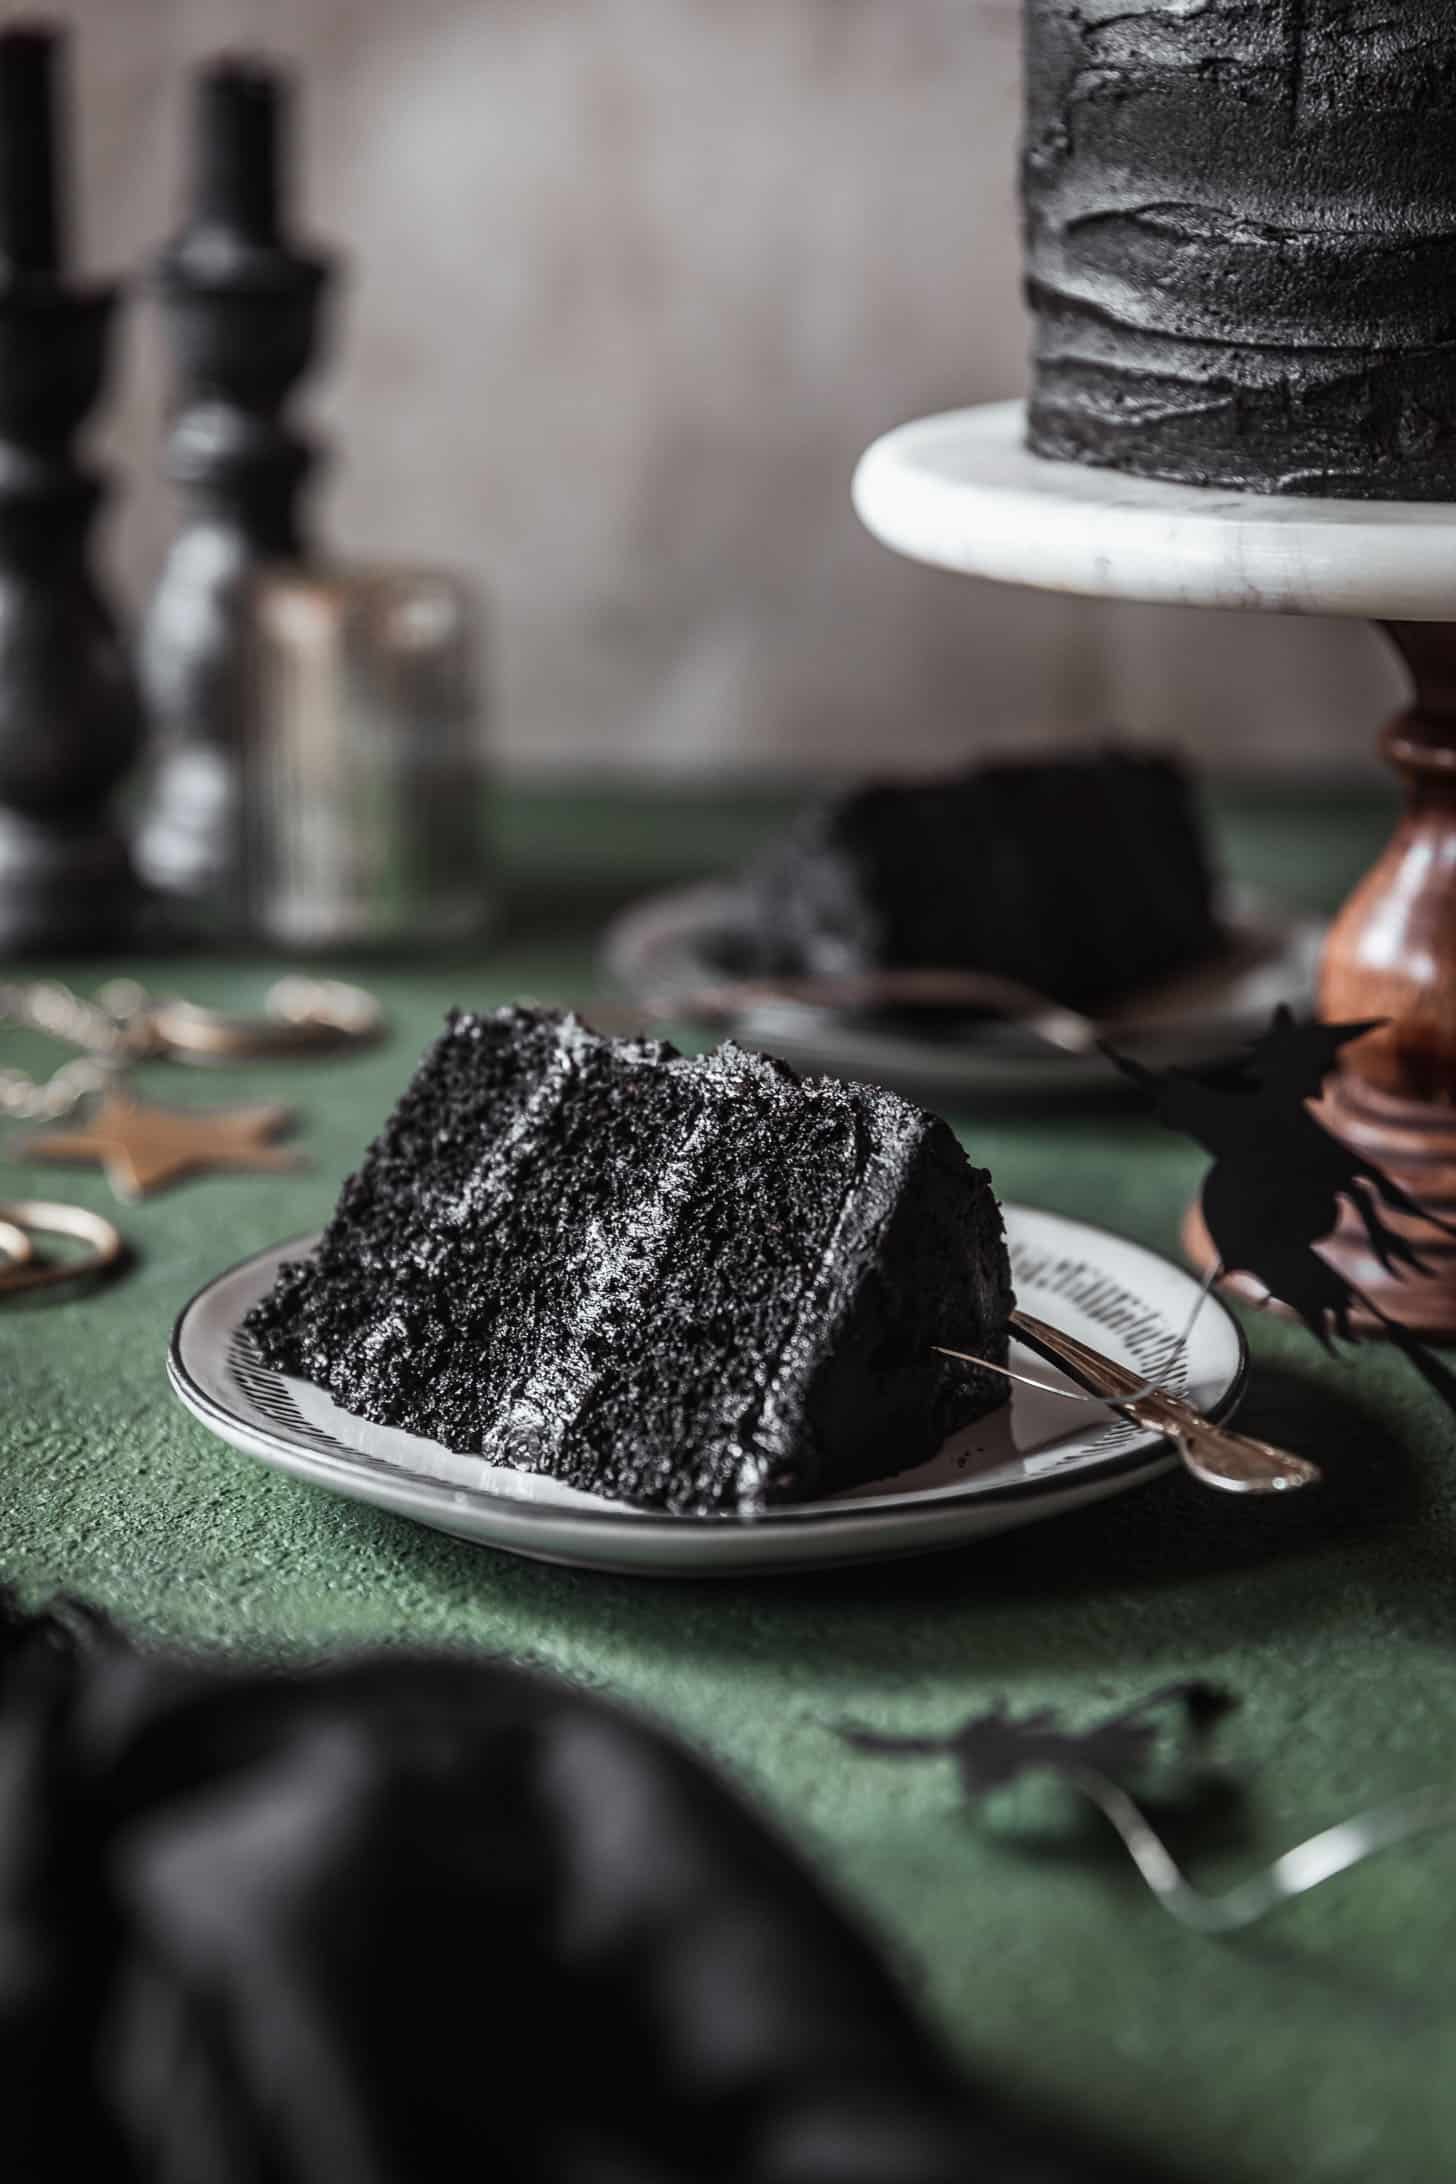
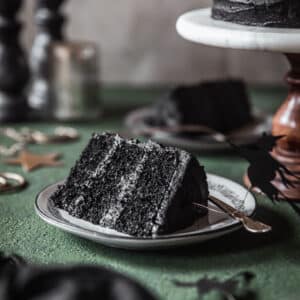
This easy black velvet cake is made with one-bowl chocolate cake and fluffy chocolate-hazelnut buttercream! It’s rich, moist, pitch black, and the ultimate Halloween party dessert. Even better, it comes together super quickly and doesn’t use food coloring. It’s a chocolate lover’s dream cake!
Ok, how excited are we for Halloween?! It’s one of my favorite holidays so I’m actually pretty bummed that spooky season is coming to an end. We spent all weekend dressing up and going to Halloween parties and events with our friends.
I dressed up as a kitty, drank a bit too much black Halloween sangria (oops), ate a whole lot of this Halloween charcuterie board, roller skated, and danced to emo music. It was the best!
But maybe the best part was, after coming home and scrubbing way to much makeup off my face, I’d get in my sweats and settle down with a slice of this cake while watching New Girl re-runs. As far as I’m concerned, the only cure for being absolutely exhausted but needing to work off some booze is a big old slice of chocolate cake.
This recipe is based off of the classic chocolate cake recipe that I learned how to make in pastry school. But, it’s made with a secret ingredient for that gorgeous black color. It tastes like a red velvet cake and a super rich, midnight chocolate cake had a baby. Almost like an Oreo!
Black cocoa powder
The secret ingredient in this cake is the black cocoa powder. That is what will give us a naturally-colored black cake without food coloring! I usually order it online. But depending on where you live, you might be able to find black cocoa in specialty food stores. If you can’t find black cocoa, you can use either Dutch-processed instead. The color won’t be as dark but it will have a similar taste and texture!
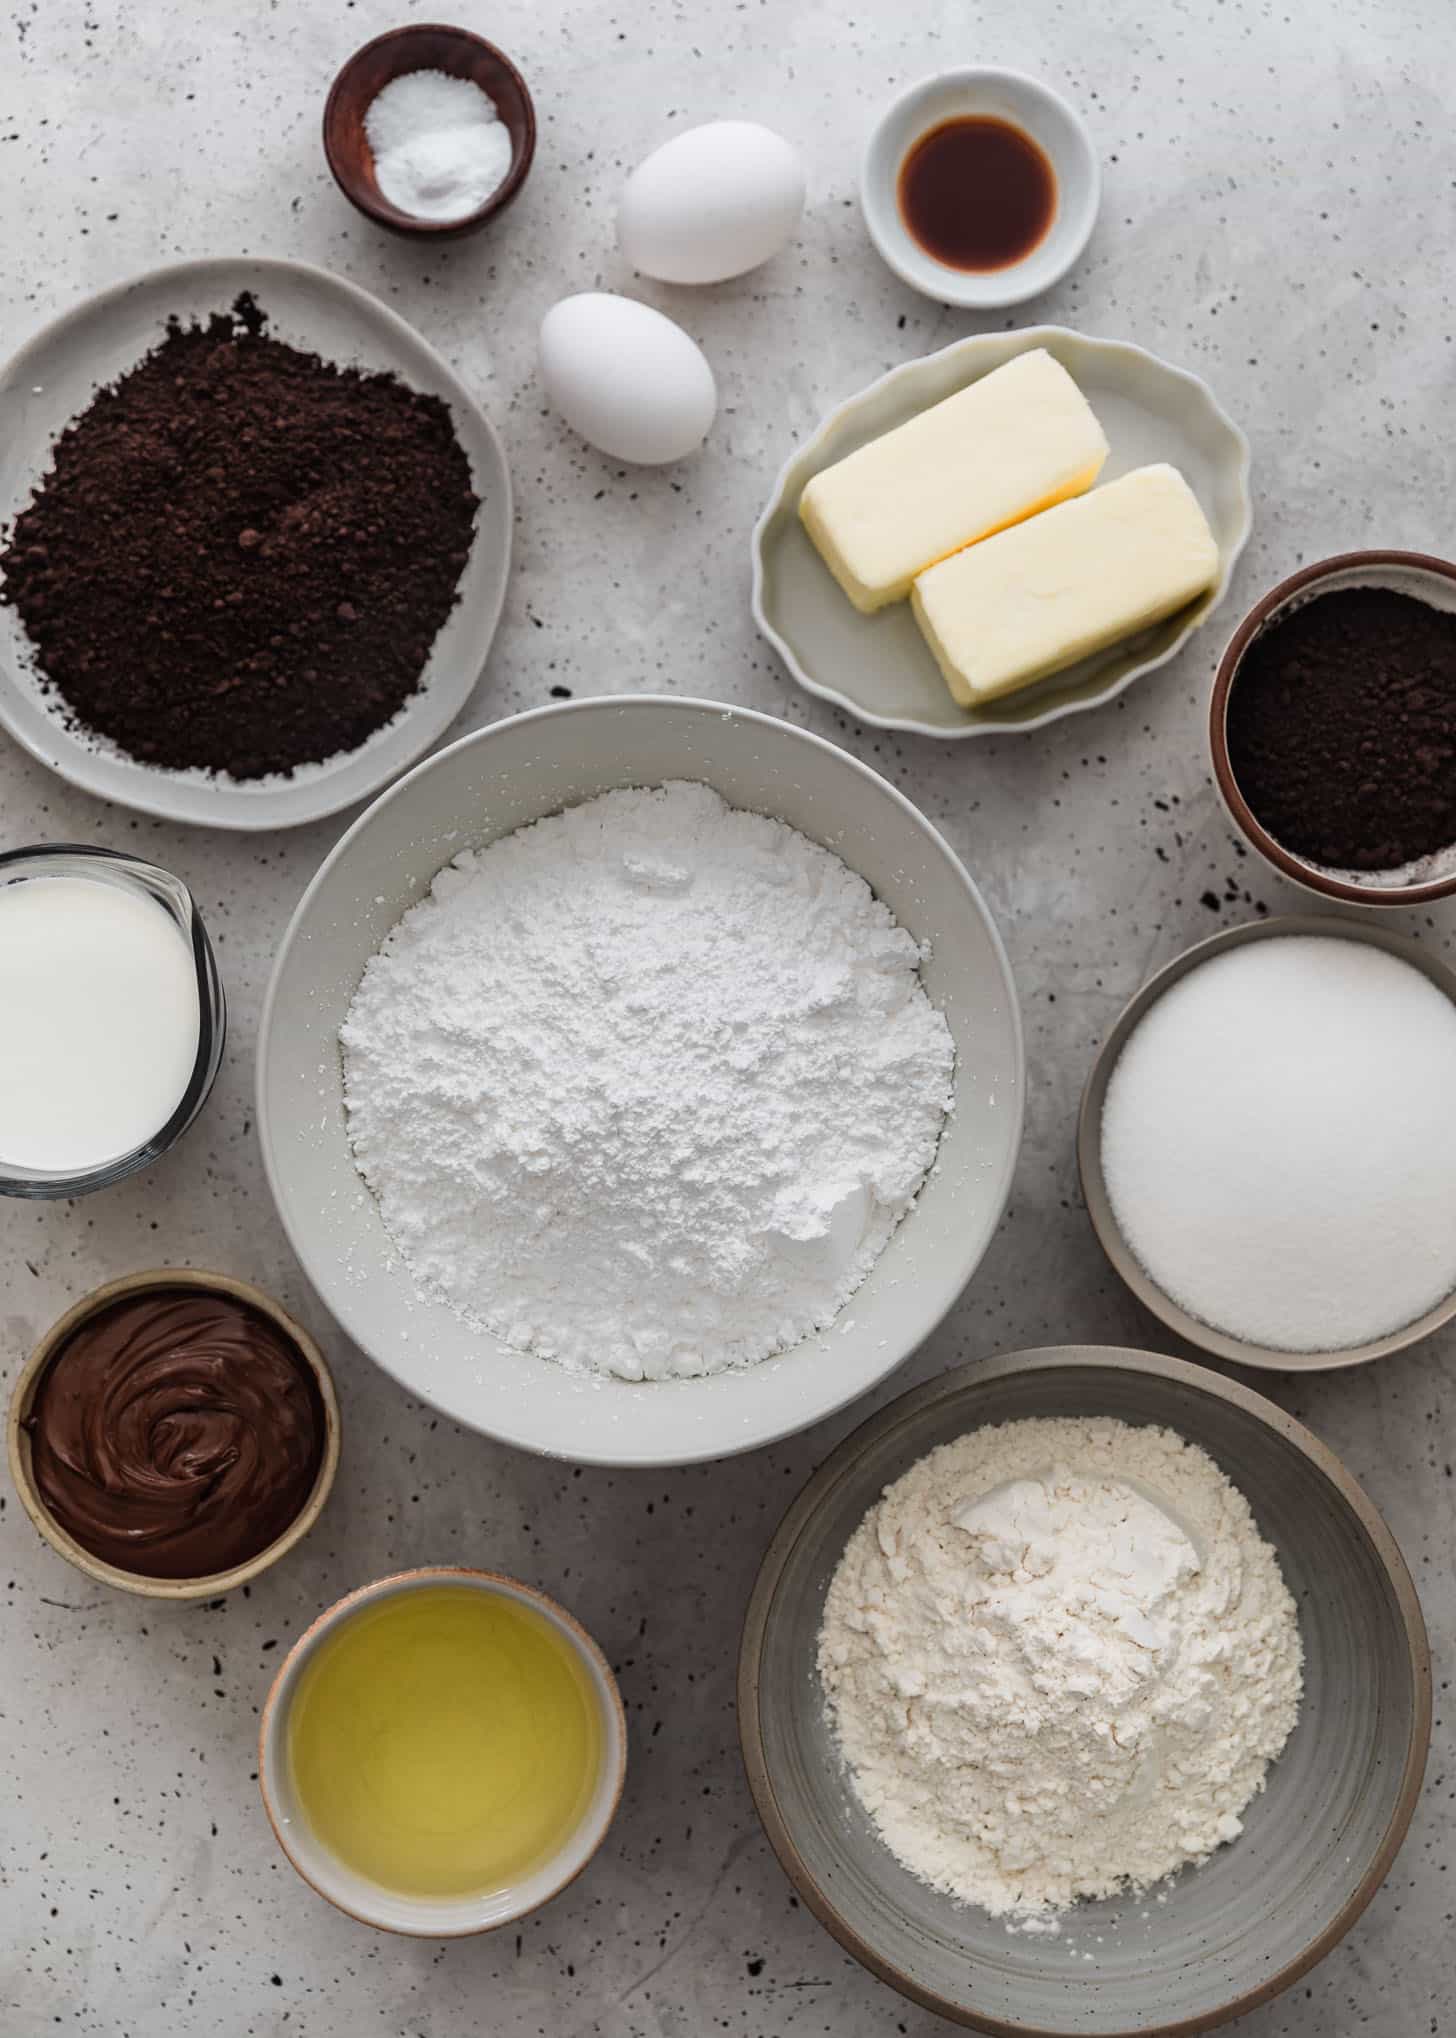
You will also need sugar, buttermilk, neutral oil (like canola or avocado), eggs, vanilla extract, all-purpose flour, baking soda, and Morton’s Kosher salt. For the frosting, make sure you have unsalted butter, chocolate hazelnut spread (like Nutella), powdered sugar, and whole milk.
If you don’t want to buy buttermilk, you can make your own. Just add 1 Tablespoon of white vinegar to a liquid measuring cup. Then, add whole milk up until the 1 cup fill line (225 milliliters). Whisk with a fork and let it sit for 10 minutes before you add it to the recipe.
Bake the cake
This cake is a total dream if you like a super easy, quick, one-bowl situation. The recipe is foolproof and super un-fussy. I’ve seriously been making it for over 10 years and it comes out super delicious every single time!
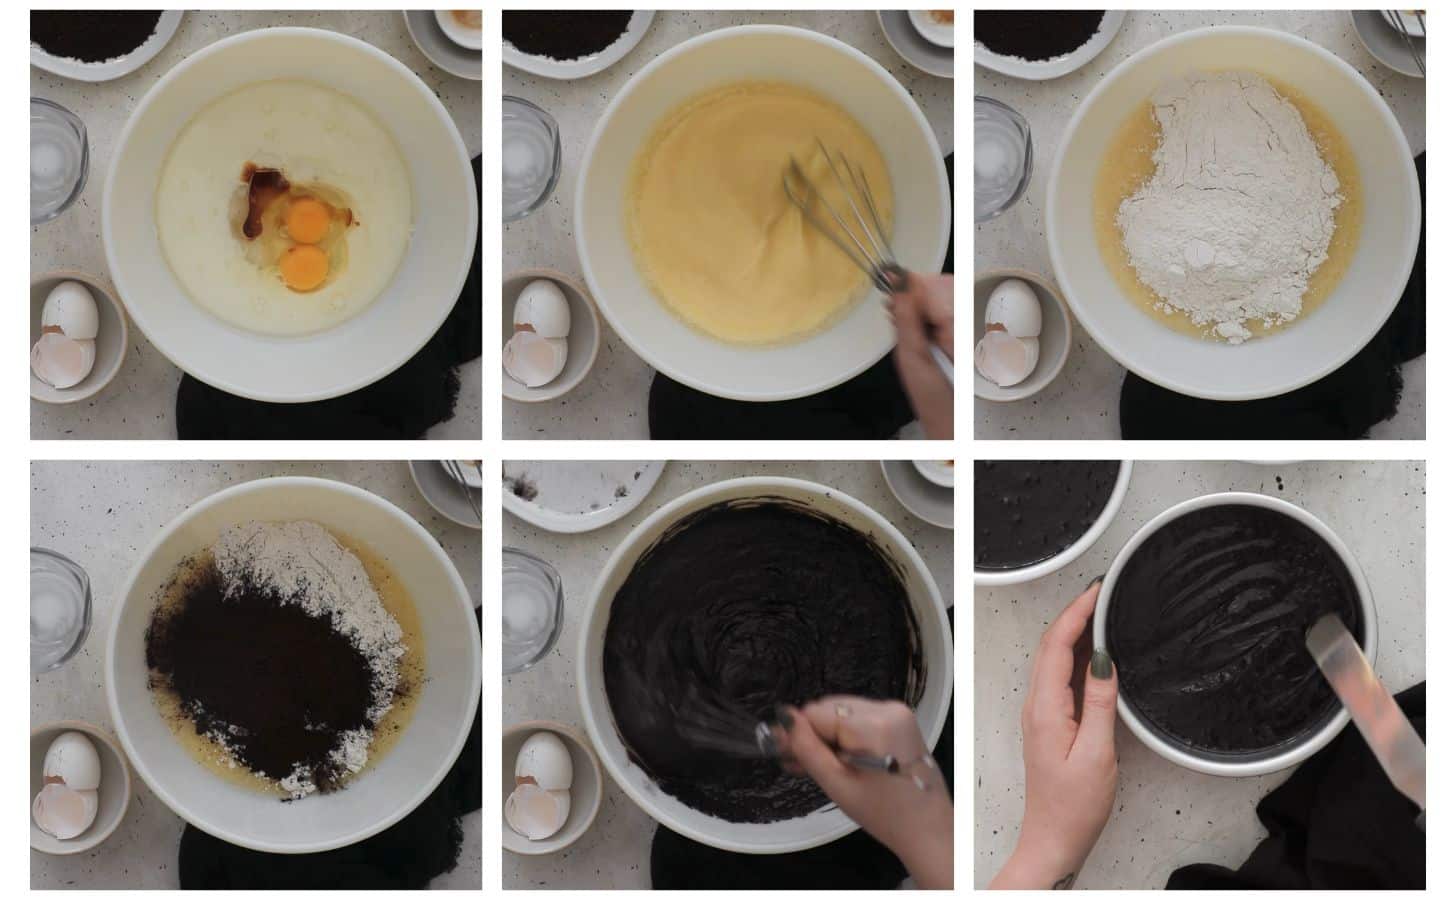
Don’t over-mix the batter, or it will come out dense and dry. You want to whisk the cake batter just until it comes together. This will keep the cake moist, light, and fluffy!
Chocolate hazelnut frosting

Assemble the cake
- If necessary, level the domes off the top of the cake layers. Stack the cake, spreading an even layer of buttercream in-between each cake round.
- Next, frost the outside of the cake using an offset spatula or butter knife. If you want smooth sides, use a bench scraper to even out the frosting.
- Add decorations if desired. Slice and enjoy with coffee or milk!
Chill the cake rounds for 20-30 minutes in the freezer before assembling the cakes. Since this cake is so light and moist, it’s a bit crumbly. Freezing the rounds will make it so much easier to frost the cake.
Black velvet cupcakes

If you want to turn this black chocolate cake into cupcakes, it’s super easy. I’ve been using this recipe for cupcakes for years, and they come out great!
- After you make the batter, divide it between 18 cupcake liners.
- Bake the cupcakes at 350°F (177°C) for 15-17 minutes, just until an inserted toothpick has a few moist crumbs on it.
- While the cupcakes cool, make the buttercream as directed. Frost the cooled black velvet cupcakes with buttercream and decorate.
Store the cake
Cover any leftovers with a cake dome or place individual slices in an airtight container. The cake will stay moist at room temperature for 3-4 days. You can also freeze the cake for up to 3 months. Just wrap it super well so it doesn’t get freezer burnt!
For the best results, measure the ingredients by weighing them on a kitchen scale. If you don’t have a scale, you can use measuring cups, but you need to measure the flour and cocoa powder the right way! Measure the flour and cocoa by fluffing them with a fork, scooping them into a measuring cup, and leveling them off (without packing it in).
If you make this recipe, I would love it if you left a star rating and review! I read every single comment and love hearing what you think about my recipes. Thank you for supporting Sunday Table!
Halloween Black Velvet Cake
Ingredients
Black Velvet Cake
- 1 1/4 cups sugar (250 grams)
- 1 cup buttermilk (240 milliliters)
- 2/3 cup canola oil (150 milliliters)
- 2 eggs, room temperature
- 1 teaspoon vanilla extract
- 1 1/2 cups all-purpose flour (180 grams)
- 1 1/4 teaspoons baking soda
- 1/2 teaspoon Kosher salt
- 1/2 cup black cocoa powder (50 grams)
Chocolate-Hazelnut Buttercream
- 1 cup unsalted butter, softened (226 grams)
- 1/2 cup chocolate-hazelnut spread (148 grams)
- 4 cups powdered sugar (480 grams)
- 1/2 cup black cocoa powder (50 grams)
- 3-4 Tablespoons whole milk, plus more as needed (45-60 milliliters)
- Pinch of Kosher salt
Equipment
- 3 6-inch cake pans
- Parchment paper
Instructions
Black Velvet Cake
- Preheat the oven to 350°F. Grease three 6-inch cake pans and line the bottoms with parchment paper rounds. Set aside.
- In a large bowl, whisk together the sugar, buttermilk, canola oil, eggs, and vanilla extract until smooth. Then, add the flour, baking soda, salt, and cocoa powder. Whisk just until the batter forms – don't over-mix!
- Divide the batter evenly between the 3 cake pans (if you're using a scale, each should have about 315 grams of batter). Smooth with an offset spatula. Place the cake pans on a sheet pan.
- Bake the cakes for 22-23 minutes, until an inserted toothpick has just a few moist crumbs on it. Let the cakes cool in the pans for about 5 minutes. Then, use a knife to loosen the cakes from the sides of the pans. Carefully flip the cakes out of the pans and let them cool completely on a wire rack.
Chocolate-Hazelnut Buttercream
- In a large bowl, beat the butter and chocolate-hazelnut spread until it's light and fluffy, 2-3 minutes. Add the cocoa powder and mix until smooth.
- Next, mix in the powdered sugar 1 cup (120 grams) at a time until a thick frosting forms. Add a pinch of salt and 3 Tablespoons (45 milliliters) of milk. Continue adding milk, 1 Tablespoon (15 milliliters) at a time, until you reach your desired texture. (The buttercream should be thick but spreadable.)
- Whip the buttercream for 2-3 minutes until it's fluffy. Set aside.
Assembly
- Using a serrated bread knife, cut the domes off of the tops of the cakes.
- Place one cake round on a plate or cake stand. Spread a thick layer of frosting on top. Top with another cake round, add frosting to the second layer, and top with the third cake round until you have a three layer cake.
- Frost the outside of the cake and use a bench scraper to smooth out the sides. Decorate as desired. Slice and enjoy with hot coffee or milk!
Notes
This recipe was originally posted on October 30, 2022.