Caramel Dutch Apple Pie with Brown Butter
This post might have affiliate links. For full details please see my disclosure policy.
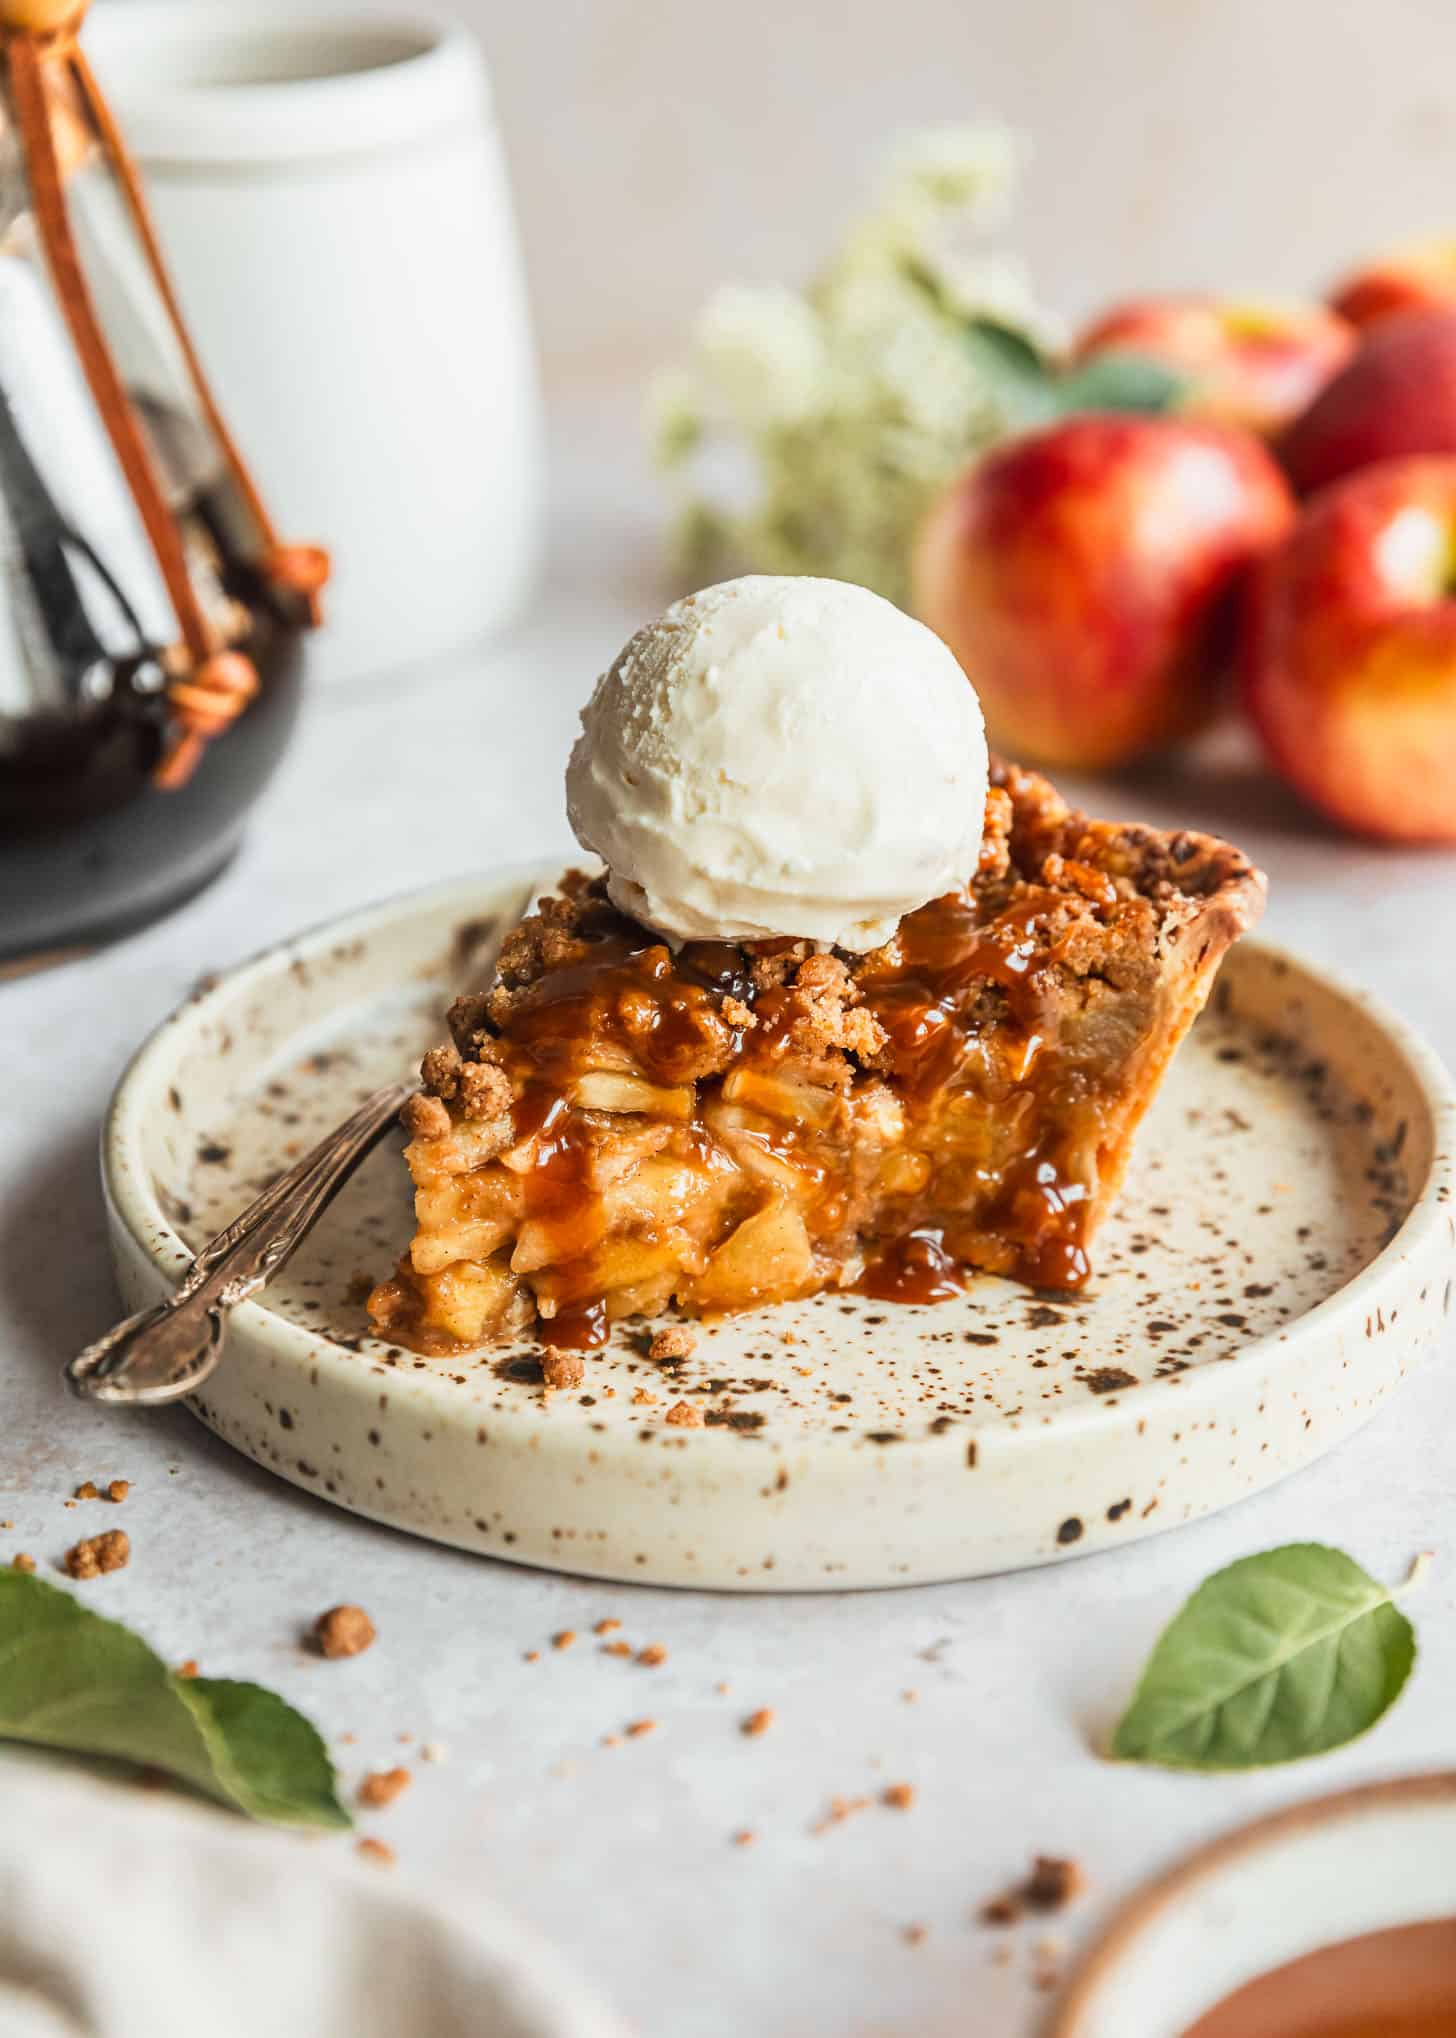
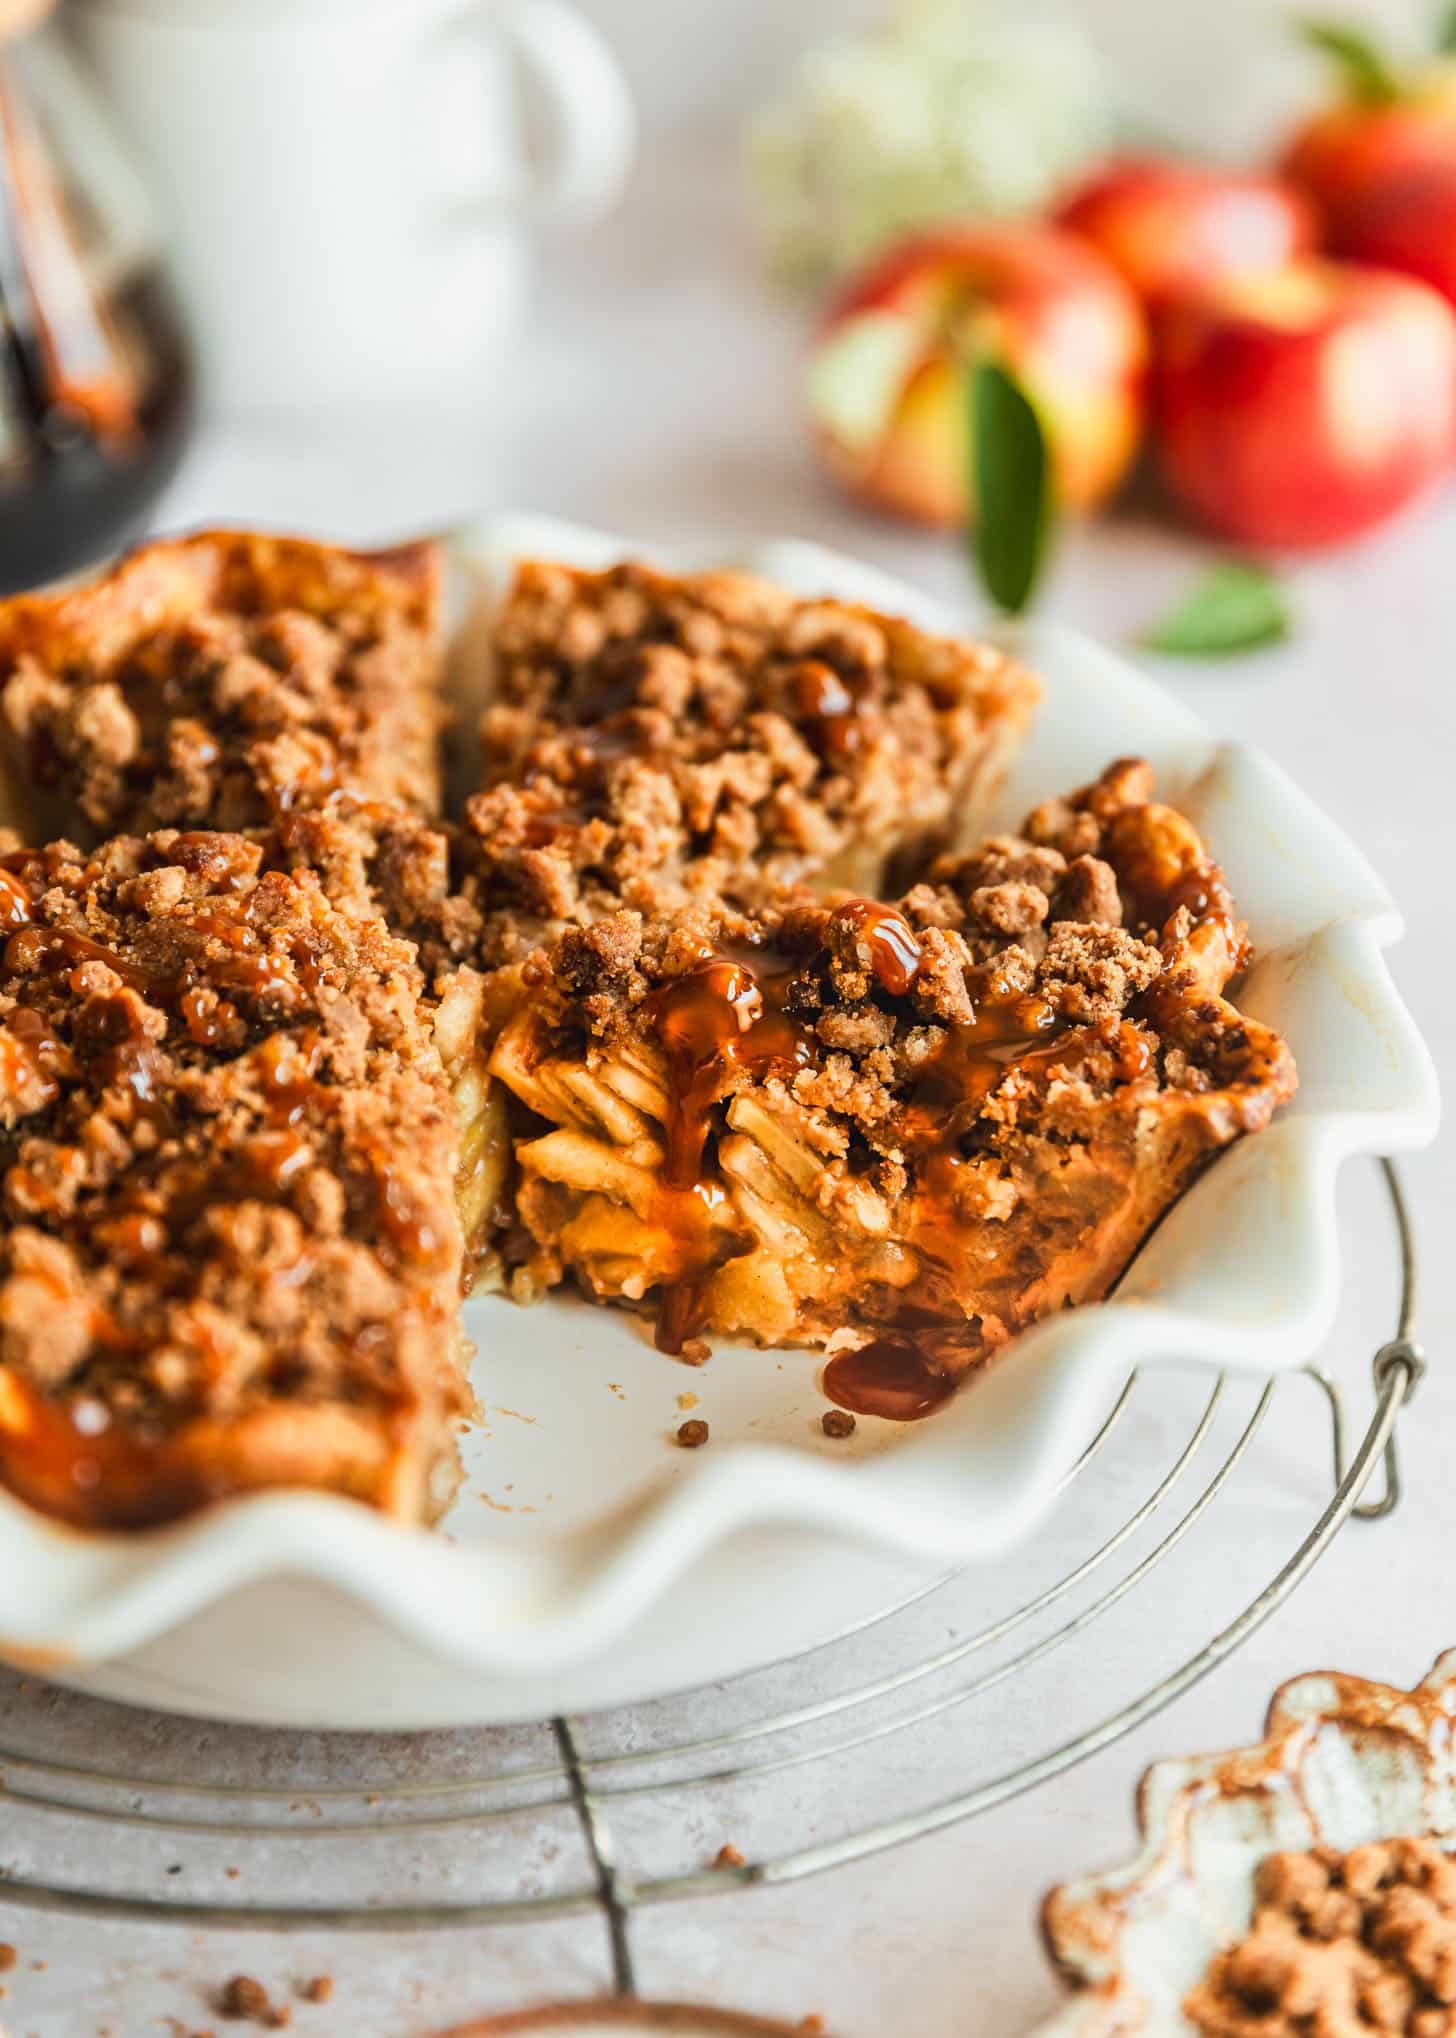
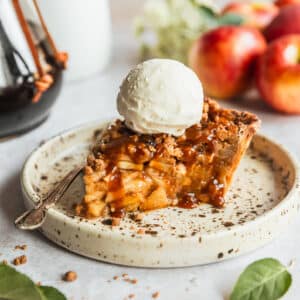
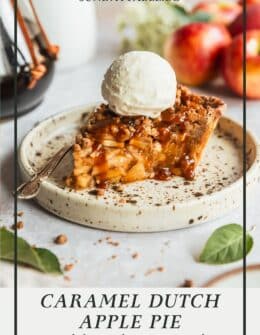
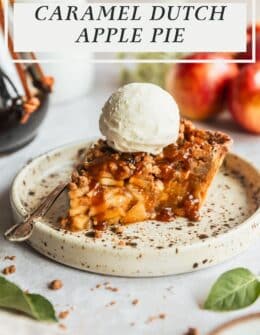
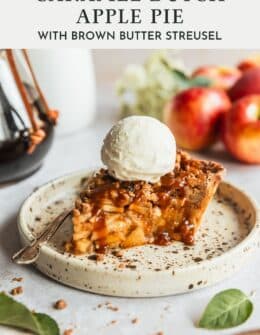
This caramel Dutch apple pie with brown butter streusel is a classic fall dessert. Crisp autumn apples are baked with brown sugar, apple pie spice, and salted caramel sauce and topped with toasty brown butter streusel to amplify the caramelized flavor. It is without a doubt one of the best apple pies ever!
It’s no secret that I wholeheartedly and firmly stand with Team Pie. When done correctly, the buttery crust, flaky layers, and spiced flavors just get me. Sticky bourbon caramel pecan pie? Juicy brown butter strawberry crumble pie? Uber creamy pumpkin custard pie? Count me in, I’m there.
On the other hand, there is an entire sector of people who think they don’t like pie. And I can’t say I blame them because while apple pie is arguably one of the best desserts, they also have the ability to just absolutely blow. Soggy, flavorless pies are downright depressing, but I am so convinced that if you have a *really* good pie, it is completely life-changing.
I actually never even knew Dutch apple pie existed until I learned about it in pastry school and made approximately 6,000 mini versions of them. But, it wasn’t until recently that I made another 6,000 to perfect my recipe.
Luckily, through a tedious process of trial-and-error, and using lots of tips I learned as a trained pastry chef, I have developed an apple pie that no one can say no to. Let’s make it!
Baking apples
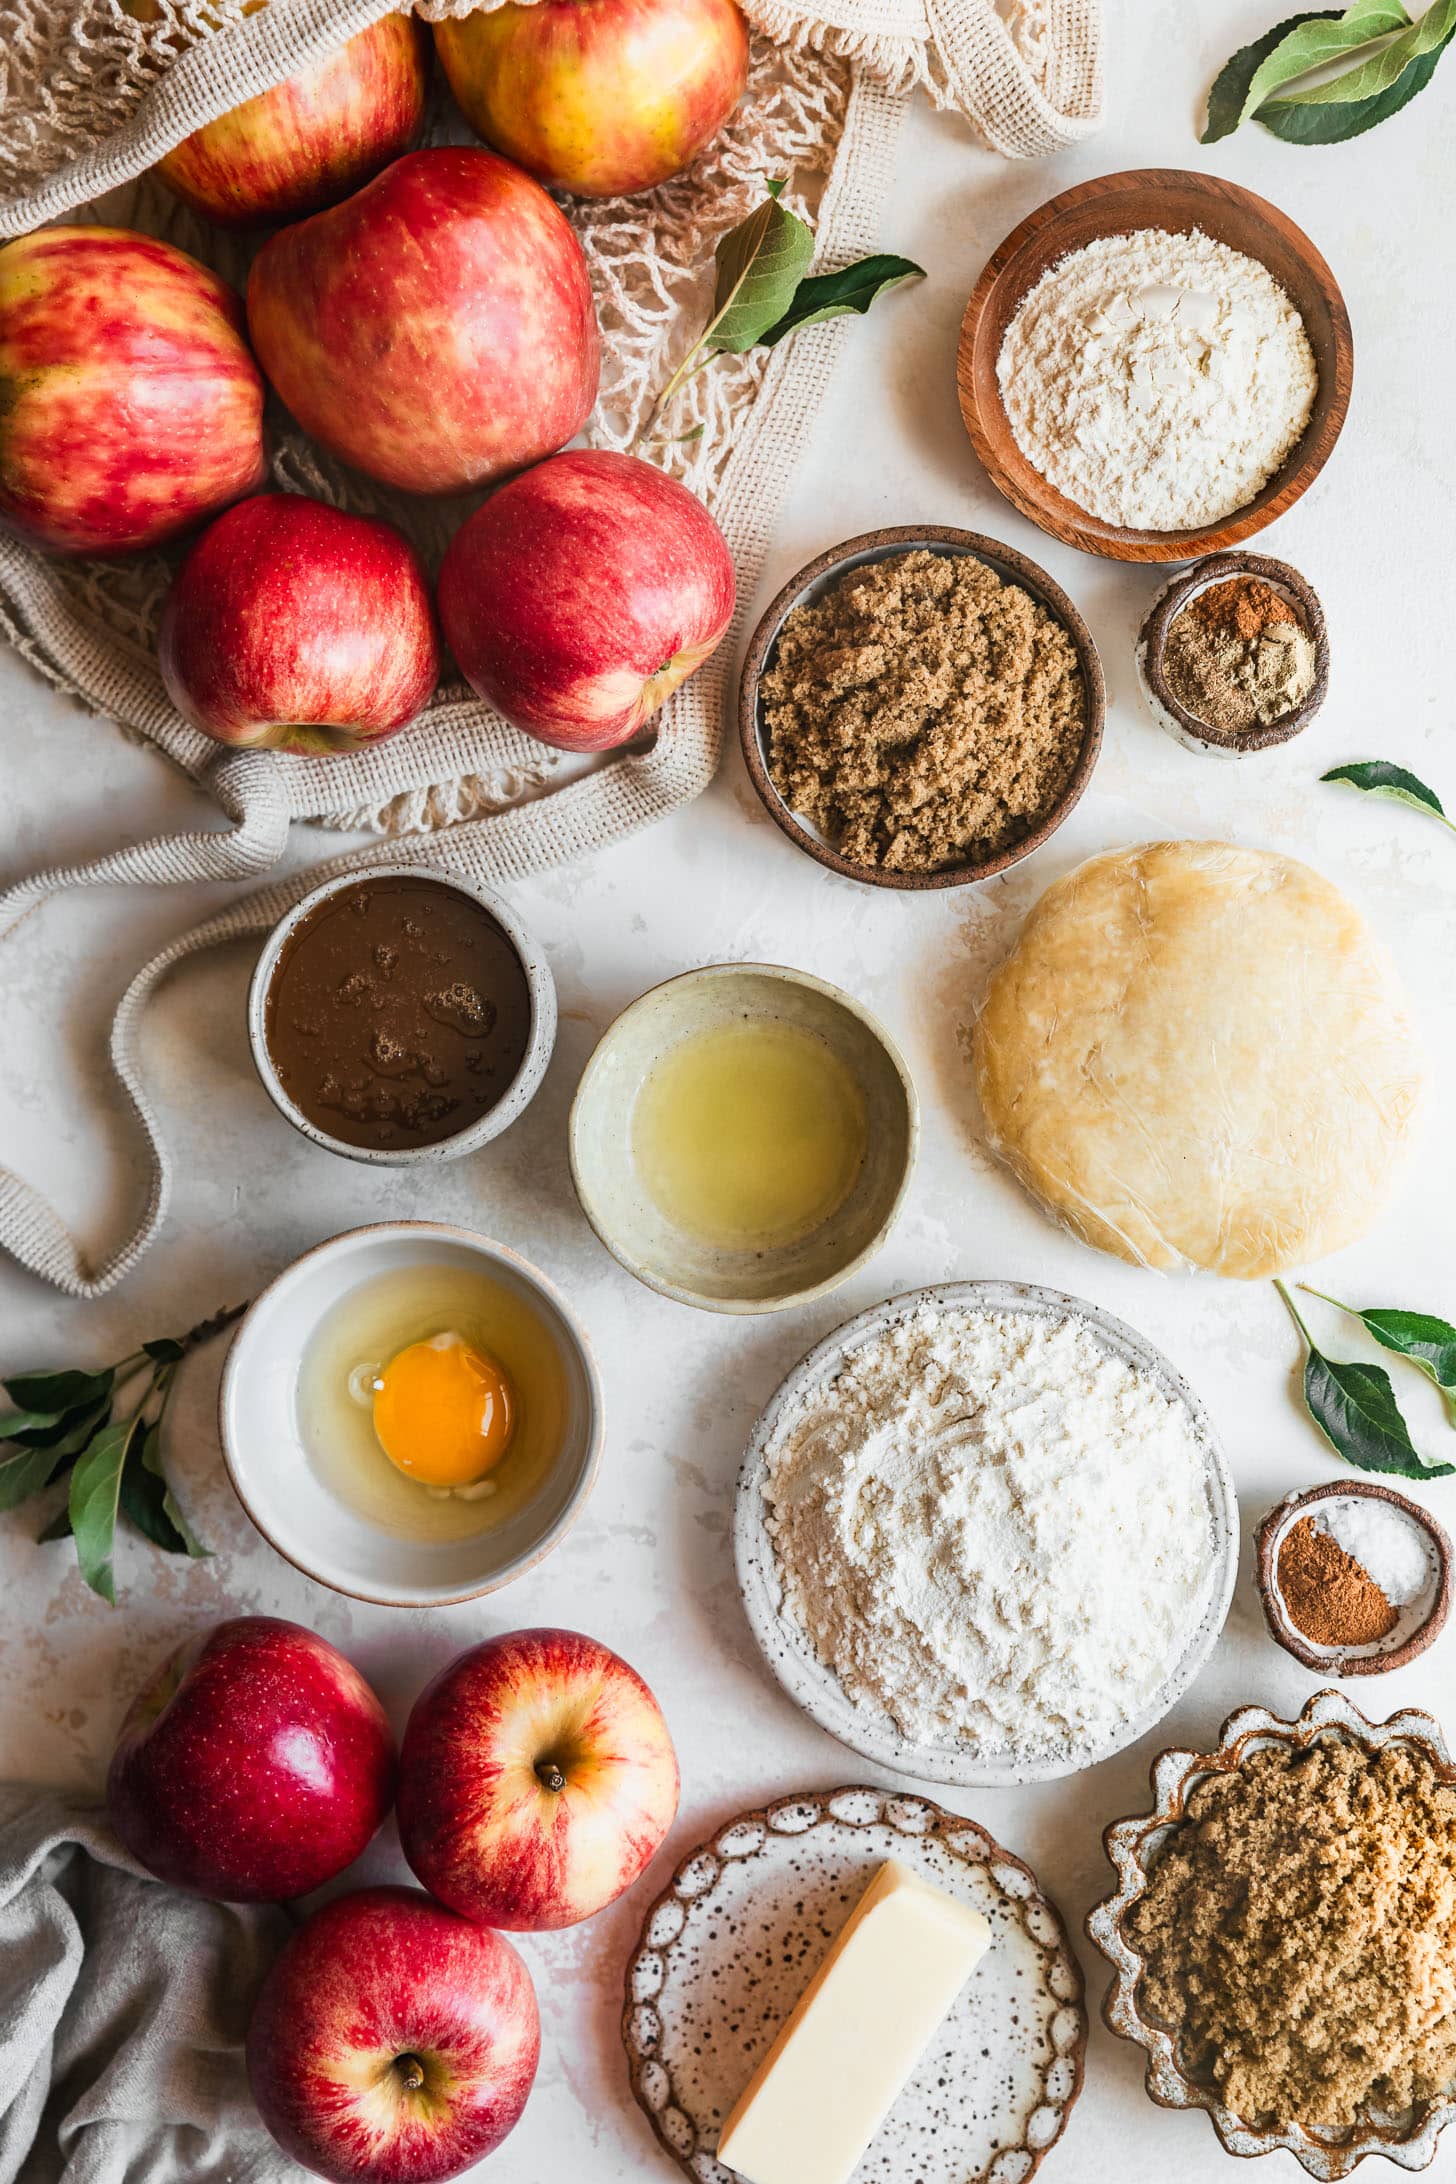
Using the right apples can make or break a pie. Choose something sweet, tart, and crisp for the best flavor and texture. My favorite is Honeycrisp because they’re super crunchy, flavorful, and hold up well in the oven. This is my desert island apple when it comes to baking. But, you can also use Pink Lady, Braeburn, Granny Smith, or Gala!
You’ll also need store-bought or homemade pie dough, lemon juice, brown sugar, flour, cornstarch, cinnamon, apple pie spice, cardamom, Kosher salt, an egg, and caramel sauce. The streusel is made with unsalted butter, flour, more brown sugar, cinnamon, & salt.
For more interesting flavor, use a mix of different apples. I like a combo of Honeycrisp, Pink Lady, and/or Granny Smith!
Prep the pie dough
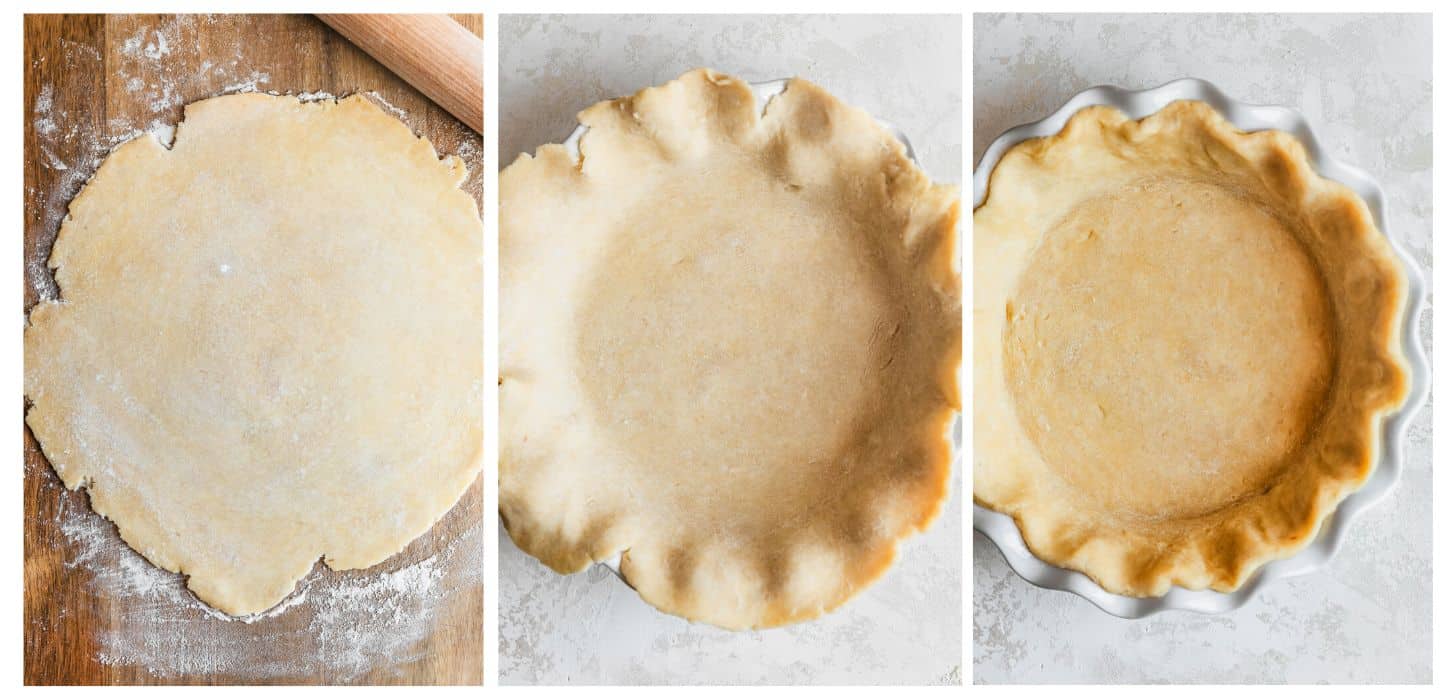
For the crispiest crust, use a metal or stoneware pie dish! It’ll transfer heat better than ceramic which makes for a nice brown crust. But don’t worry, ceramic will also work! The bottom may not be as crisp but it’ll still get browned. Also, go for a deep dish, because there’s lots of apples in this filling!
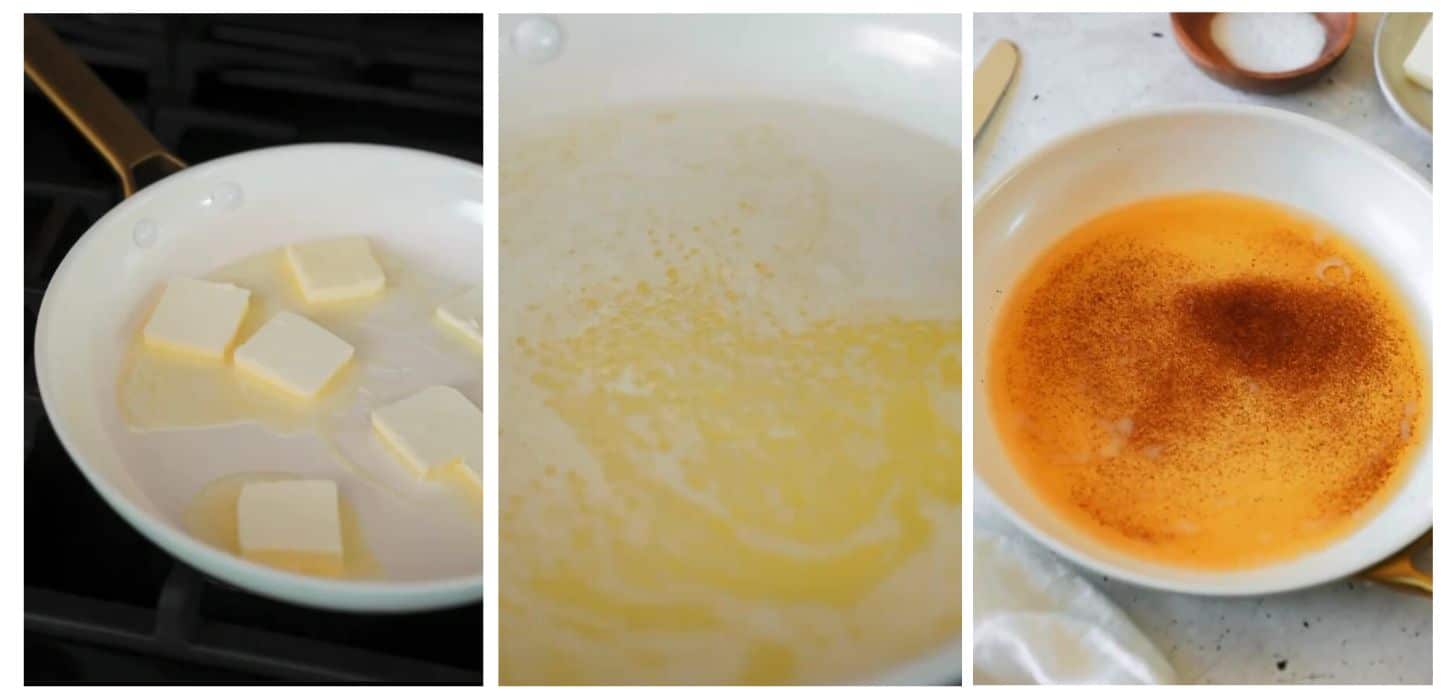
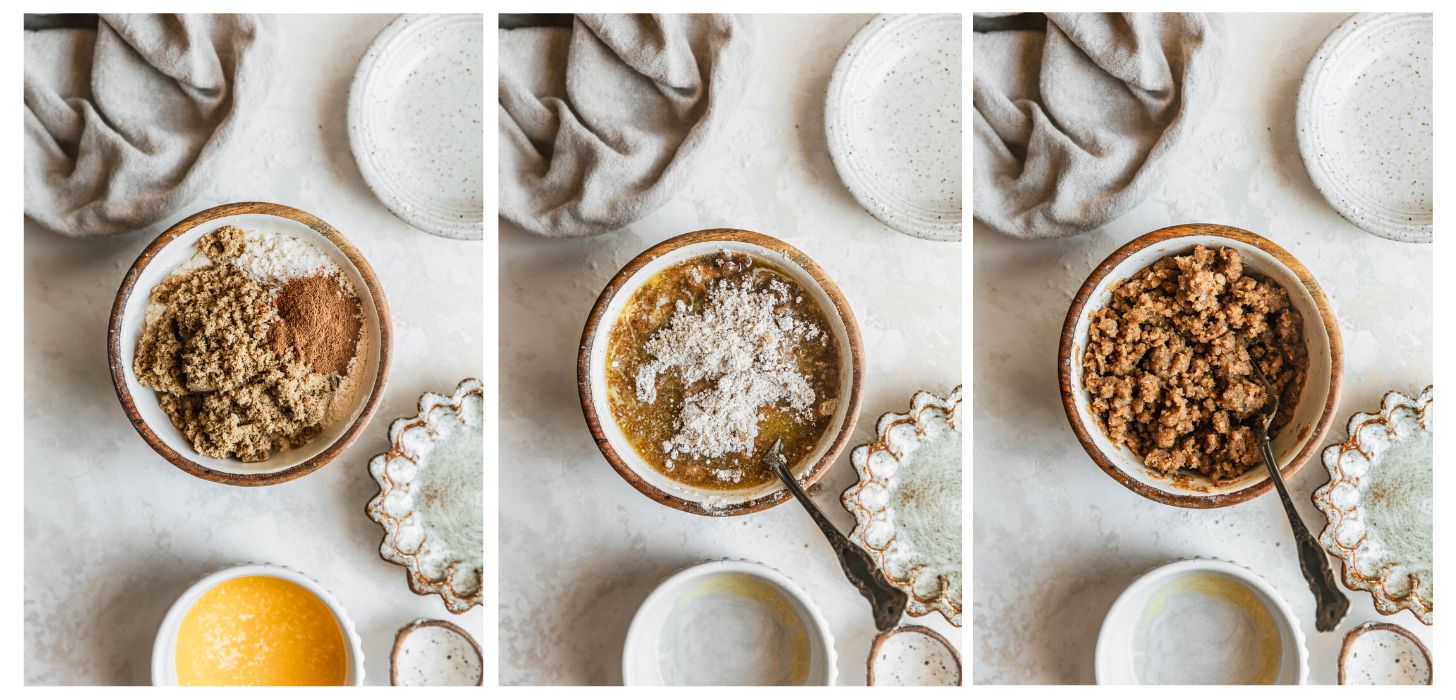
Brown the butter
Mix up the streusel
Fill & bake
For a crisp (never soggy!) bottom pie crust, bake the pie in the lower 1/3 of your oven. Also, if you have a pizza stone, it’s a great tool for pie baking! Just place the pie on the hot pizza stone and it will help crisp up that bottom crust. If you don’t have a pizza stone, throw a sheet pan in the oven while it’s heating up and bake the pie on the hot sheet pan instead!
Jammy filling
First, let me say that this pie is a bit juicy. I like it that way! But, if you want a jammy pie, replace the flour in the filling with cornstarch. You also need to make sure the pie cools for at least 4 hours so the filling has time to set completely. Otherwise, the juices will seep out.
Make-ahead & storage tips
Pie is the ultimate make-ahead dessert. To make this pie ahead of time, just bake it 1 day in advance. I actually prefer to make pie the night before because the longer the pie sits, the more flavorful it’ll taste!
If you have leftovers, cover the pie plate with a cake dome or cover it loosely with tin foil. Let it sit at room temperature for up to 2 days. Or, you can store the pie in the fridge for up to 5 days.
If you make this recipe, I would love if you left a star rating and review! I read every single comment and love hearing what you think about my recipes. Thank you for supporting Sunday Table!
Caramel Dutch Apple Pie with Brown Butter Streusel
Ingredients
Caramel Apple Pie
- 1 homemade pie crust (or store-bought)
- 3 pounds apples (1.35 kilograms)
- 1 1/2 Tablespoons freshly-squeezed lemon juice (24 milliliters)
- 1/3 cup brown sugar (65 grams)
- 2 Tablespoons all-purpose flour, plus more for dusting (15 grams)
- 1/4 cup cornstarch (30 grams)
- 1 teaspoon cinnamon
- 1 teaspoon apple pie spice
- 1/4 teaspoon cardamom
- 1/4 teaspoon Kosher salt
- 1 egg
- 1/2 cup good-quality salted caramel sauce, plus more for serving (160 grams)
- Vanilla ice cream, for serving
Brown Butter Streusel
- 1/2 cup unsalted butter (114 grams)
- 1 1/4 cups all-purpose flour (150 grams)
- 1/2 cup brown sugar (100 grams)
- 1 teaspoon cinnamon
- 1/2 teaspoon Kosher salt
Equipment
- Deep 9-inch pie dish
- Pizza stone or metal sheet pan
Instructions
Prepare the pie dough
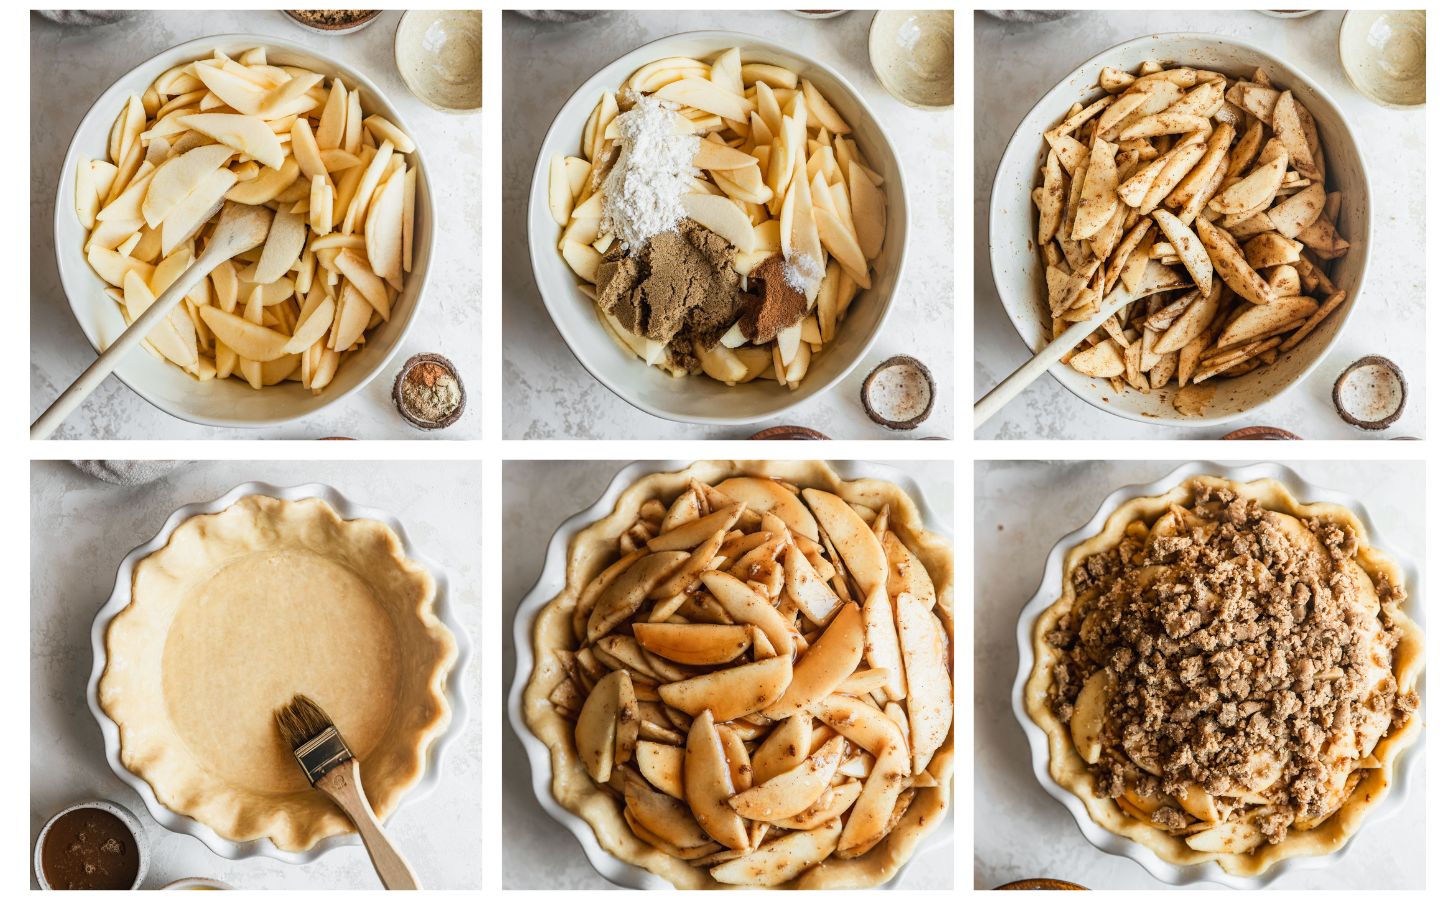
- Preheat the oven to 400°F (204°C). Place an oven rack in the lower 1/3 of the oven. If you have a pizza stone, place it on the rack while the oven is heating. (If you don't have a pizza stone, use a sheet pan instead.)
- On a lightly floured surface, roll out the chilled pie dough. Turn the dough after every few rolls until you have a circle of dough that is about 1/8-inch thick and 12-inches in diameter.
- Roll the pie dough over the rolling pin and then carefully unroll the dough into the pie plate. Gently press the pie dough into the pie plate with your fingers.
- Next, crimp the edges of the dough. Refrigerate the dough while you make the filling and streusel.
Make the streusel
- To make the brown butter, melt the unsalted butter in a light-colored pan over medium-low heat. It will start to simmer and foam up. Stir constantly until the butter smells caramelized and there are golden-brown bits on the bottom of the pan. Immediately remove the pan from the heat and pour the butter into a heat-proof bowl to keep it from burning. Let it cool for 5-10 minutes.
- Add the flour, brown sugar, cinnamon, and salt to a small bowl. Use a fork to mix it until there are no clumps.
- Then, add 6 Tablespoons (84 grams) of the brown butter to the flour-sugar mixture. Use the tines of a fork to mix the streusel together until it's crumbly and there are no more streaks of flour.
Mix up the filling
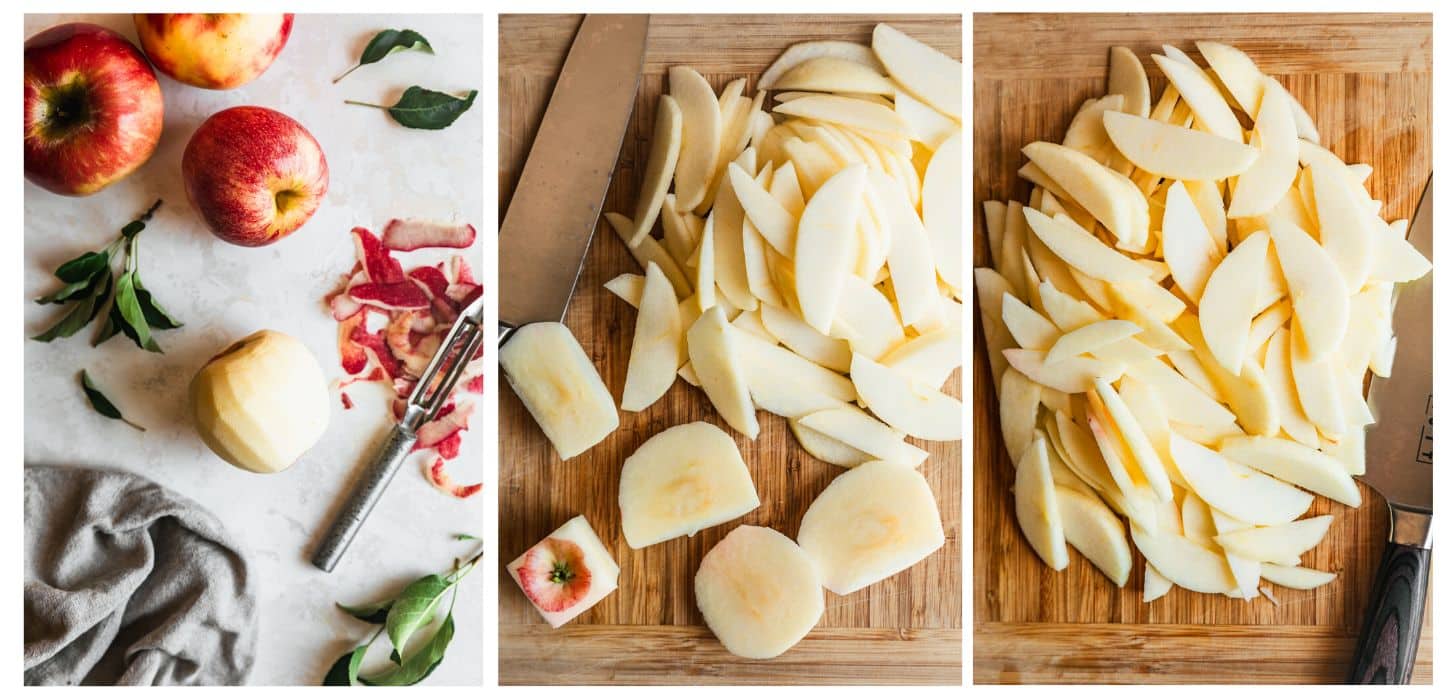
- Start by peeling and coring the apples. Cut the apples into 1/8-inch to 1/4-inch slices. Keep them as uniform as possible to ensure even baking.
- Place the apples in a large bowl. Drizzle the lemon juice over the apples and toss to combine.
- Then, add the brown sugar, flour, cornstarch, cinnamon, apple pie spice, cardamom, and salt. Mix well and let the apples sit for a couple of minutes until there are no dry spots.
Assemble & bake
- In a small bowl, whisk together the egg and 1 Tablespoon (15 milliliters) of water until smooth. Brush the pie dough with 2 layers of egg wash.
- Then, pour the apple filling into the pie crust. Drizzle the caramel sauce over the apple filling. Then, crumble the streusel evenly over the top of the pie.
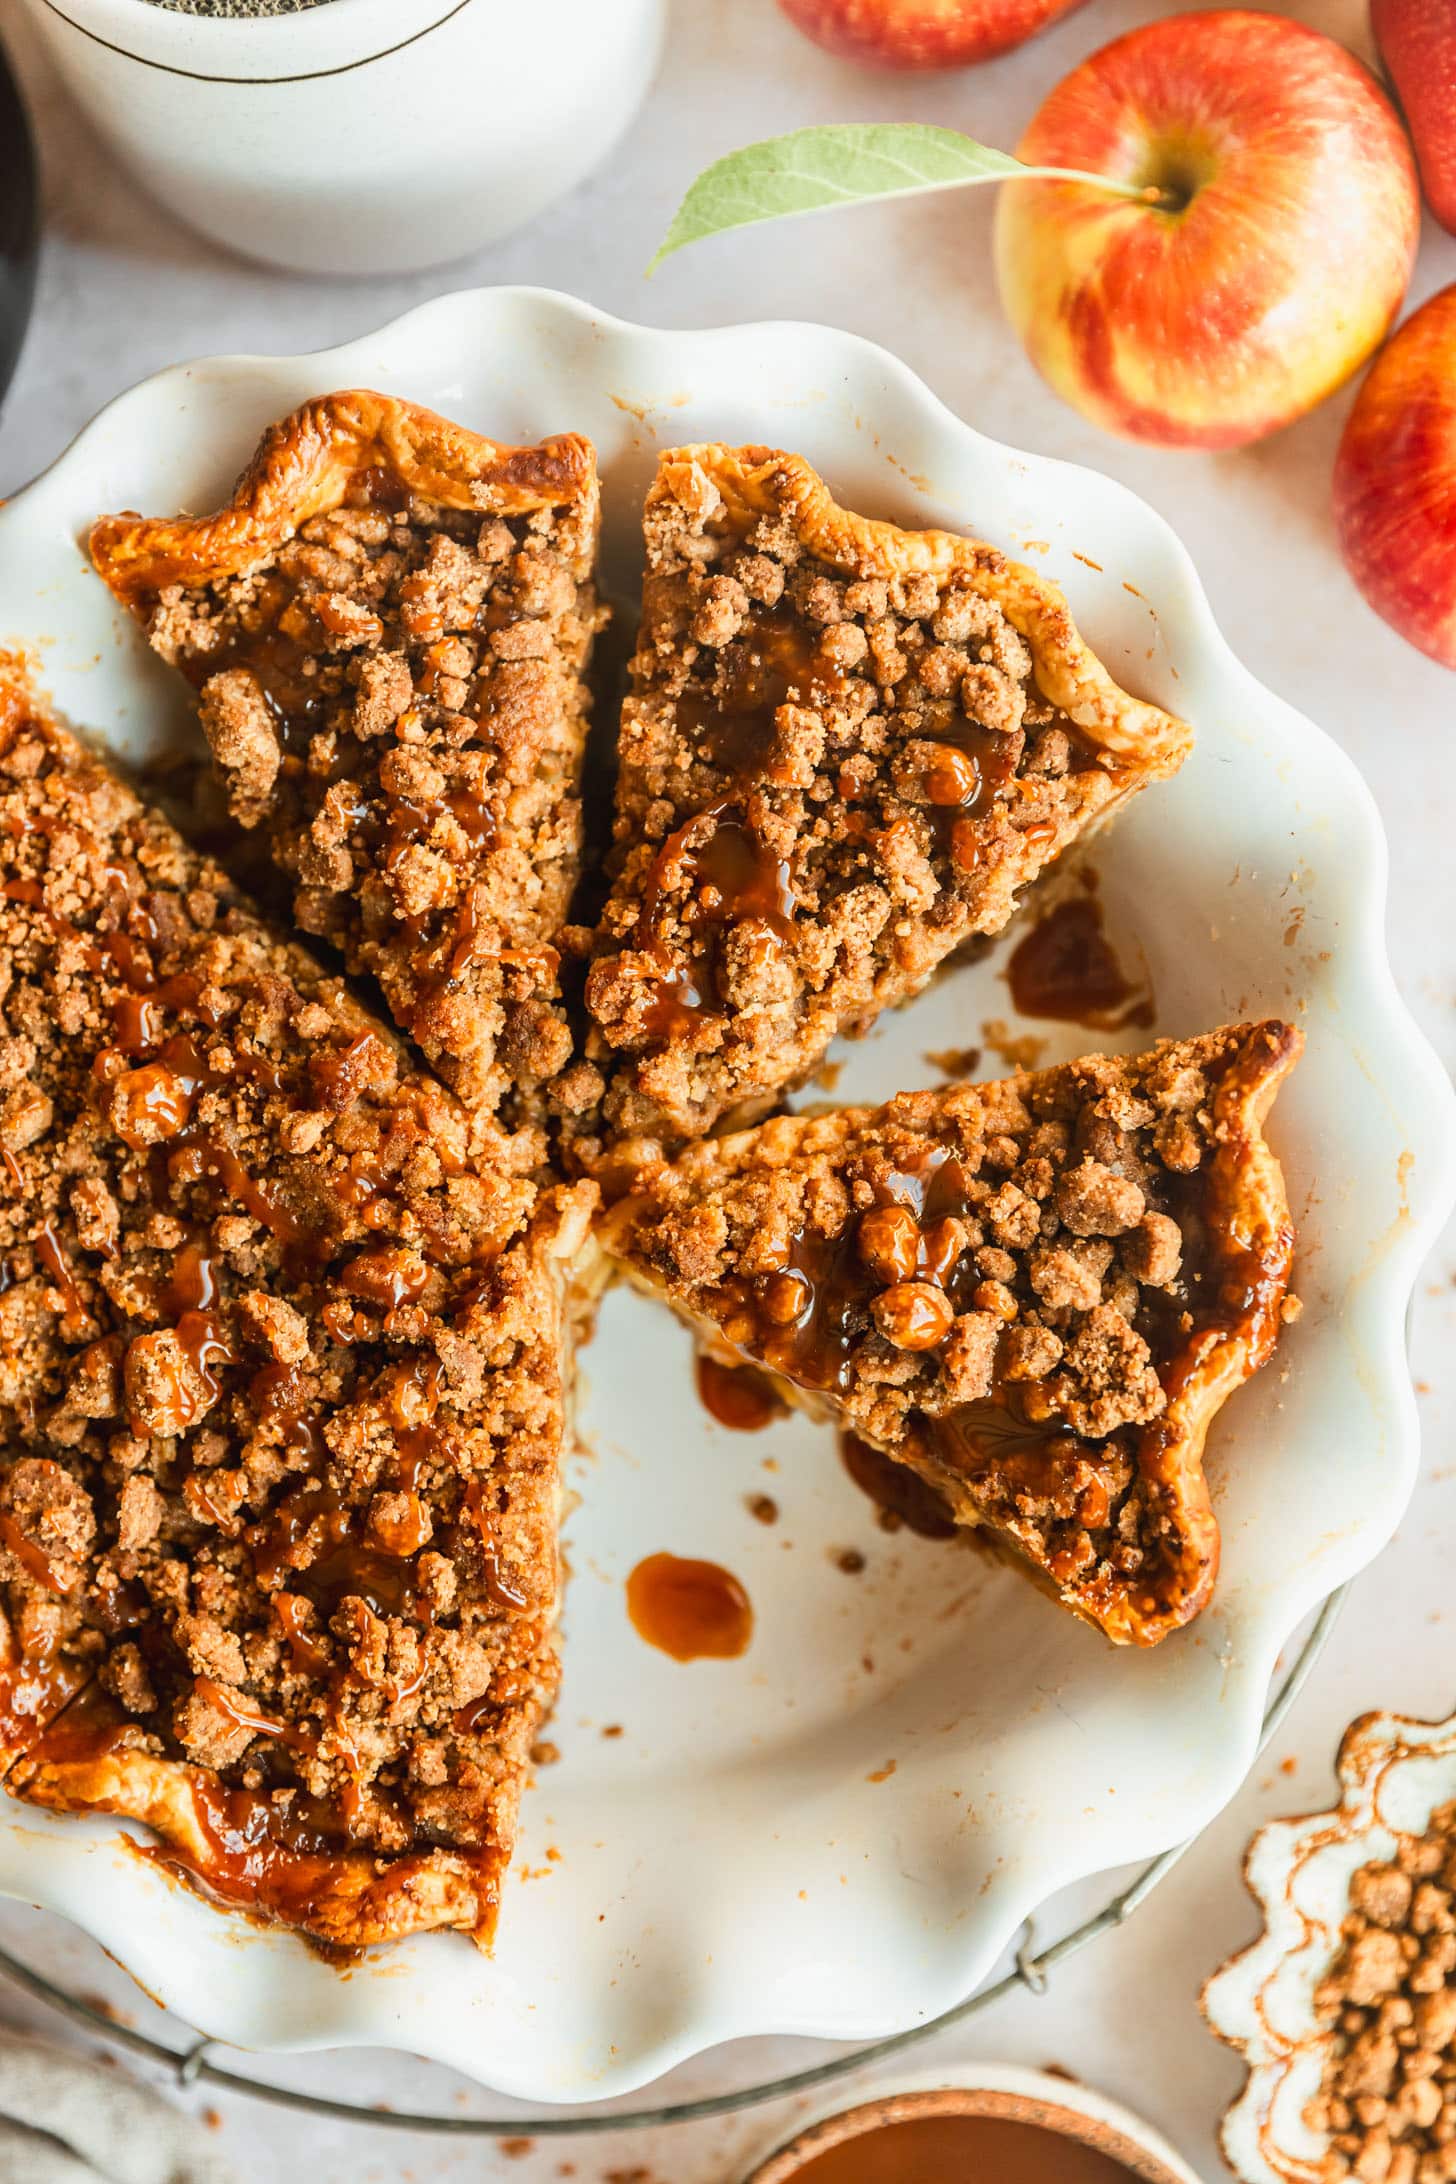
- Place the pie on the hot pizza stone or sheet pan. Bake for 45-50 minutes until the crust is a deep golden brown and the filling is bubbly. (If the streusel is getting too browned, tent it with tinfoil to prevent it from burning.)
- Let the pie cool on a wire rack at room temperature for at least 4 hours. Slice, re-warm if desired, and serve with vanilla ice cream and extra caramel sauce. Enjoy!
Notes
Recipe originally posted on November 22, 2021.

This apple pie recipe is my new go-to! I tested out on our big family thanksgiving and it was a hit. I have been asked for this recipe now a few times. No need to look for another apple pie recipe, this will take you to a new level
Awww thank you so much, my friend! 💗 I’m so glad everyone likes the recipe. 🙂 You’re the best!