Do you love fries? Do you love cheese? Then you need to make these cheesy loaded waffle fries ASAP! With bacon, jalapeños, red chilis, and fresh chives, they’re loaded with flavor and taste amazing with a side of ranch and a cold beer. Make this snack for parties, game days, and get-togethers with friends!

A metal tray of loaded waffle fries with cheese, bacon, and jalapeños on a white counter next to beer and brown bowls of chives and ranch.

Earlier this week, I said the actual sentence, “WOW, it’s been a week”. And it was only Tuesday. So needless to say, I needed something covered in cheese by the time Friday rolled around.

For me, the only cure for a long week involves inviting my friends over for wine and early 2000s teen movies. Plus a variety of snacks like garlic butter chicken wings, spicy deviled eggs, spicy ranch snack mix, or cheesy fries!

These fries are by far one of my go-to party snacks. They’re super cheesy, a bit spicy, and made for sharing with friends. Let’s get into it!

These fries are so good

Anyone who tells you that cheesy fries aren’t one of the best foods ever is honestly? Lying. These fries are a superior bar food and one of my go-tos for casual get-togethers at home. They’ve been one of my go-to late night orders ever since I was in college spending my weekends bar-hopping. But they’re also a super easy snack to make at home!

  • These fries are melty, crunchy, and topped with crispy bacon.
  • You can customize the fries with all of your favorite toppings!
  • This recipe is ridiculously easy thanks to a shortcut – frozen fries.
  • Serve these fries for movie nights with friends, casual parties, or game day!

Ingredients you’ll need

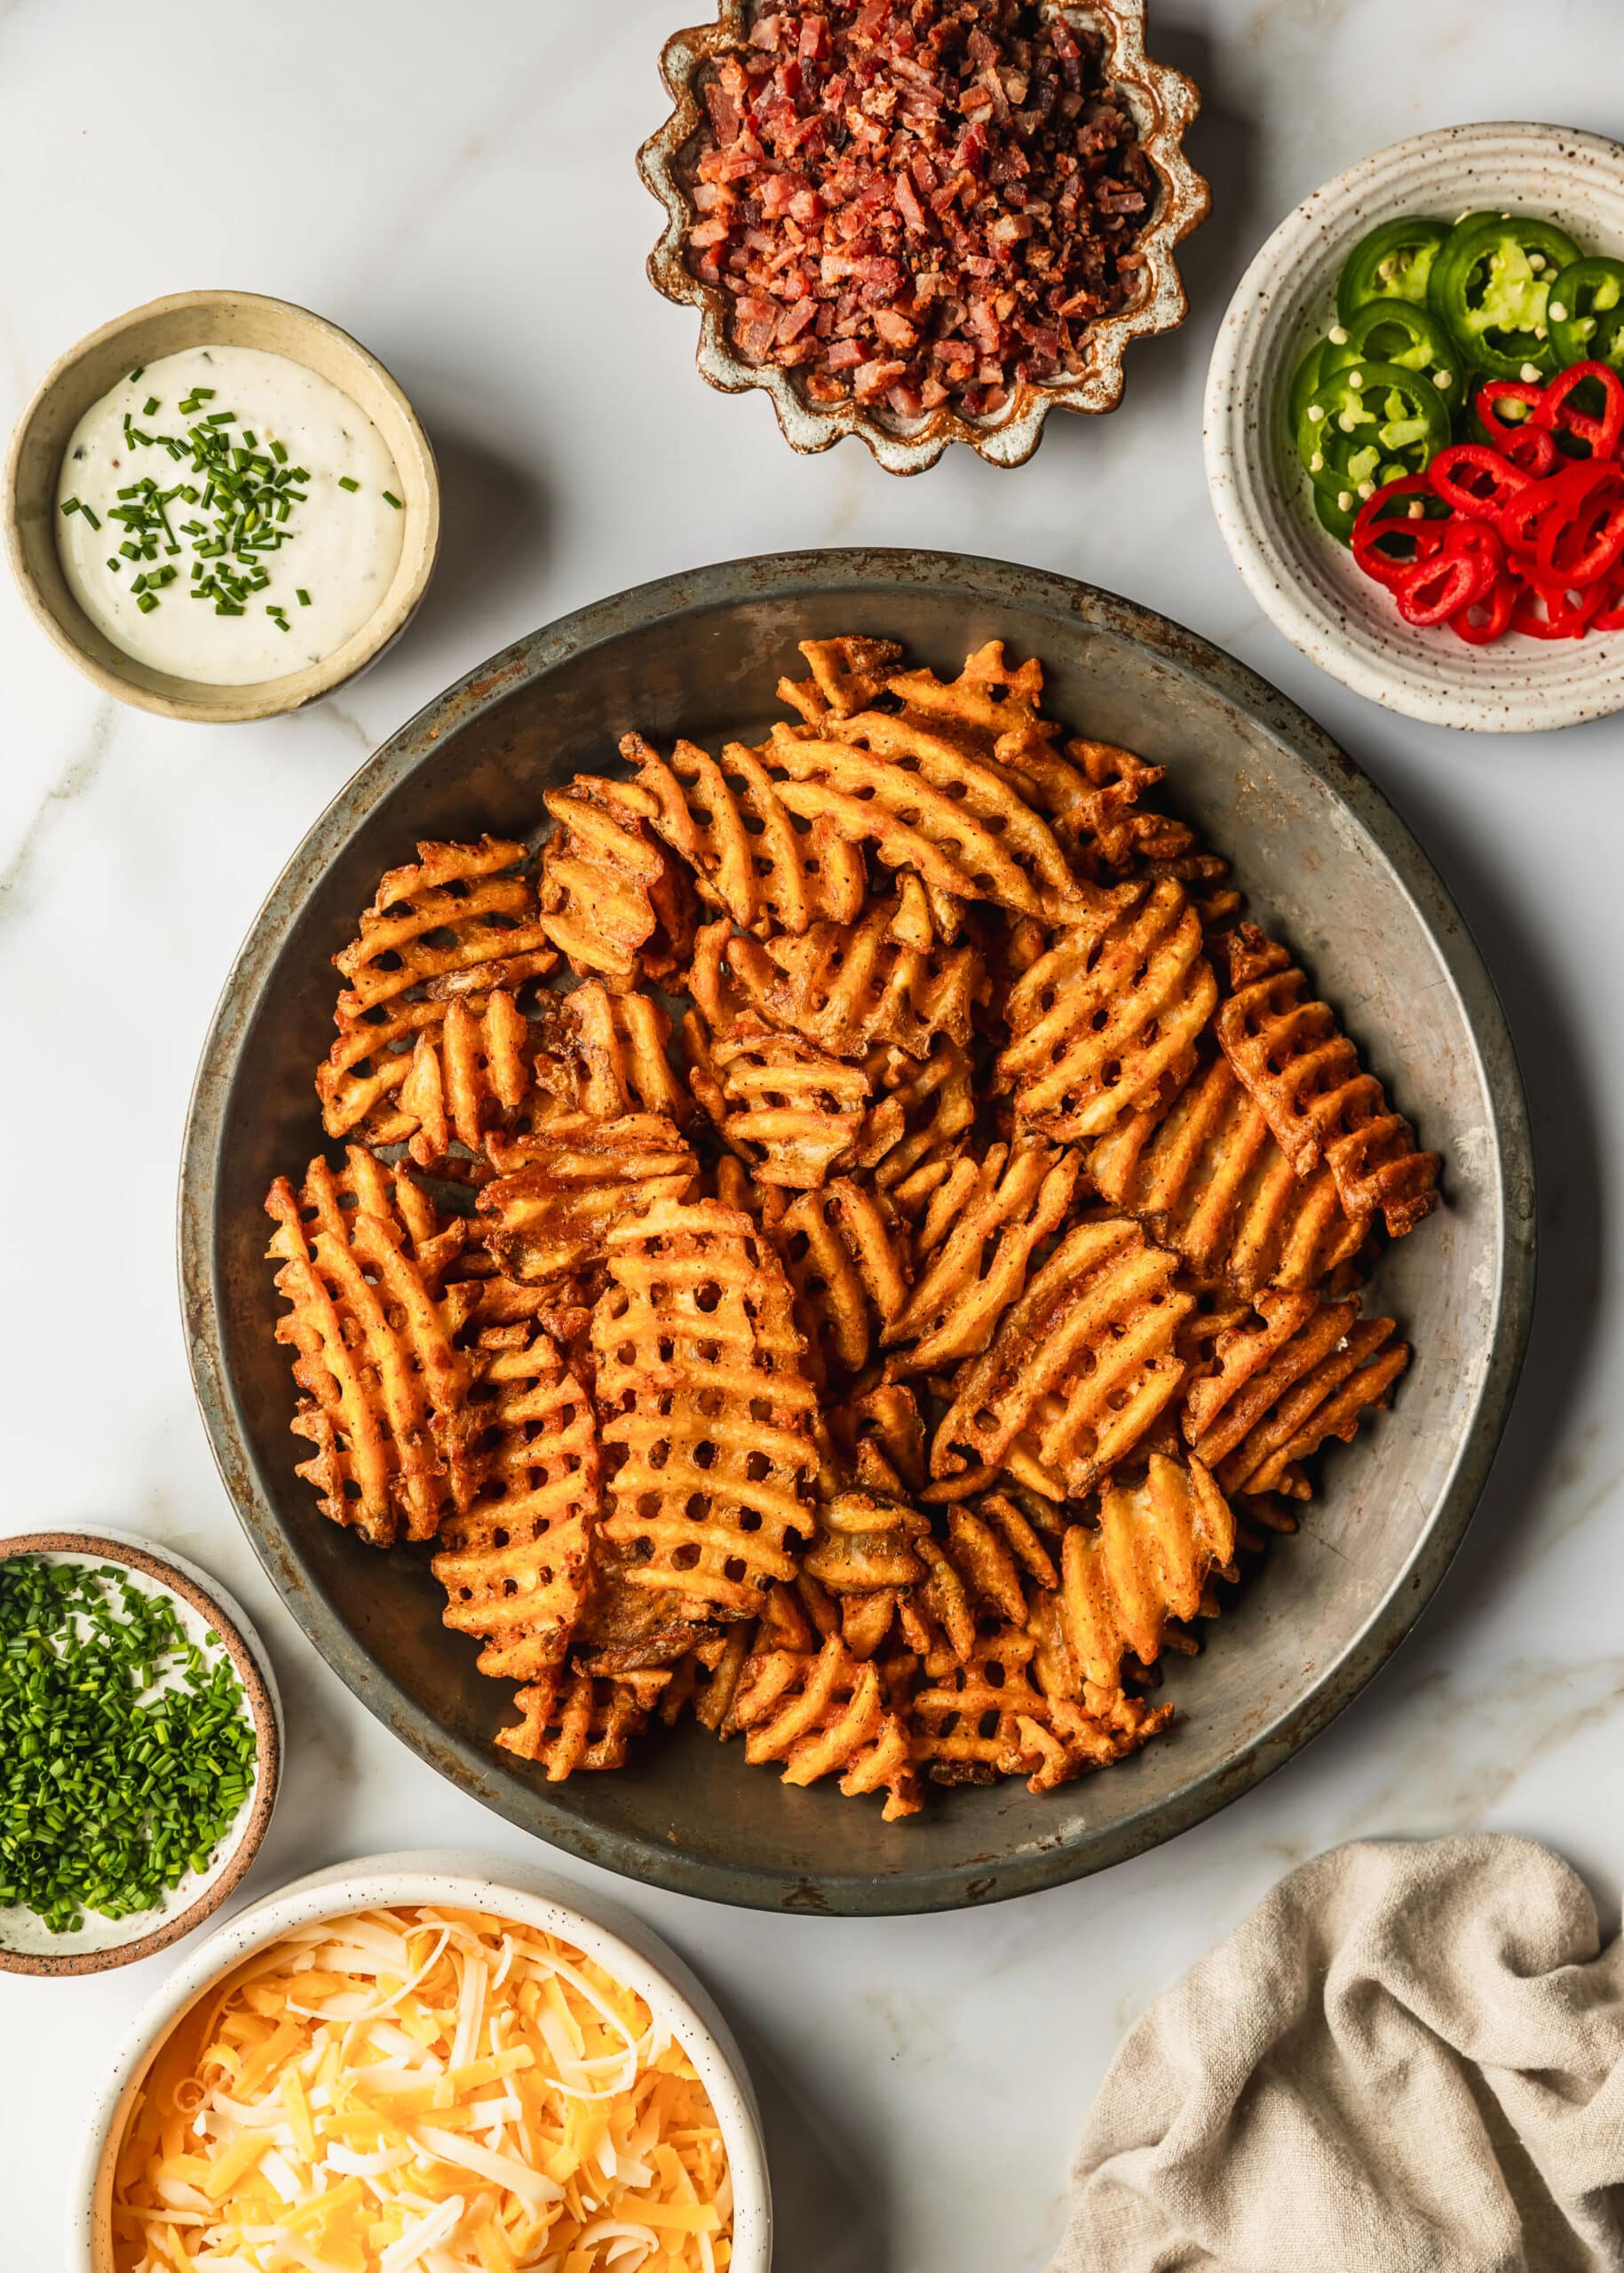
A tin of baked fries next to white and brown bowls of chives, cheese, peppers, bacon, and ranch on a white counter.
  • Waffle fries – to keep things nice any easy, this recipe uses frozen waffle fries! I like seasoned fries but feel free to use plain salted.
  • Cheese – a mix of sharp cheddar and Monterey jack cheese will add a savory flavor but still lots of meltiness!
  • Bacon – look for thick-cut bacon for the best texture. I usually buy it from the meat counter.
  • Hot peppers – for a little spice, we’ll top the fries with jalapeños and red chili peppers.
  • Chives – a sprinkle of fresh chives add a pop of freshness.
  • Ranch – for dipping! Store-bought or homemade will both work.

Substitutions & variations

  • Fries – use regular fries, sweet potato fries, or tater tots instead.
  • Cheese – any melty cheese, like pepper jack, provolone, or mozzarella, will work too. If you’re using a milder cheese like mozzarella, make sure you pair it with something more flavorful like cheddar.
  • Peppers – if you’re not a fan of spice, feel free to replace the chilis with sautéed peppers & onions.
  • Green onions – these are a great replacement for fresh chives!
  • Dipping – you can also serve these fries with fry sauce, ketchup, or sour cream.
  • Vegetarian – to make vegetarian loaded fries, leave off the bacon or replace it with vegetarian bacon.

Make this recipe

Three steps to cooking bacon. In photo 1, raw bacon is on parchment paper. In photo 2, the bacon is cooked. In photo 3, the bacon is chopped on a wood board.

Cook the bacon

This is how I learned how to make bacon when I was in culinary school. It’s truly the best way to make bacon without making a huge mess in your kitchen!

  1. Line a sheet pan with parchment paper or tin foil. Line the bacon side-by-side on the pan.
  2. Then, bake the bacon for 10-18 minutes, until it’s crisp and cooked through.
  3. Transfer the cooked bacon to paper towels to soak up any extra grease. Chop the bacon and set it aside for later.
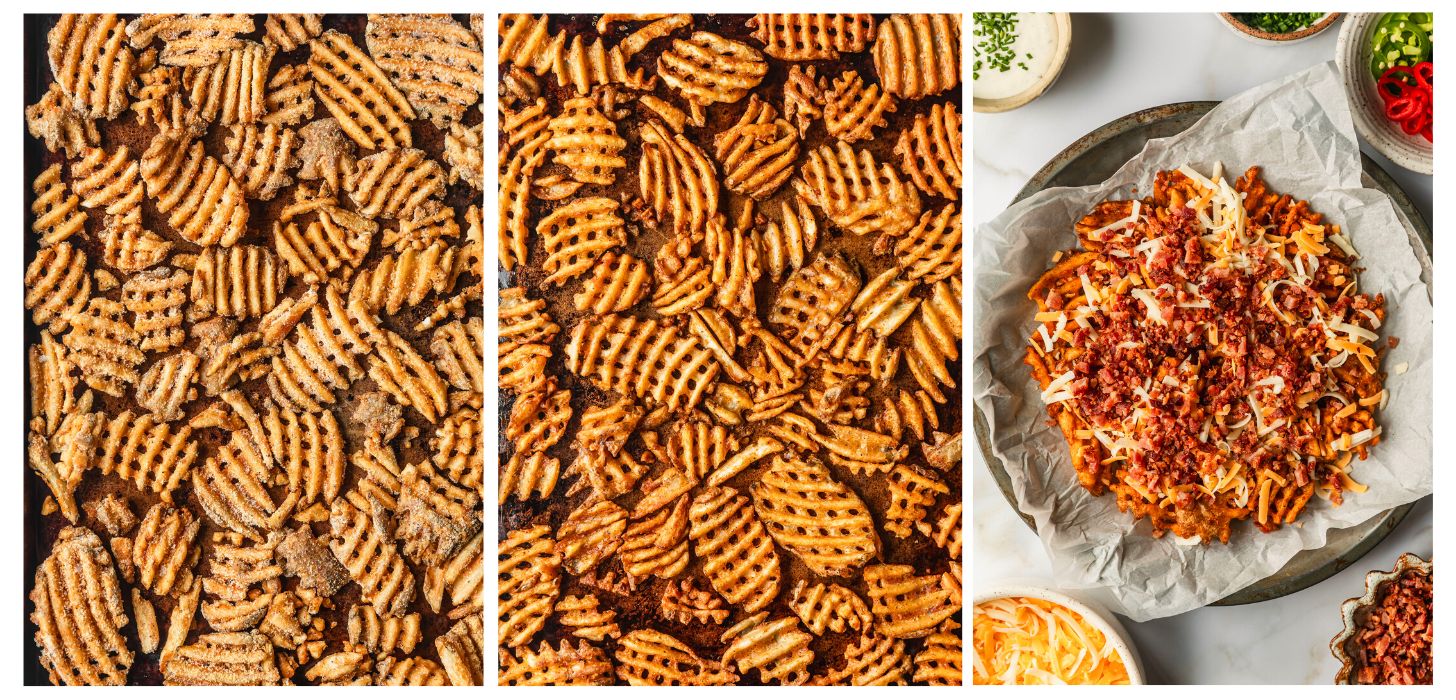
Three steps to making cheesy fries. In photo 1, frozen fries are on a sheet pan. In photo 2, the fries are baked. In photo 3, the fries are in a silver pan topped with cheese and bacon. The pan is on a white counter next to white bowls of cheese, bacon, peppers, and ranch.

Bake & assemble

  1. Spread the waffle fries in a single layer on a sheet pan.
  2. Then, bake the fries according to package directions until they’re crispy.
  3. Place half of the fries in an oven-safe serving dish. Top with half of the cheese and bacon.
Three steps to making loaded waffle fries. In photo 1, silver pan with waffle fries is on a white counter next to white bowls of bacon, cheese, and peppers. In photo 2, the fries are topped with bacon and cheese. In photo 3, the fries are topped with chilis.
  1. Add the rest of fries, cheese, and bacon.
  2. Next, evenly spread the chilis over the top.
  3. Broil the fries for 3-5 minutes until the cheese is melty and the chilis are lightly charred. Serve with ranch and enjoy!

Feel free to assemble the fries in a single layer on a sheet pan instead of a serving dish. Just line the sheet pan with parchment paper so the cheese doesn’t stick to the pan!

Can I make this recipe in the air fryer?

Definitely! To make loaded fries in the air fryer:

  1. Spread the waffle fries in a single layer and air fry according to package directions.
  2. Once the fries are nice and crispy, spread the cheese, bacon, jalapeños, & red chilis on top.
  3. Then, air fry at 390°F (198°C) for 2-3 minutes until the cheese is melted and the chilis are lightly charred. Serve with ranch and enjoy!
A metal tray of loaded waffle fries on a white counter next to beer and a beer opener.

More topping ideas

If you want to elevate these fries even more, you can use all kinds of toppings! Here are some ideas:

  • Meat – pulled pork, chicken, ground beef, or smoked tri-tip would be delicious.
  • Veggies – try sautéed bell peppers or onions. You can also top the fries with raw cherry tomatoes, avocado, or finely diced onions.
  • Gravy – serve the fries with a side of gravy for poutine vibes.
  • Cheese sauce – you can also use cheese sauce instead of fresh cheese.
  • Nacho – for a nacho twist, top the fries with beans, jalapeños, guacamole, pico de Gallo, etc.
  • Buffalo – try adding crispy buffalo chicken, bleu cheese, bacon, and green onions.
  • Cheesesteak – use a mix of pepper jack cheese, sliced beef, and sautéed peppers, onions, & mushrooms.
  • Carne asada – these fries would be amazing with carne asada, onions, & cilantro!

These fries are the perfect way to use up leftovers! Some of my go-tos are leftover pulled pork, roasted chicken, tri-tip, or roasted veggies. So delicious!

Recipe tips & tricks

  • For easy cleanup, line the sheet pan with parchment paper or tinfoil. It’s such a lifesaver against melty cheese!
  • Always shred your own cheese. I promise, it’s super worth it! Not only does the cheese taste so much better but it also melts nicer. Pre-shredded cheese will end up being grainy.
  • Double layer the ingredients for max coverage! If you just pile the cheese and bacon on top, you’ll end up with a bottom layer of fries sans toppings.
  • Serving a crowd? This recipe is super easy to double or triple! Just spread everything out between 2 sheet pans so the fries come out nice and crispy.
A metal pan of cheesy loaded waffle fries with bacon on a white counter next to beer and brown bowls of chives and ranch.

Storing leftover fries

I think these fries taste best fresh but if you have leftovers, they’ll still be good! Just spoon them into an airtight container and refrigerate the fries for up to 3 days.

3 ways to reheat

To reheat the fries, you have a few options!

  • Air fry – reheat the fries in the air fryer at 350°F (177°C) for 3-4 minutes until hot. This is my favorite method. They get nice and crispy!
  • Bake – place the fries on a greased sheet pan. Bake at 350°F (177°C) for 10-15 minutes. This is my second favorite way to reheat the fries. They still get crispy, it just takes longer.
  • Microwave – transfer the fries to a plate and microwave for 1-2 minutes until they’re heated through. I definitely don’t prefer this reheating method because it makes the fries a bit soggy but it will work in a pinch!
A hand reaching for a fry on a tray of cheesy loaded waffle fries on a white counter next to beer and brown bowls of ranch and chives.

If you make this recipe, I would love it if you left a star rating and review! I read every single comment and love hearing what you think about my recipes. Thank you for supporting Sunday Table!


5 from 1 vote

Cheesy Loaded Waffle Fries with Bacon

Yield: 6 servings
Prep Time: 10 minutes
Cook Time: 30 minutes
Total Time: 40 minutes
Do you love fries? Do you love cheese? Then you need to make these cheesy loaded waffle fries ASAP! With bacon, jalapeños, red chilis, and fresh chives, they're loaded with flavor and taste amazing with a side of ranch and a cold beer. Make this snack for parties, game days, and get-togethers with friends!

Ingredients

  • 1/2 pound thick-cut bacon (226 grams)
  • 20 ounces frozen seasoned waffle fries (566 grams)
  • 3/4 cup shredded sharp cheddar cheese (84 grams)
  • 3/4 cup shredded Monterey jack cheese (84 grams)
  • 1 jalapeño pepper, very thinly sliced
  • 1 red chili pepper, very thinly sliced
  • 2 Tablespoons chopped fresh chives (6 grams)
  • Ranch dressing, for serving

Equipment

  • Parchment paper
  • Cutting board
  • Chef's knife

Instructions 

Cook the bacon

  • Preheat the oven to 425°F (218°C). Line a sheet pan with parchment paper.
  • Then, line the bacon on the sheet pan side-by-side, leaving a bit of space between each slice of bacon. Bake the bacon for 10-18 minutes, until it's crisp and cooked through. The total cook time will depend on the thickness of the bacon.
  • Once the bacon is cooked, transfer it to paper towels to soak up any extra grease. Let it cool for a few minutes. Then, finely chop the bacon. Set aside.

Bake the fries

  • Evenly spread the waffle fries on a sheet pan. Bake the fries until crispy, according to package directions.

Assemble & bake

  • Turn the broiler on HIGH. Transfer half of the fries to an oven-safe serving dish. Sprinkle the fries with half of the cheddar cheese, half of the jack cheese, and half of the bacon.
  • Add another layer of waffle fries. Top the fries with the remaining cheese and bacon. Spread the sliced jalapeños and red chilis on top. Broil the loaded fries for 3-5 minutes until the cheese is melted and the peppers are lightly charred.
  • Remove the loaded fries from the oven and immediately sprinkle them with fresh chives. Serve the fries with ranch dressing & enjoy!

Notes

For easy cleanup, line the sheet pan with parchment paper or tinfoil. It’s such a lifesaver against melty cheese!
Always shred your own cheese. I promise, it’s super worth it! Not only does the cheese taste so much better but it also melts nicer. Pre-shredded cheese will end up being grainy.
Feel free to assemble the fries in a single layer on a sheet pan instead of on a serving dish. Just line the pan with parchment paper so the cheese doesn’t stick!
Double layer the ingredients for max coverage! If you just pile the cheese and bacon on top, you’ll end up with a bottom layer of fries sans toppings.
Serving a crowd? This recipe is super easy to double or triple! Just spread everything out between 2 sheet pans so the fries come out nice and crispy.
I would keep any cold and hot ingredients separate. Put chilled dips (or other ingredients) in small bowls for serving on the side. If you drizzle the chilled ingredients over the top of the fries, they’ll make the fries soggy and the cheese hard.
These fries are the perfect way to use up leftovers! Some of my go-to toppings are leftover pulled pork, roasted chicken, tri-tip, or roasted veggies. So delicious!
Cuisine: American
Course: Appetizer, Snack
Serving: 1serving, Calories: 288kcal, Carbohydrates: 10.6g, Protein: 15g, Fat: 20.2g, Saturated Fat: 8.5g, Cholesterol: 48mg, Sodium: 757mg, Potassium: 282mg, Fiber: 1.1g, Sugar: 0.3g, Calcium: 211mg, Iron: 1mg
Did you make this recipe?Tag @sundaytable.co on Instagram!

xo Sara Lynn

Song of the day – No More Lies by Thundercat & Tame Impala