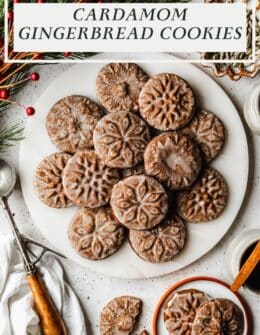
Cardamom Gingerbread Cookies with Orange Glaze
This post might have affiliate links. For full details please see my disclosure policy.
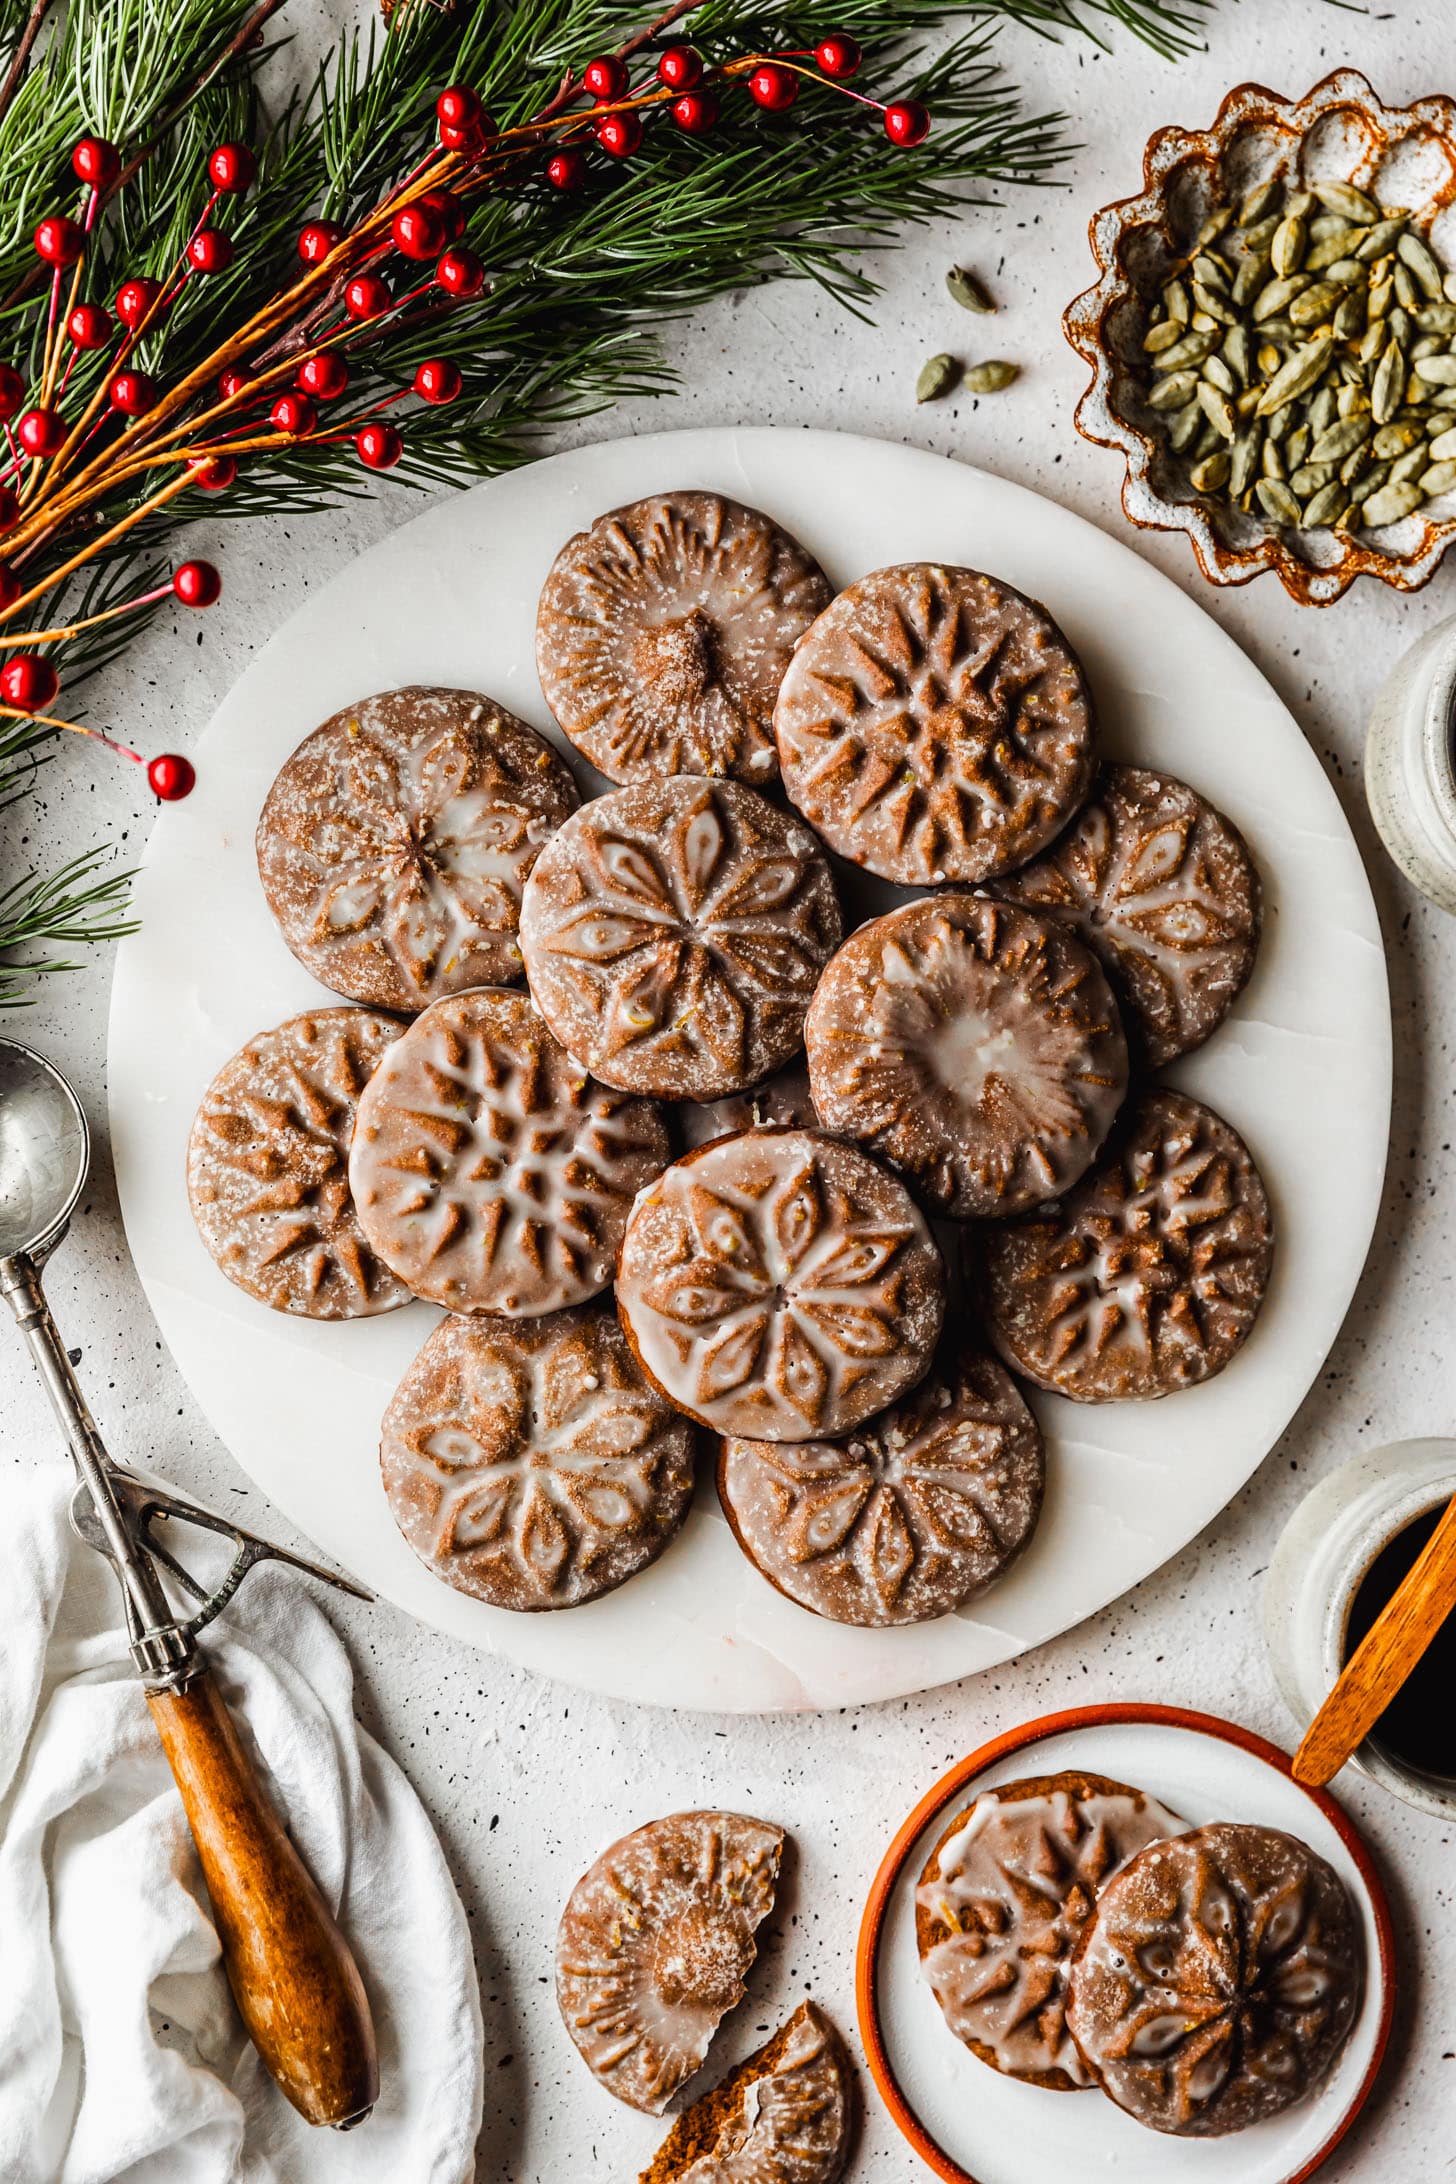
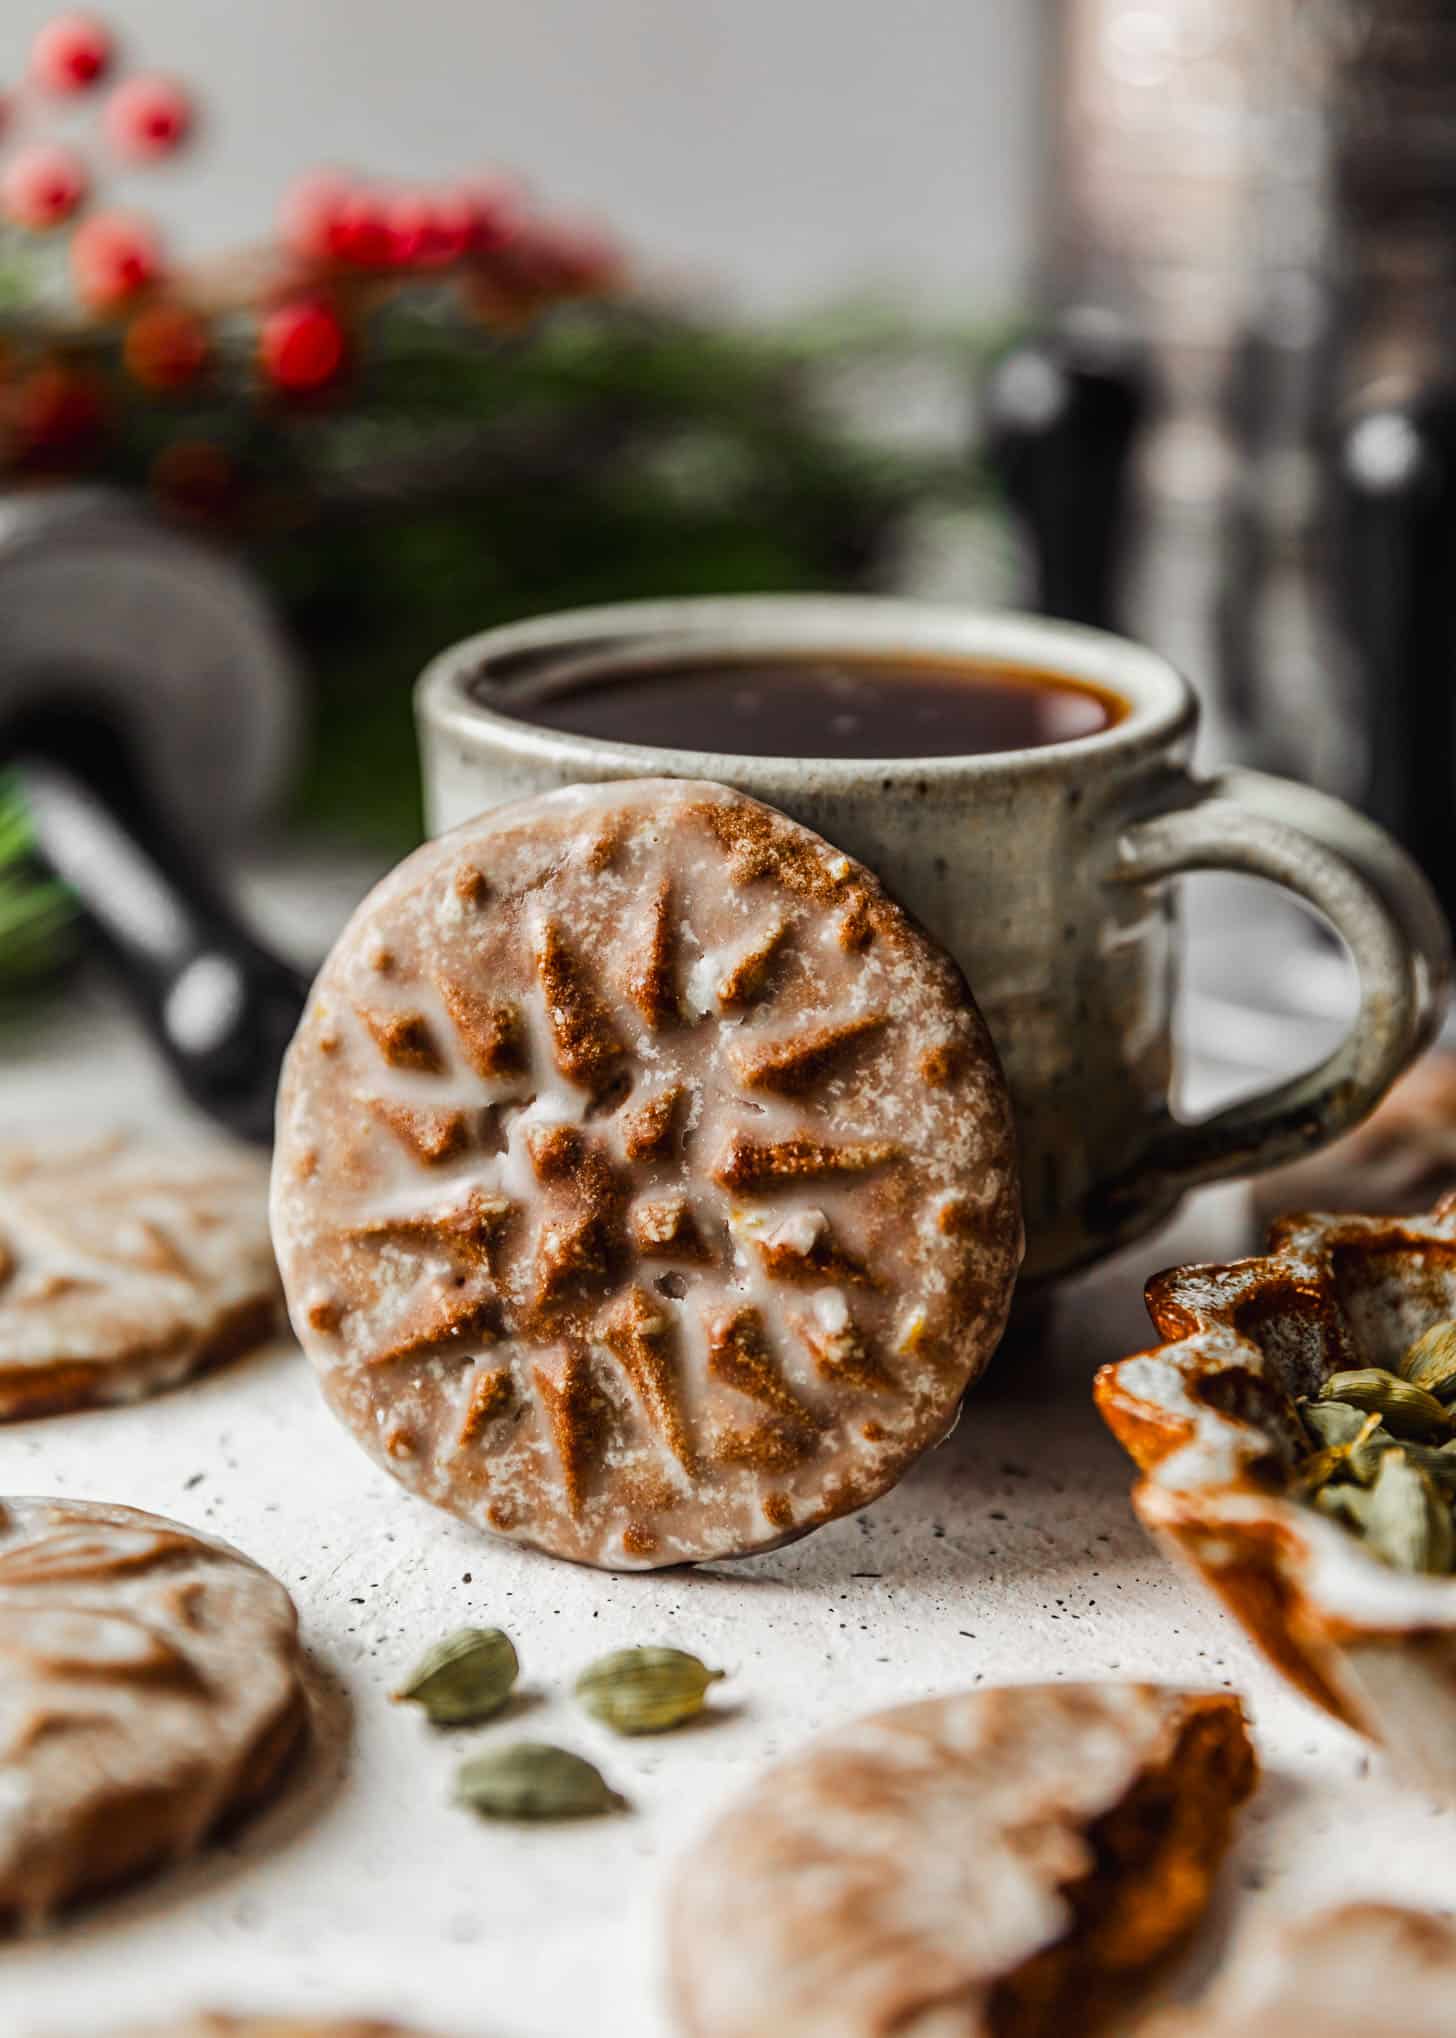
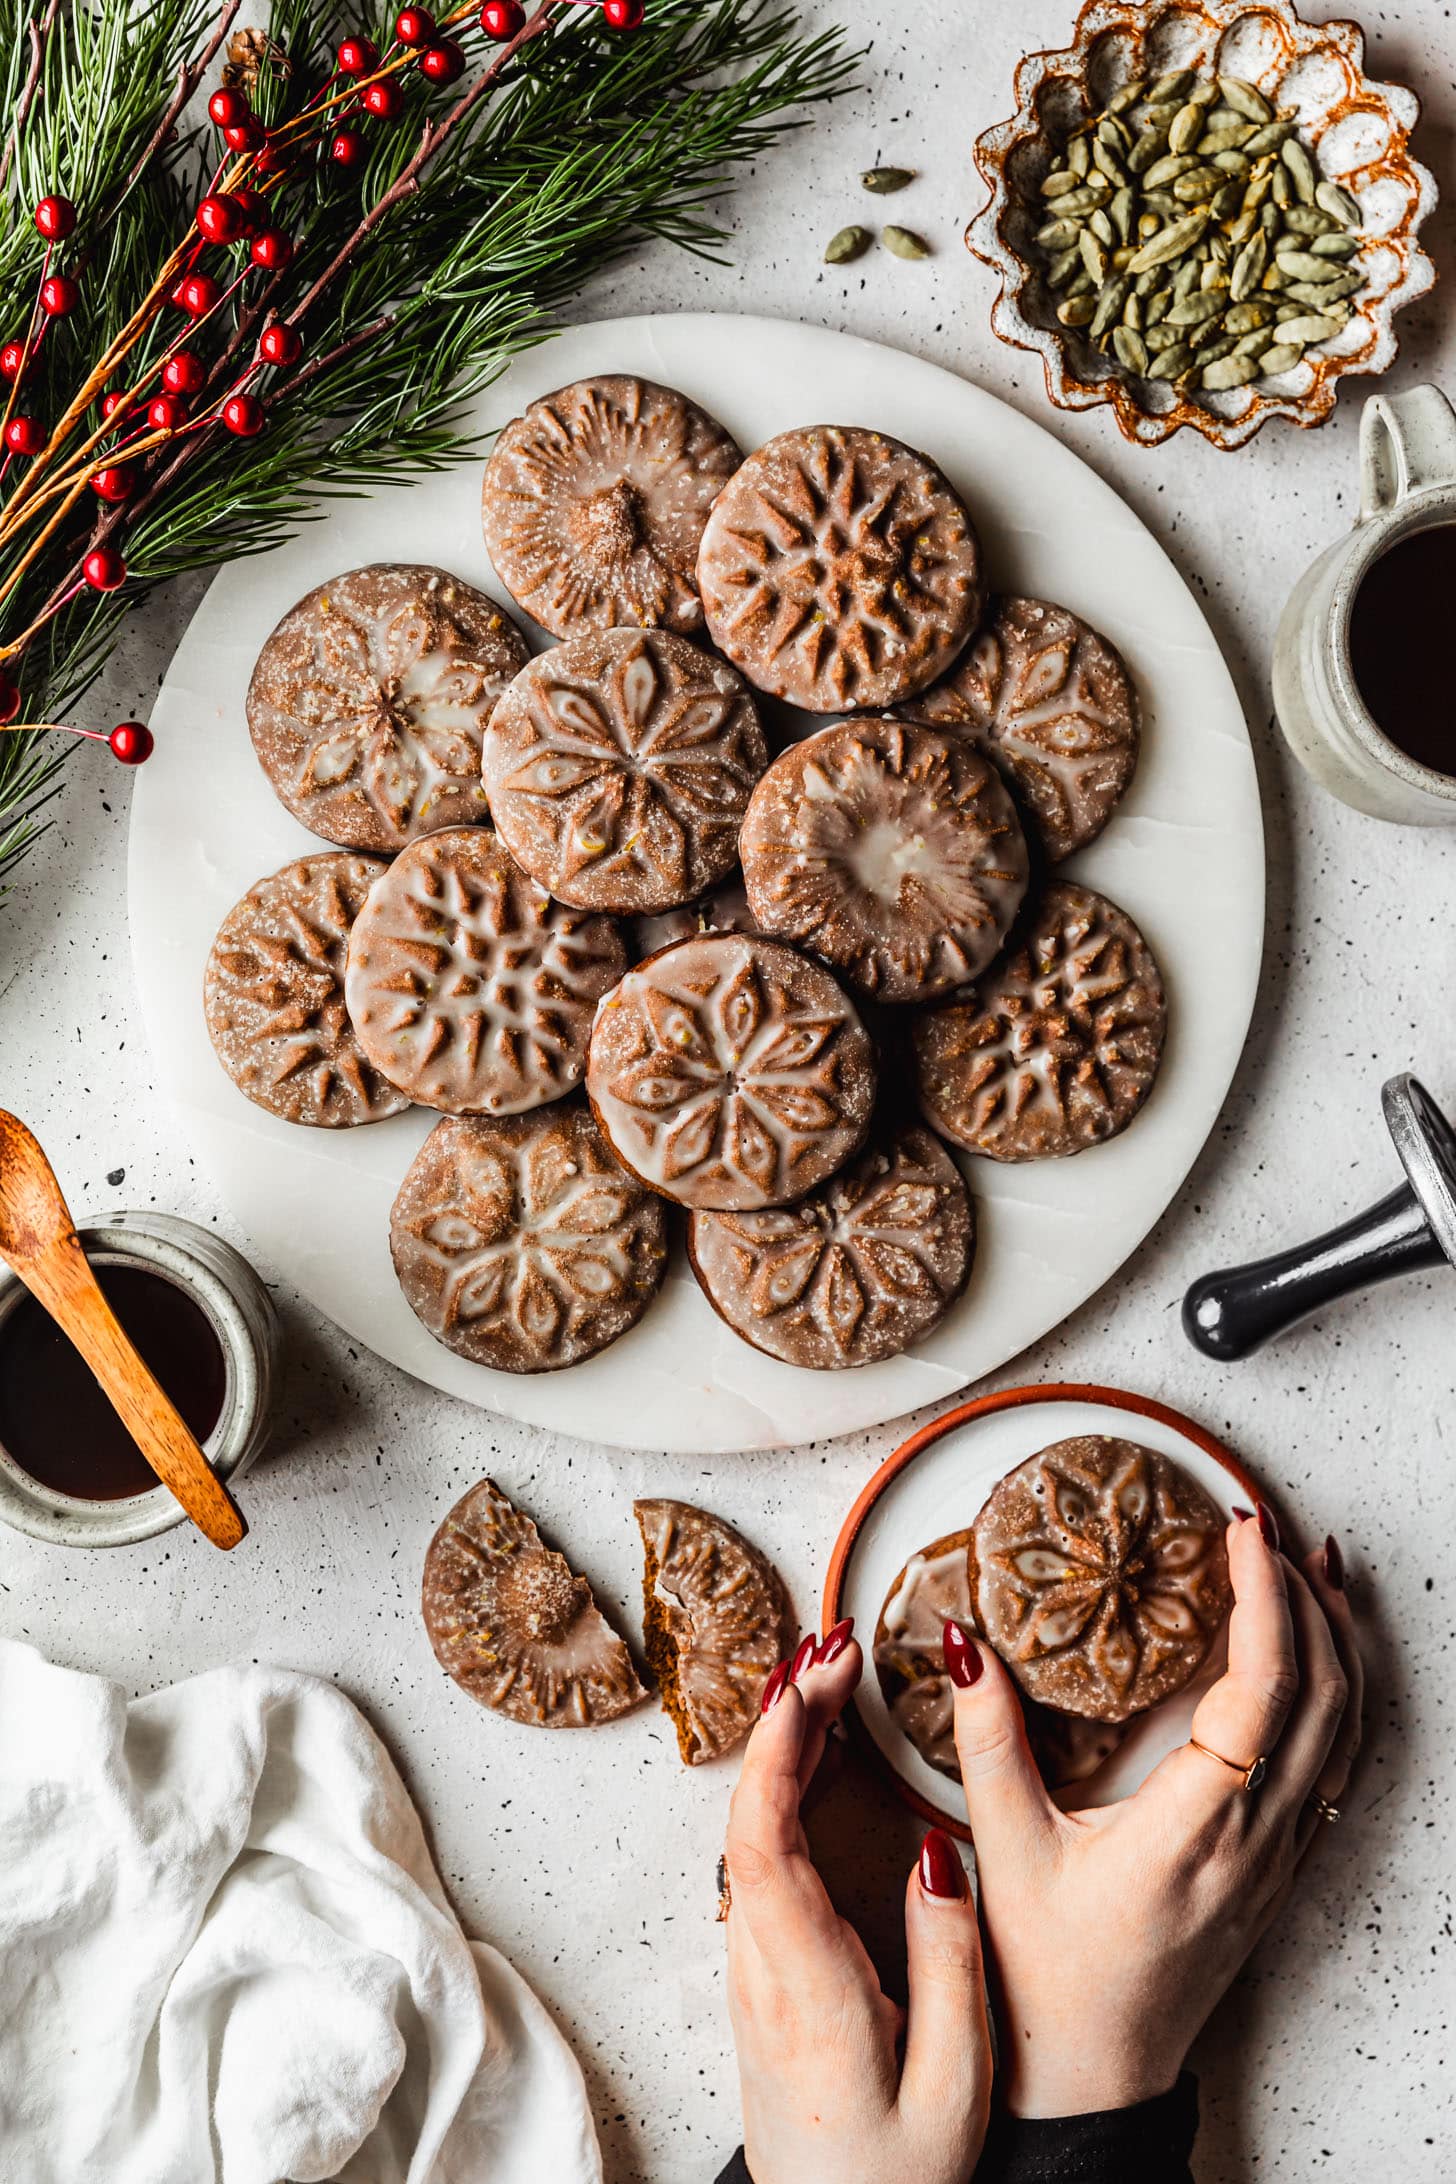
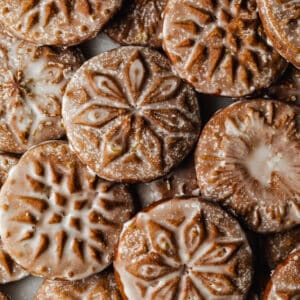
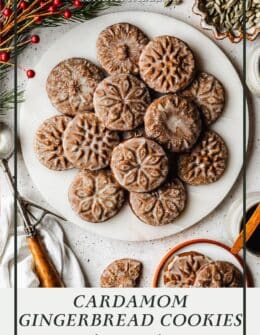
Stamped cardamom gingerbread cookies with orange glaze is my most popular holiday recipe! They’re chewy, perfectly spiced, and even better, there’s no chilling or rolling required. These cookies are a stunner for cookie exchanges, Christmas parties, and cookie boxes. Make sure to add this recipe to your holiday baking list!
Yesterday, I may have had a slight meltdown in response to six hours of recipe-testing, washing approximately three mountains of laundry, and also trying to pack the car for our Christmas roadtrip.
But, thanks to some wine (and my husband washing the dishes from said six hours of recipe testing), I’ve reached zen. The bags are packed and I’m headed to Vegas with tubs of brown butter pecan chocolate chip cookies, my chewy molasses crinkle cookies, and of course, these cutie gingerbreads.
This recipe is based off of a recipe I found in one of my grandma’s old cookbooks! I’ve been making these cookies for years, but after learning about the power couple that is cardamom and orange when I was in pastry school, I decided to elevate it just a tad.
These gingerbread cookies have become one of my more popular holiday recipes. They’re soft, chewy, so pretty, and have a lovely spice. Let’s make them!
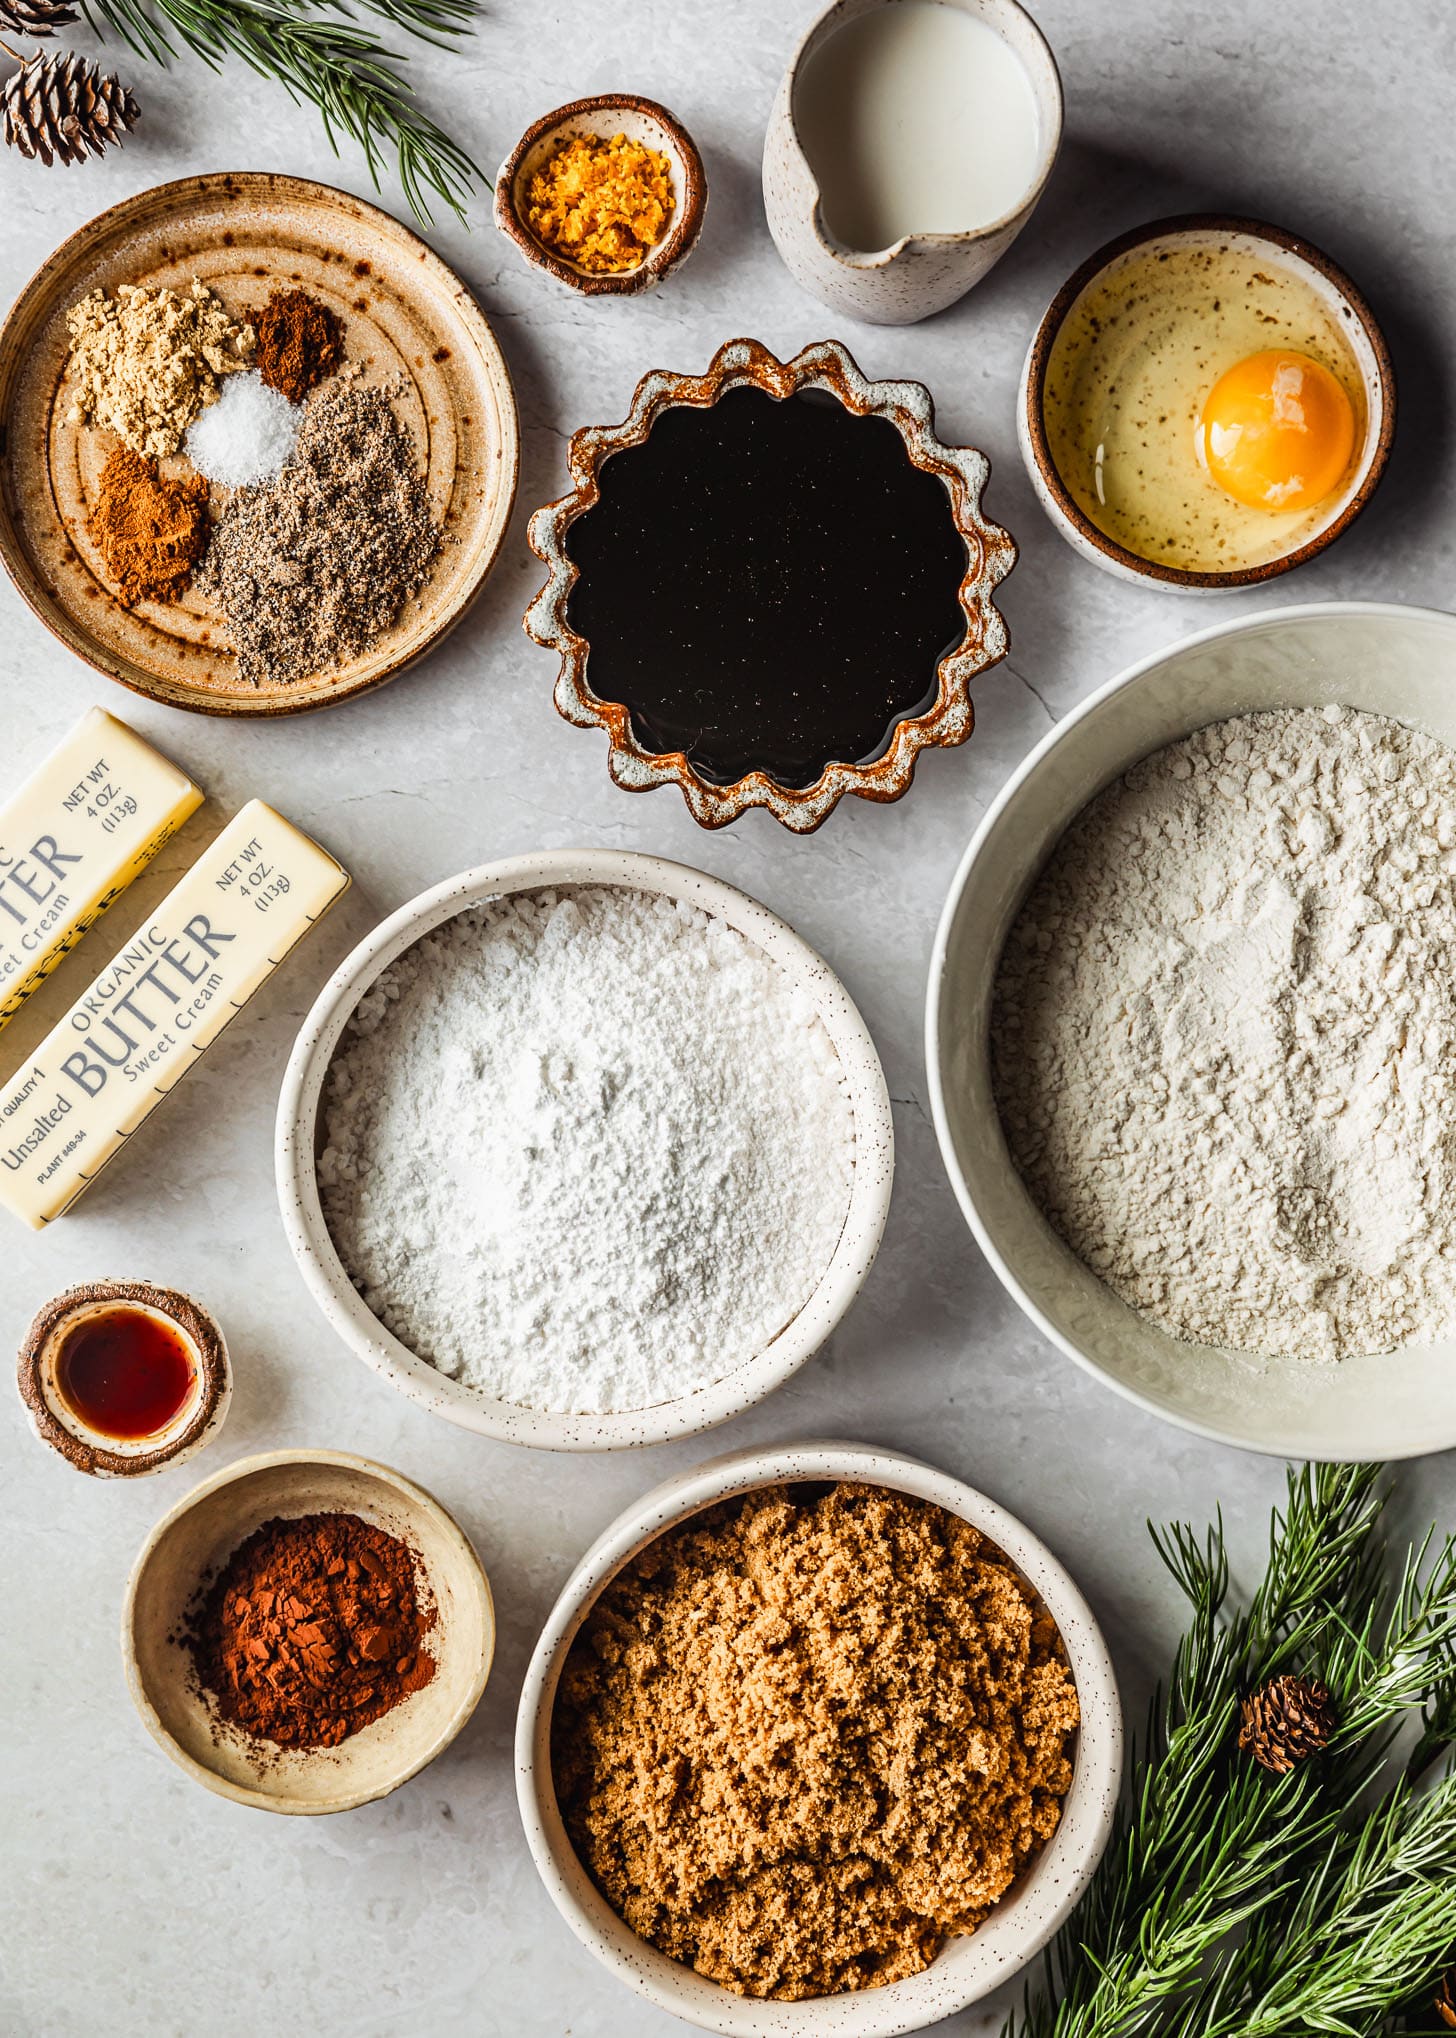
Freshly-ground cardamom
Inspired by my Norwegian roots and these gorgeous Scandinavian-style cookie stamps, I added a ton of cardamom to these cookies! And I definitely recommend freshly grinding your own cardamom – it makes a huge difference.
For the rest of the dough ingredients, you’ll need all purpose flour, cocoa powder, Morton’s Kosher salt, ginger, cinnamon, cloves, unsalted butter, brown sugar, eggs, vanilla extract, unsulphured molasses, powdered sugar, whole milk, & orange zest. Just make sure you’re using unsulphured molasses (like Grandma’s or Brer Rabbit) and not blackstrap molasses!
Soft & cakey cookies
For very soft, cakey cookies, add 1/2 teaspoon of baking soda to the flour mixture. Please note that the stamp design will not be as pronounced, because they will puff up more. Without baking soda, the cookies are still soft but with more of a chew.
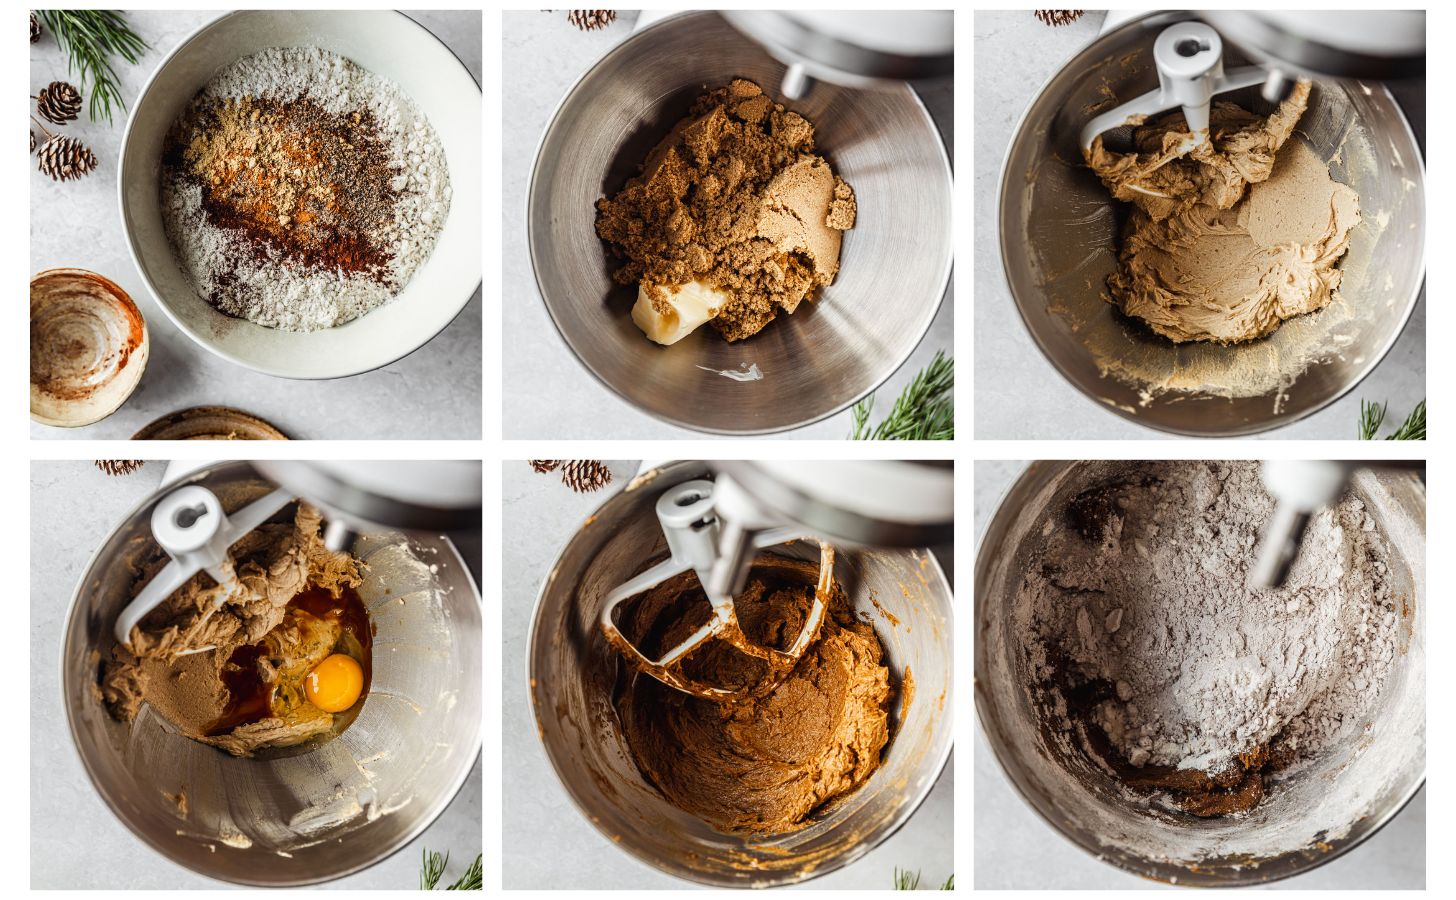
Make the cookie dough
Stamp the dough
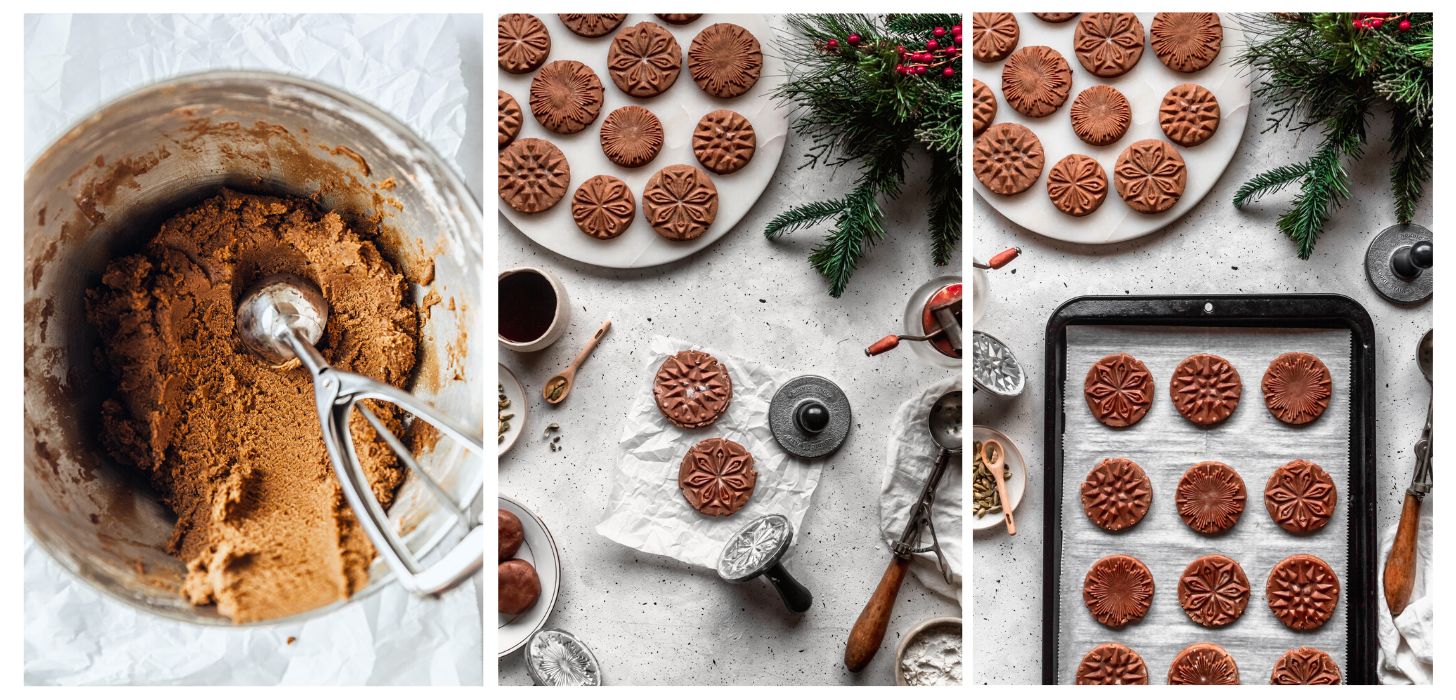
Glaze the cookies
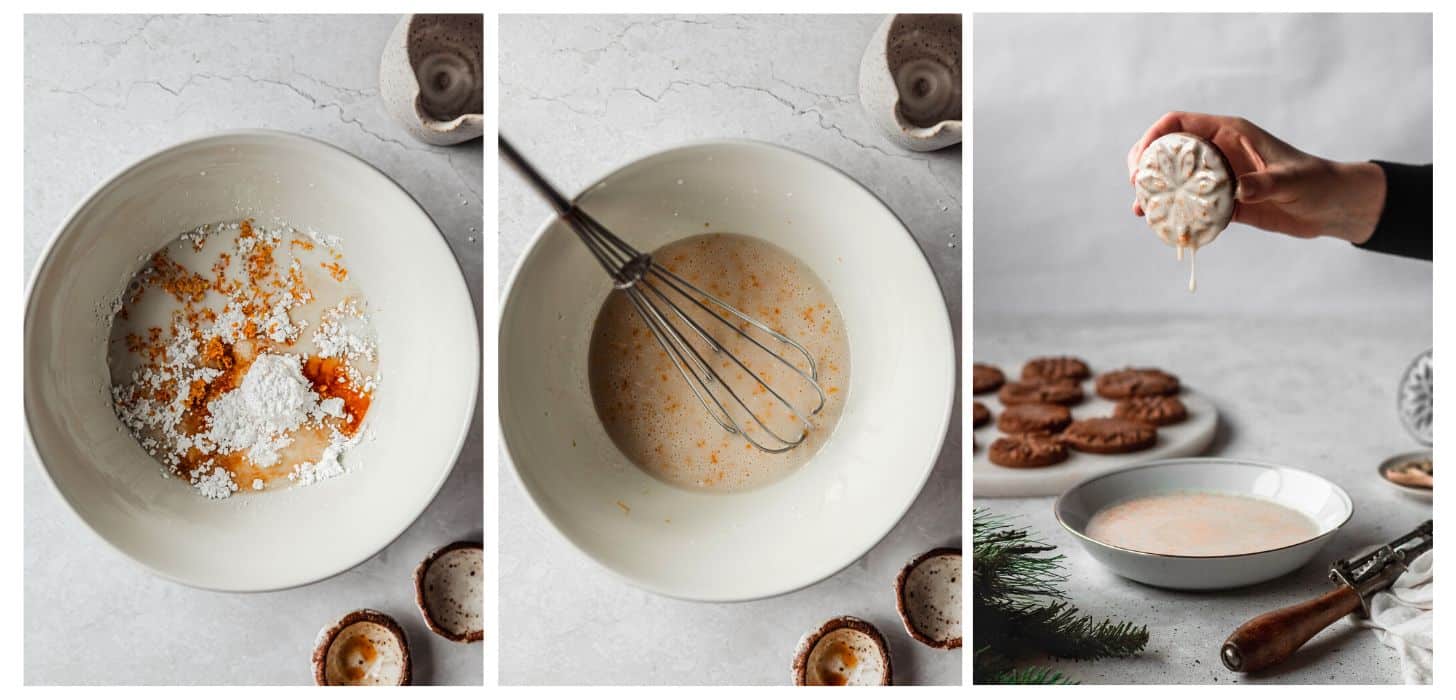
The glaze might seem thin, but it’s supposed to be that way! If the glaze is too thick, it will cover up the cookie designs. Just let it harden for 20-30 minutes and it’ll be good to go!
Can I make these without cookie stamps?
Definitely! I bought stamps because, well, I’m obsessed with them and I make these orange gingerbread cookies every year. But you can make this recipe without stamps if you don’t have any on hand. Here are a couple of other things you can use instead:
- Vintage glassware – if you have vintage drinking glasses, a citrus juicer, or bud vases with pretty designs on the bottom, they work just as well.
- A jar or flat-bottomed mug – you won’t get a pretty design, but it will still press the cookies down very well! And, in the end, all that really matters is how they taste.
To keep the dough from sticking to the cookie stamps, dust the stamps with a bit of powdered sugar. If the dough is still sticking, try chilling the dough and cookie stamps for 30 minutes or so.

The best way to store cookies
Place leftover cookies in an airtight container. Let them sit at room temperature for up to 3 days. After 3 days, they’ll start to lose their chew. Or, make the dough in advance! Just chill the cookie dough in the fridge for up to 2 days and bake them later.
Freezer instructions
You can freeze these orange cardamom cookies either before or after baking. Here’s how!
- Freeze the baked cookies – place the unglazed cookies in an airtight container or freezer bag lined with parchment paper and freeze for up to 3 months. Glaze before serving.
- Freeze the cookie dough – roll the cookie dough into balls and flatten them into pucks. Then, place the cookie dough balls on a parchment-lined sheet pan and freeze for 1-2 hours, until solid. Store the frozen cookie dough balls in an airtight container or freezer bag for up to 3 months.
- Bake the frozen dough – let the dough thaw in the fridge overnight, or until it’s soft enough to stamp. Then, stamp the cookies and bake them using the recipe directions below!
I always recommend weighing ingredients with a scale! This is the only way to make sure that the cookies come out perfect every single time. If you are using cups, make sure to measure the flour properly! Fluff the flour with a whisk and spoon the fluffed flour into a measuring cup. Then, level it off without packing in the flour.
If you make this recipe, I would love it if you left a star rating and review! I read every single comment and love hearing what you think about my recipes. Thank you for supporting Sunday Table!
Cardamom Gingerbread Cookies with Orange Glaze
Ingredients
Cardamom Gingerbread Cookies
- 480 grams all purpose flour (4 cups)
- 12 grams Dutch process cocoa powder (2 Tablespoons)
- 1/2 teaspoon baking soda optional, for very soft cookies
- 1/2 teaspoon Kosher salt
- 2 teaspoons freshly-ground cardamom or 1 Tablespoon pre-ground
- 1 teaspoon ginger
- 1/2 teaspoon cinnamon
- 1/4 teaspoon cloves
- 226 grams unsalted butter, softened (1 cup)
- 210 grams dark brown sugar (1 cup, packed)
- 1 large egg, room temperature
- 1 teaspoon vanilla extract
- 162 milliliters molasses (1/2 cup)
Orange Glaze
- 168 grams powdered sugar, plus more for stamping (1 1/2 cups)
- 60 milliliters whole milk, more or less as needed (1/4 cup)
- 1 teaspoon vanilla extract
- 2 teaspoons orange zest (1 large orange)
Equipment
- Kitchen scale (or measuring cups)
- Stand mixer (or hand mixer)
- Parchment paper
Instructions
Cardamom Gingerbread Cookies
- Preheat the oven to 375°F (190°C) and line two sheet pans with parchment paper. In a medium bowl, whisk together the flour, cocoa powder, baking soda (if using), salt, cardamom, ginger, cinnamon, and cloves. Set aside.
- Using a hand mixer or stand mixer, beat the butter and brown sugar until it's light and fluffy, 3-4 minutes. Add the egg and vanilla until incorporated. Then, beat in the molasses until thoroughly mixed.
- Add the flour mixture in 2 batches, beating just until the dough comes together. Don't over-mix the dough! Stir the dough with a rubber spatula to make sure there are no dry spots.
- Using a #40 (2 Tablespoon) cookie scoop, scoop the dough and roll it into balls. Then, flatten each ball into a thick puck. Dust a cookie stamp lightly with powdered sugar. Firmly and evenly press the cookie stamp into one of the balls of dough. Repeat with remaining dough until all of your cookies are stamped. If you want clean edges, use a 2-2 1/2 inch cookie cutter to cut off the rough edges.
- Line the cookies on the prepared sheet pans about 2 inches apart. Refrigerate the cookies for about 15-30 minutes (optional – I do this to ensure the design on the cookies remains pronounced. However, I've baked them from room temperature, and it doesn't make a huge difference either way). Bake the cookies for 10-12 minutes just until they're baked through. The cookies will puff up a little, but they will deflate once they're cooled.
- Let the cookies cool on the sheet pan for about 5 minutes, and then place the cookies on a wire rack and let them cool completely.
Orange Glaze
- In a small bowl, whisk together the powdered sugar, milk, vanilla extract, and orange zest. Add more milk (1 Tablespoon at a time) if it's too thick or more powdered sugar (1 Tablespoon at a time) if it's too thin. The icing should be fairly thin (the consistency of warmed honey) so it doesn't cover up the design of the cookies.
- Once the cookies are cooled, dip the top of each cookie in the glaze. Place the glazed cookies on a wire rack over a parchment-lined sheet pan and let any extra icing drip off. Let the icing harden for about 20-30 minutes. Once the glaze is hard, store the cookies in an airtight container for up to 3 days. Enjoy!
Notes
Originally posted on December 23, 2019.


Therapeutic and delicious! These were everything winter cookies should be, all the warm spices and that brightness of orange in the glaze. A beautiful treat for neighbors that looks so elegant but doesn’t take all day. I definitely will be making these again!
Aww thank you, Alana! I’m glad you liked them 🙂
They held the stank shape beautifully! They are wonderfully fragrant and the orange glaze perfectly complements the spice. This will definitely be an addition to my holiday cookie list.
Thank you so much, Emma! I’m so glad you liked the recipe!
This is my third Christmas making these cookies! I usually end up chilling the dough a bit anyway because I have some really pretty snowflake-shaped cutter/stamps and it seems to work better. But you really can’t beat the flavor!
Thank you so much, Becca! I’m so glad you love this recipe. 🙂 They’re my fave! Happy holidays! xx.
Wow! These are show stopper cookies – not only visually but in taste as well. I didn’t have a cookie stamp but used a potato masher to get a pretty pattern and the glaze settled into the grooves beautifully. I definitely have to make these every Christmas now. And maybe quarterly between Christmases too because they are so flipping good! AND EASY!
Still LOVE the potato mashed idea. 😂 It’s so good!
Love love love this recipe! It has all the Christmas flavors in one cookie and that topped with the orange glaze is perfection!!
ahh thanks so much, lucy! i’m so glad you enjoyed these cookies 🙂
They can only keep for three days? We cook ahead of time and freeze for holiday visitors. Do these hold up?
Hi Cyndy. They are best within 3 days because they start to lose their chew after that. You can also freeze the cookies for up to 2 months. I would recommend freezing them un-glazed, defrosting the cookies, and then glazing them about an 20-30 minutes before you want to serve them.
Hello! Just wondering if you can swap out the molasses for maple syrup? I’m not much of a molasses (or golden syrup) kinda gal. Just wondering what your thoughts are on swapping to maple syrup?
Thanks 🙂
Nella
Hi Nella, I have never tried it so I can’t guarantee the texture will be the same, but I’m sure it would work since they’re very similar textures! The ‘gingerbread’ flavor comes from the molasses but I’m sure maple or golden syrup would taste delicious too!
Do you think I could substitute oil instead of butter?
hi kate, i would not recommend substituting oil instead of butter. the butter helps firm up the dough and oil would likely make the cookies too soft to roll and press. hope that helps!
Great flavor! I can’t find my cookie press so used a molded rolling pin. I found the impressions didn’t stay enough after baking. Especially once the glaze was on. I highly recommend using a press that will have a deeper impression.
Taste matters more than looks in this house, so they’ll be eaten up in no time!
thank you, katie! i’m so glad you liked them. 🙂 yes, you have to press pretty hard to get a good impression, but the taste is definitely the most important part! thanks for trying my recipe!
Two questions.
1. Did you use store bought ground cardamom or did you grind it yourself, ie, fresh ground? I find fresh ground much more potent and since I’ll be doing the grinding, want to know if I should adjust accordingly.
2. Have you made these without baking soda? Your note in the ingredients list says to use for soft cookies. I’d like to know if they will be rock hard. I like a bit of crunch for cookies like these and am thinking about leaving it out.
Thanks in advanced for the tips. I look forward to making them!
Hi Thelma, happy to help!
1. In this recipe, I used pre-ground store-bought cardamom rather than freshly-ground. For freshly-ground, I would start with 1/2 Tablespoon of fresh-ground cardamom, taste the dough, and add more if desired!
2. I usually make these cookies without baking soda to get the pronounced stamp design. With baking soda, the cookies are a bit more cake-y. Without baking soda, they are a bit chewier with more of a ‘bite’ but they are definitely not rock hard.
Hope you love them!
I tried these this year because I was looking for a recipe to use with my Nordic Ware cookie stamps. The cookies turned out perfectly. Not one ugly one in the bunch! Plus the whole house smells like Christmas. The glaze is perfect. Thanks for the recipe. Can’t wait to taste test one after they dry!
Yay, I’m so glad you like them, Anita! Thank you for trying my recipe and leaving such a lovely review. 🙂 Merry Christmas!
I’m so disappointed! I followed the receipt exactly, but they are dry and leaden. I bought the stamps and double-checked all ingredients, but…so sad.
Hi Frances, sorry to hear that. Are you measuring the flour correctly? I recommend fluffing the flour with a whisk or fork, spooning it into the measuring cup, and leveling it with a knife (without packing it in). If you just scoop the flour, the cookies will turn out dry.
Looking forward to making these for a Christmas cookie swap but wondering if they will keep any longer than 3 days per the recipe? Any suggestions to make them last longer once people bring them home? Thank you!
Hey Sophie! These cookies do tend to dry out after 3 days at room temp. I would recommend freezing the cookies (they will last up to 3 months in the freezer). If you bring them to the party from the freezer, they should last 3-4 days once your friends take them home. Hope that helps! xx.
Any chance you know if these would work well with a gluten free all purpose flour?
Hi Jess! I haven’t tested this specific recipe with GF flour, but if you’re using a 1-to-1 gluten-free flour (like Cup4Cup) it should work great! I’d love to hear how it goes if you give the recipe a try. 🙂
Hi! I’m attempting to put together cookie boxes this year and have about 6 different kinds (which I probably can’t get finish in more than two days).
I saw that you recommended freezing the baked cookies, what do you think about just freezing the dough until the day I’m ready to bake all my cookies? Thanks for the advice! 🙂
Hi Elise, you can definitely freeze the dough! I would recommend rolling the dough into balls, placing them on a parchment-lined sheet pan, and freezing them until solid (about 2 hours). Then, pop them in an airtight container or freezer bag and freeze for up to 3 months. They will just need to defrost overnight in the fridge so that they soften enough to stamp. Hope that helps! xx.
These look amazing, could these be rolled out and cut into shapes? I don’t want to overwork the dough if it will make them too tough.
Hi Anna! I haven’t tried it, but I think it could work because I used this recipe as a base for my classic gingerbread cookies. 🙂 You’ll just need to chill the dough for at least 2-3 hours before rolling it out. Here’s my classic gingerbread recipe if you want to use the directions as a guide!
I will be making these every Christmas! So easy and beautiful and DELICIOUS!
Thank you so much, Jessica! You’re the best! xo.
My grandson and I made these last year for his class when they were studying Christmas traditions around the world. These cookies were a big hit with everyone! When he came home there were only a few left and we’re definitely making them again this year as part of our Christmas baking. Thank you!❤️❤️
Oh wow, I love hearing that, Denise! I’m so glad everyone liked the recipe, that makes me so happy. 🙂
Hello. First, thank you for sharing your recipe and detailing your process for the rest of us! Second, I’ve only ever used blackstrap molasses…I didn’t even know there were other kinds until you mentioned not to use blackstrap. LOL A quick google research explained that it’s bitter and possibly mineral-ly compared to the molasses from the first and second presses. Are those the reasons not to use it here? Or maybe it wouldn’t create the correct chemical reaction due to a different sugar content (or other baking-science-wizardry reason)? I put the Brer Rabbit on my shopping list, but am still curious if blackstrap can work if I like that bitter, mineral flavor. 🙂
Hi Whitney, thank you so much! I’ve never used blackstrap molasses, because from what I understand, it’s quite bitter and salty. That’s why I recommend unsulphured, because it’ll give the gingerbread a sweet + spicy flavor. 🙂 I’m not sure if blackstrap would work very well in this recipe, but if you like that flavor in gingerbread, it’s certainly worth a try!