A Spooky Halloween Dessert Table
Spooky szn is upon us, friends – let’s celebrate with some cute, festive desserts! These are all of my best tips for creating a DIY Halloween dessert table for a party. From cookies to candies, this is a super easy and impressive way to serve desserts to a crowd!
Listen, if my Halloween doesn’t include booze, a ton of sugar, and some version of a black dress, I honestly don’t even want it. I’m a basic Halloween girlie and I don’t feel bad about it!
And seeing as how much I love a good buffet situation from brunch party spreads to an entire Oktoberfest snack table, it was about time that I got a little spooky with it. In the form of desserts because, obviously.
I’ve thrown so many parties, cut so many cakes, passed out a ton of tiny plates that need to be washed after everyone leaves, and you know what? A dessert table is the only way to go for a big group. We need easygoing, and a little buffet situation is just that. Plus, it’s supes cute!
Gather your favorite crowd-pleasing dessert recipes, dig up your Halloween decorations, and let’s get into it, friends.
Halloween dessert ideas
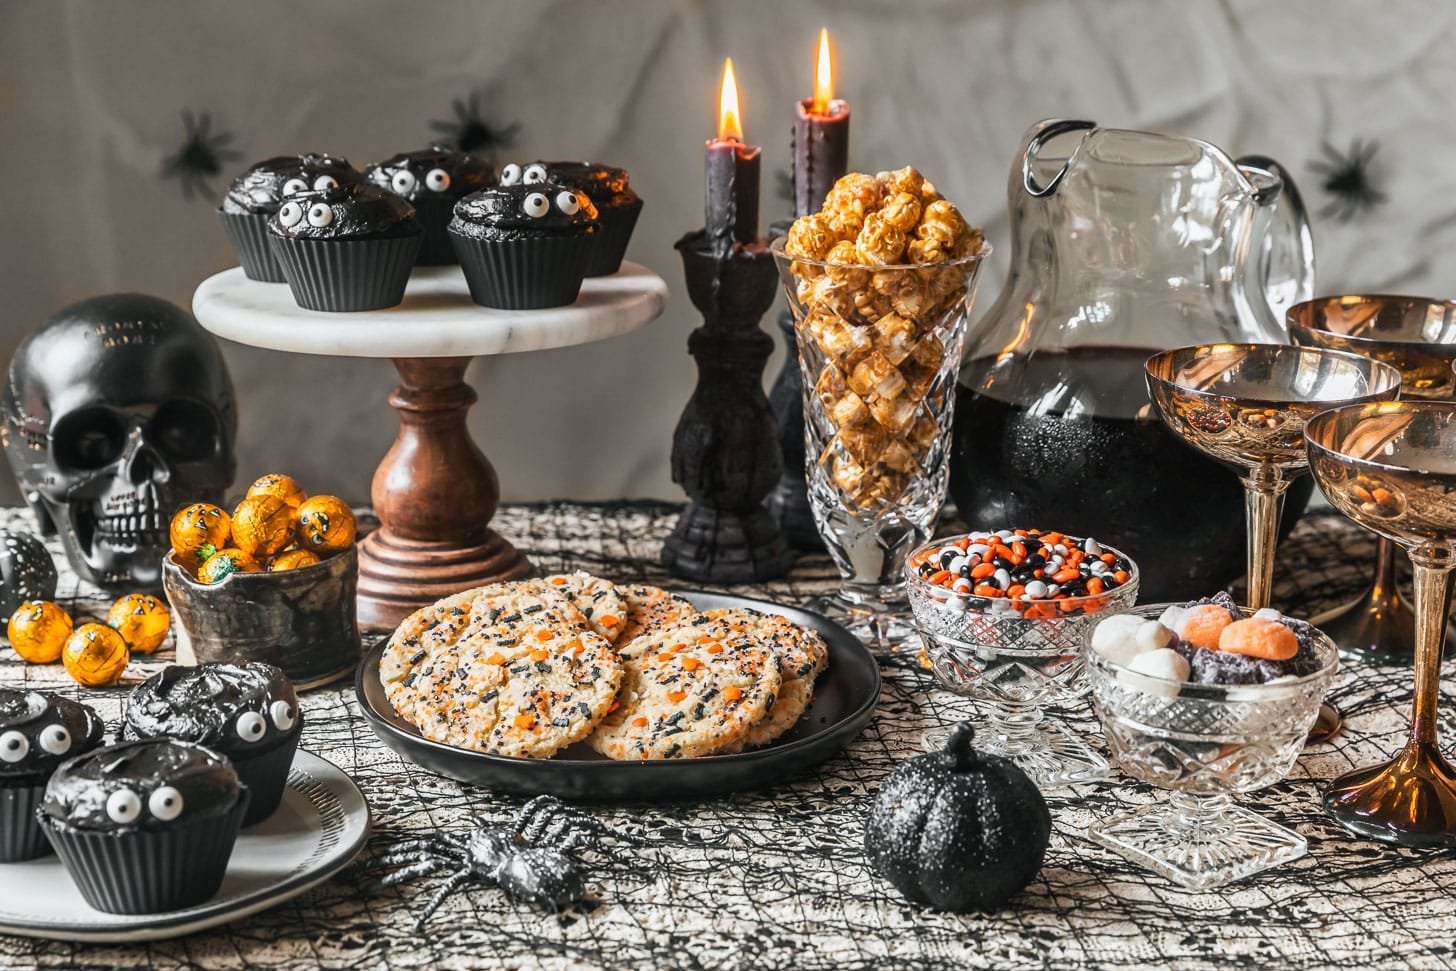
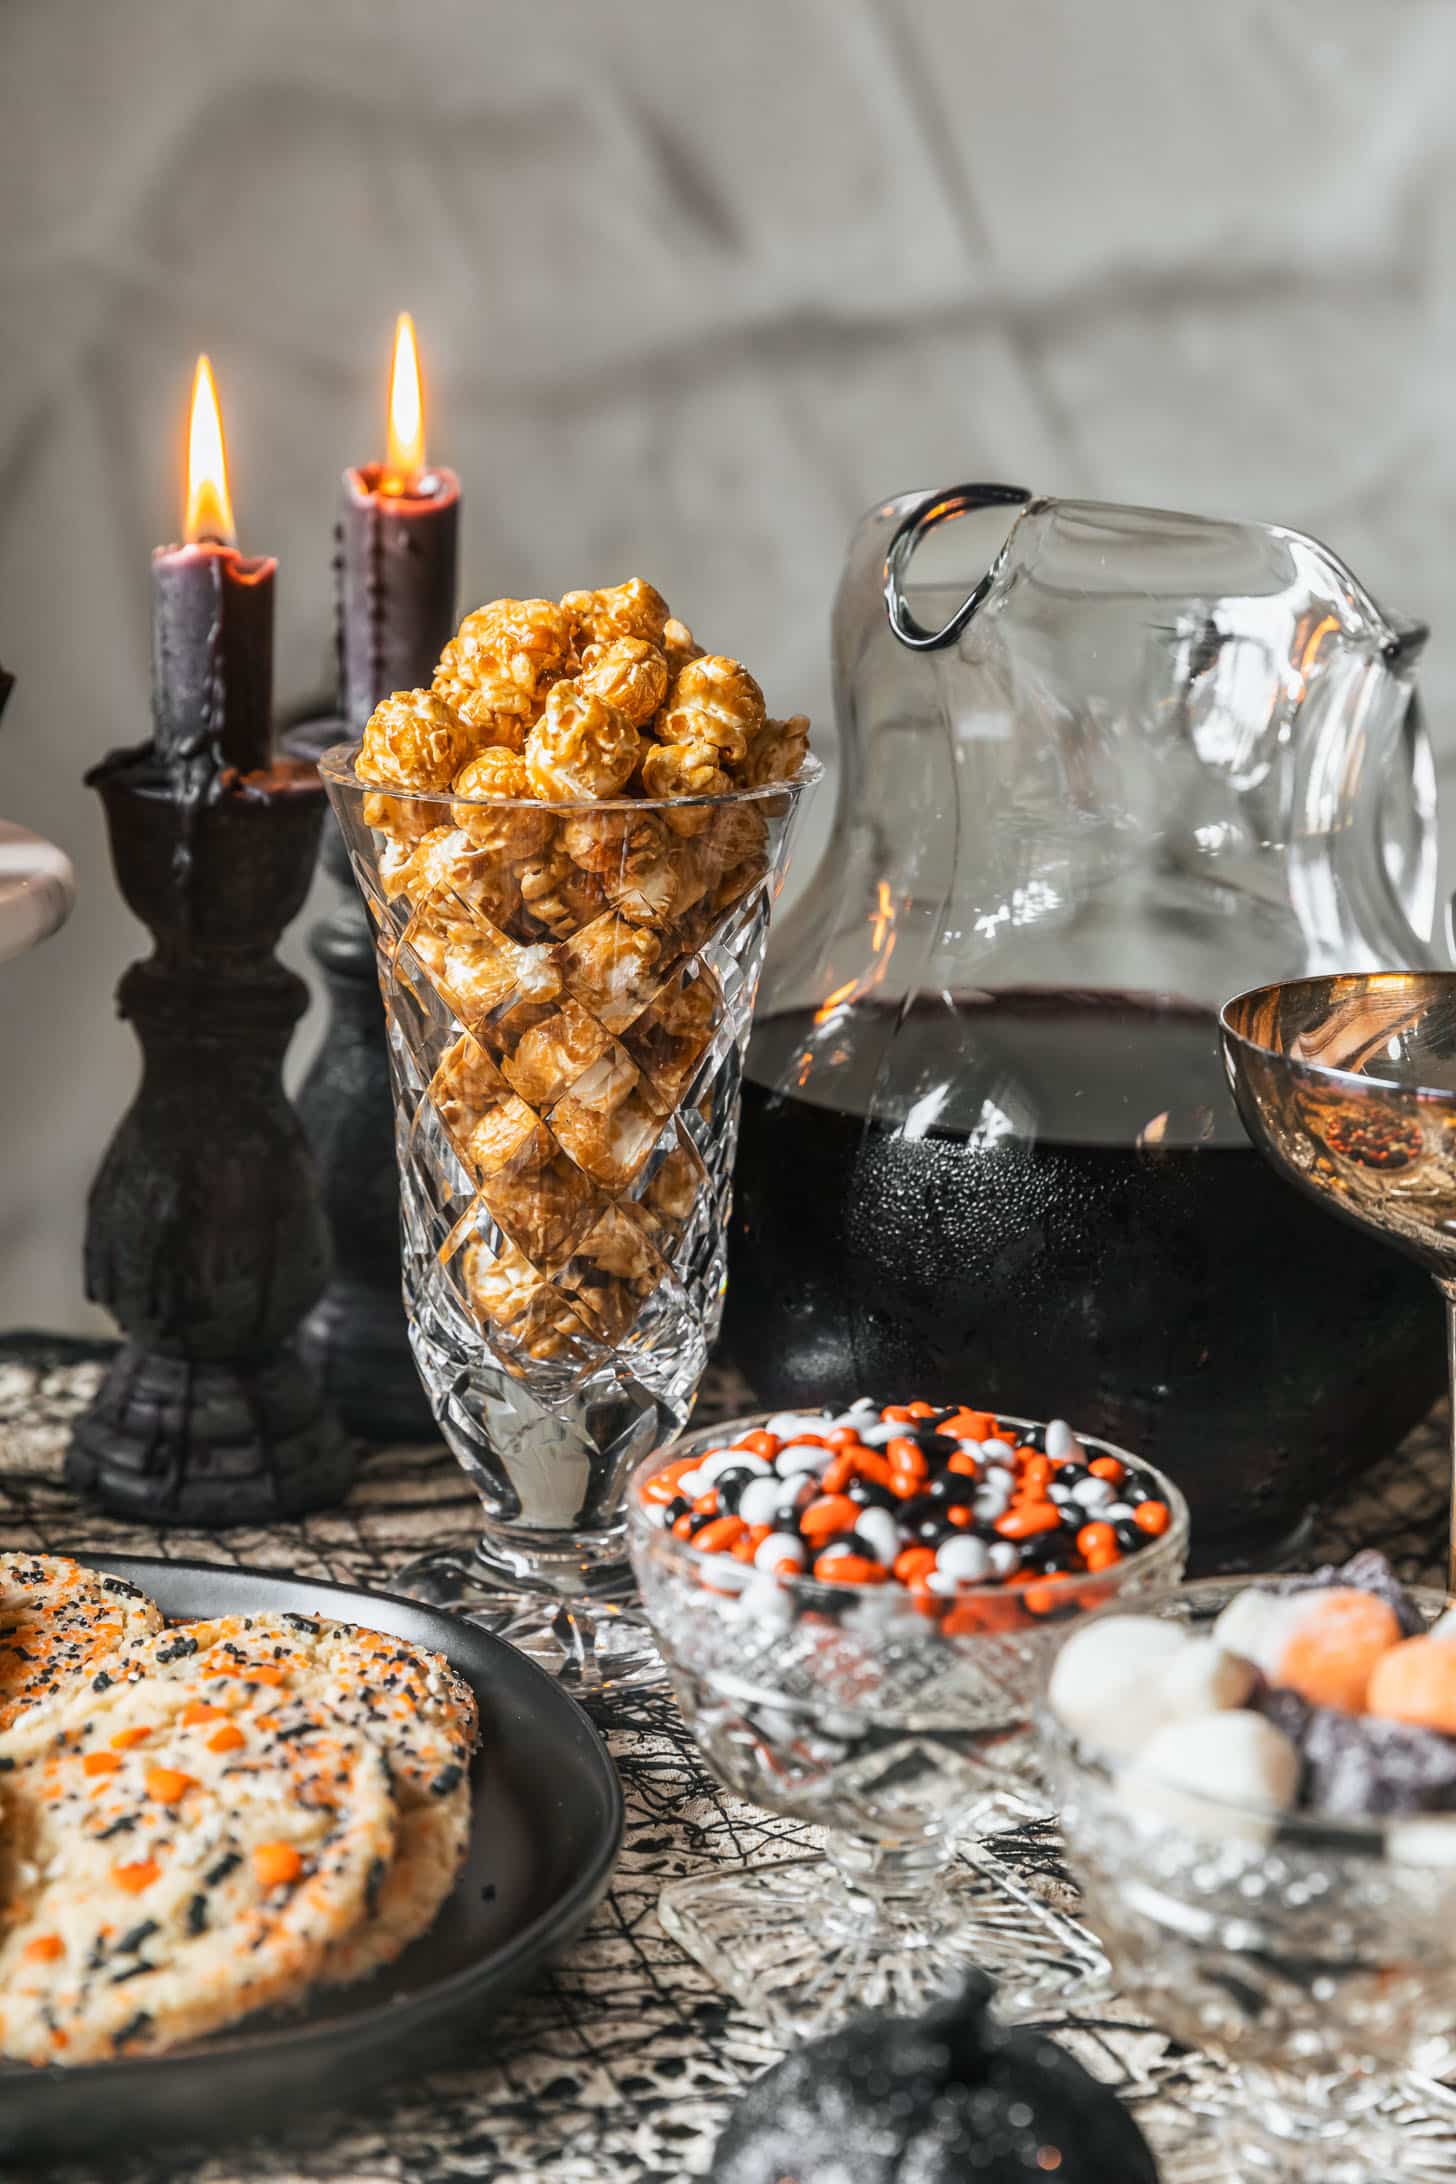
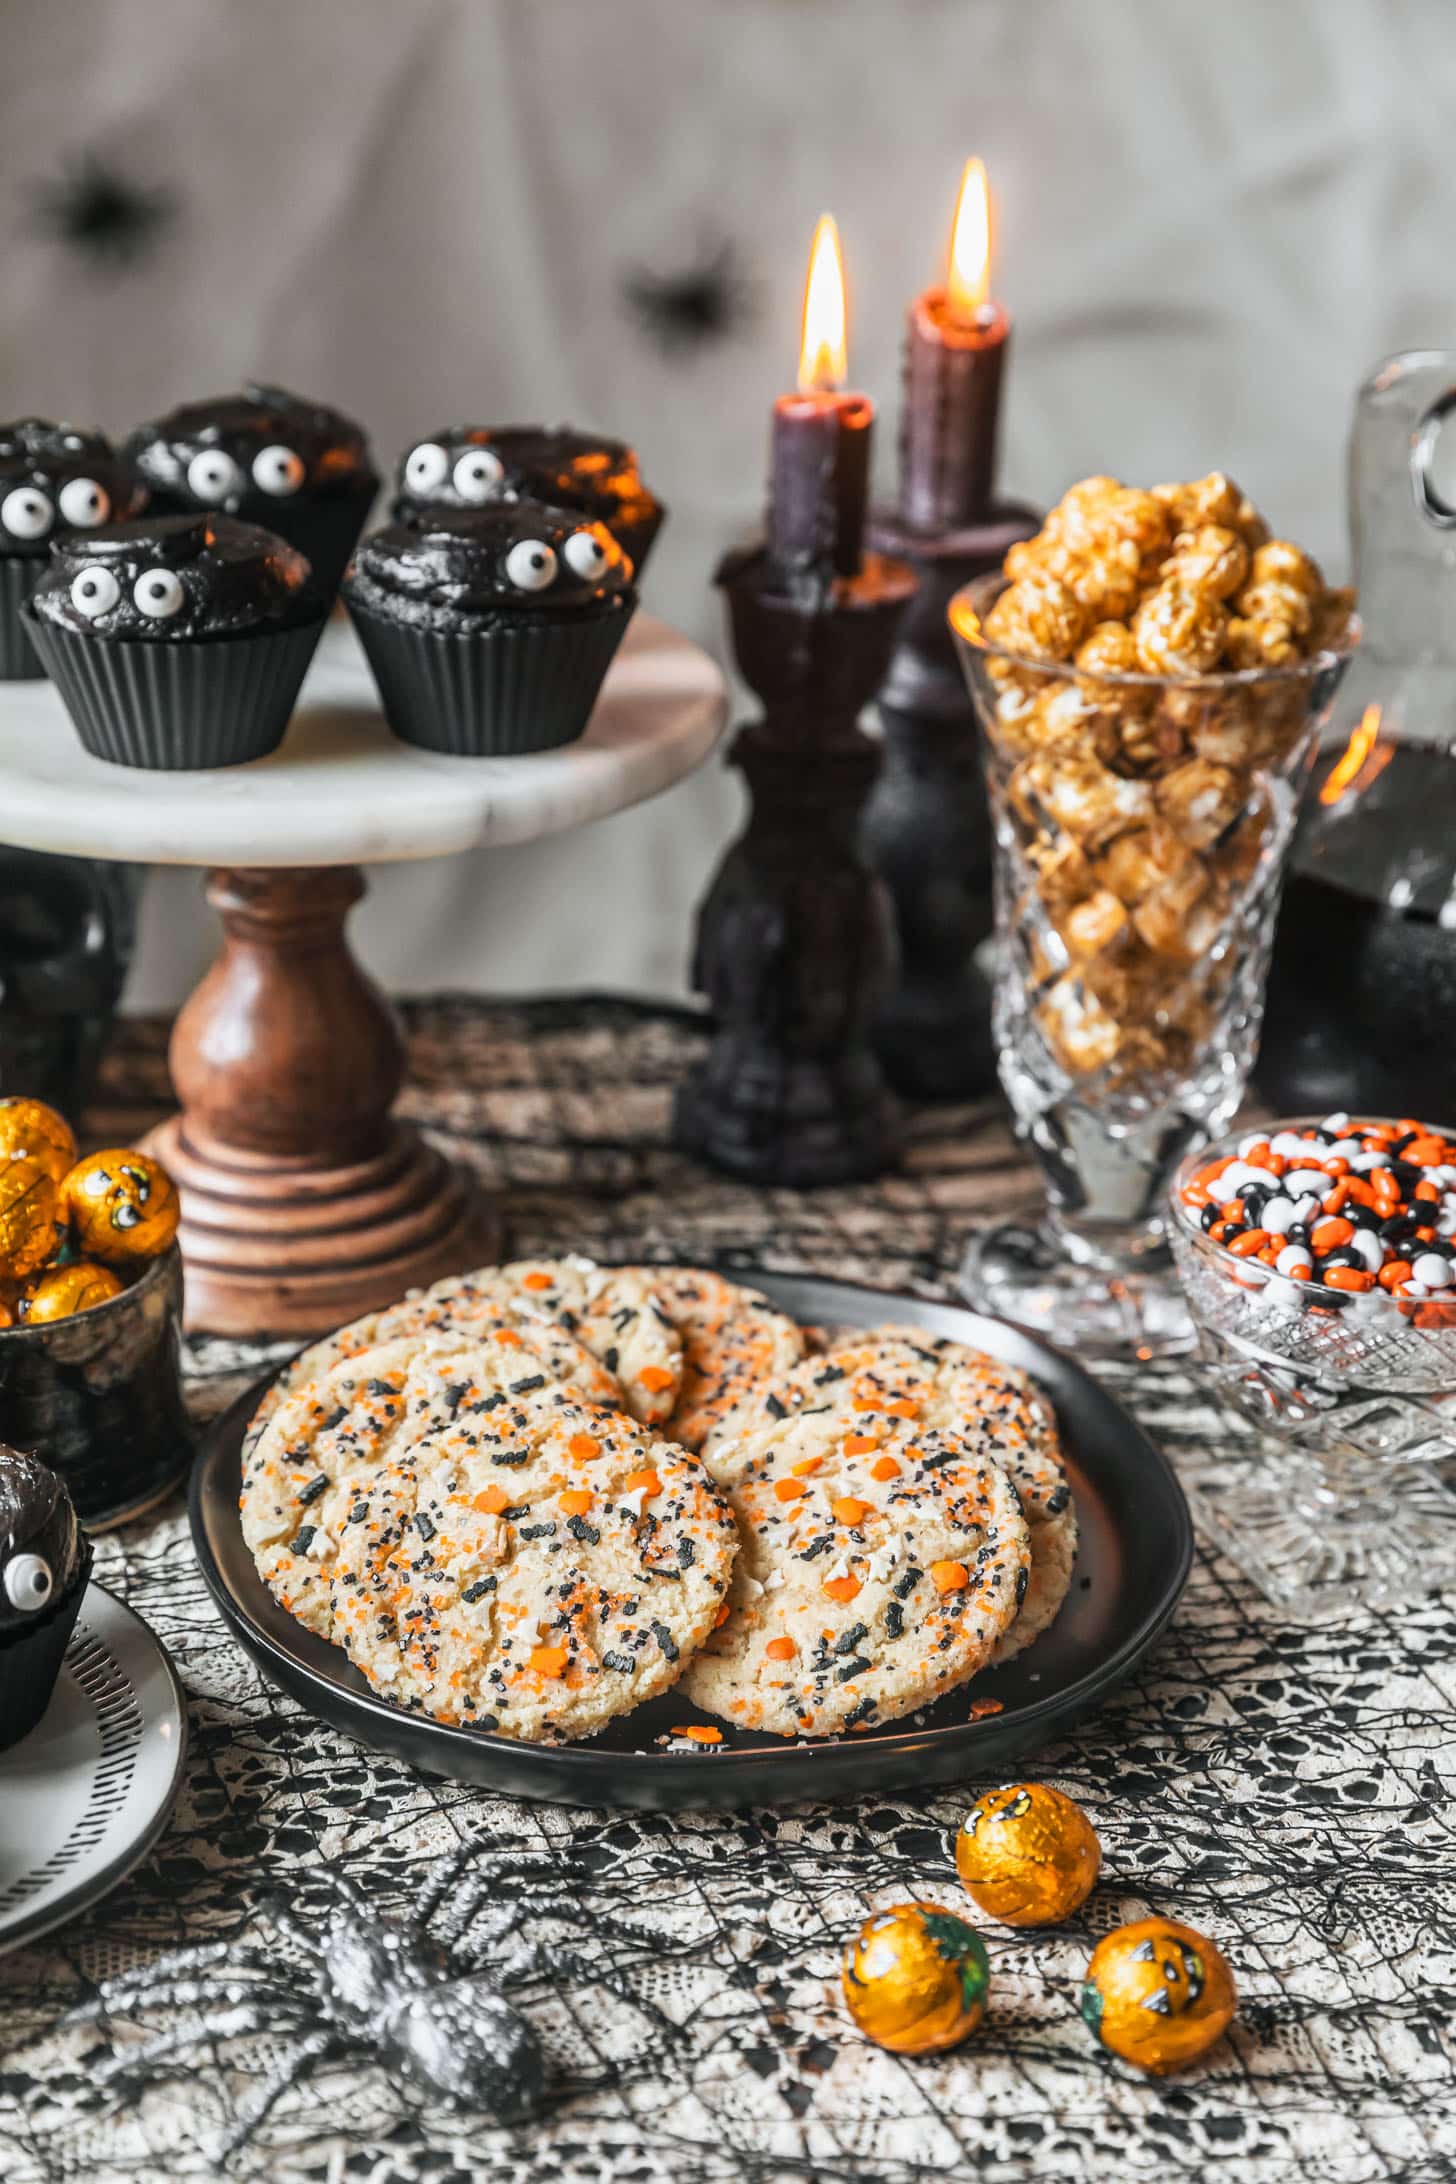
The first step is to pick out your desserts! For a smaller group, I normally make 2 desserts and for a larger party, I’ll make 3-4 desserts. I also like to fill out the table with fun stuff like cute Halloween candy, caramel corn, and other sweet snacks.
Here are some of my go-to desserts that are perfect for a Halloween party! Bonus: all of these can be made the night before.
- Bars – brown butter pretzel cereal treats, triple chocolate brownies, or chewy brownie bites
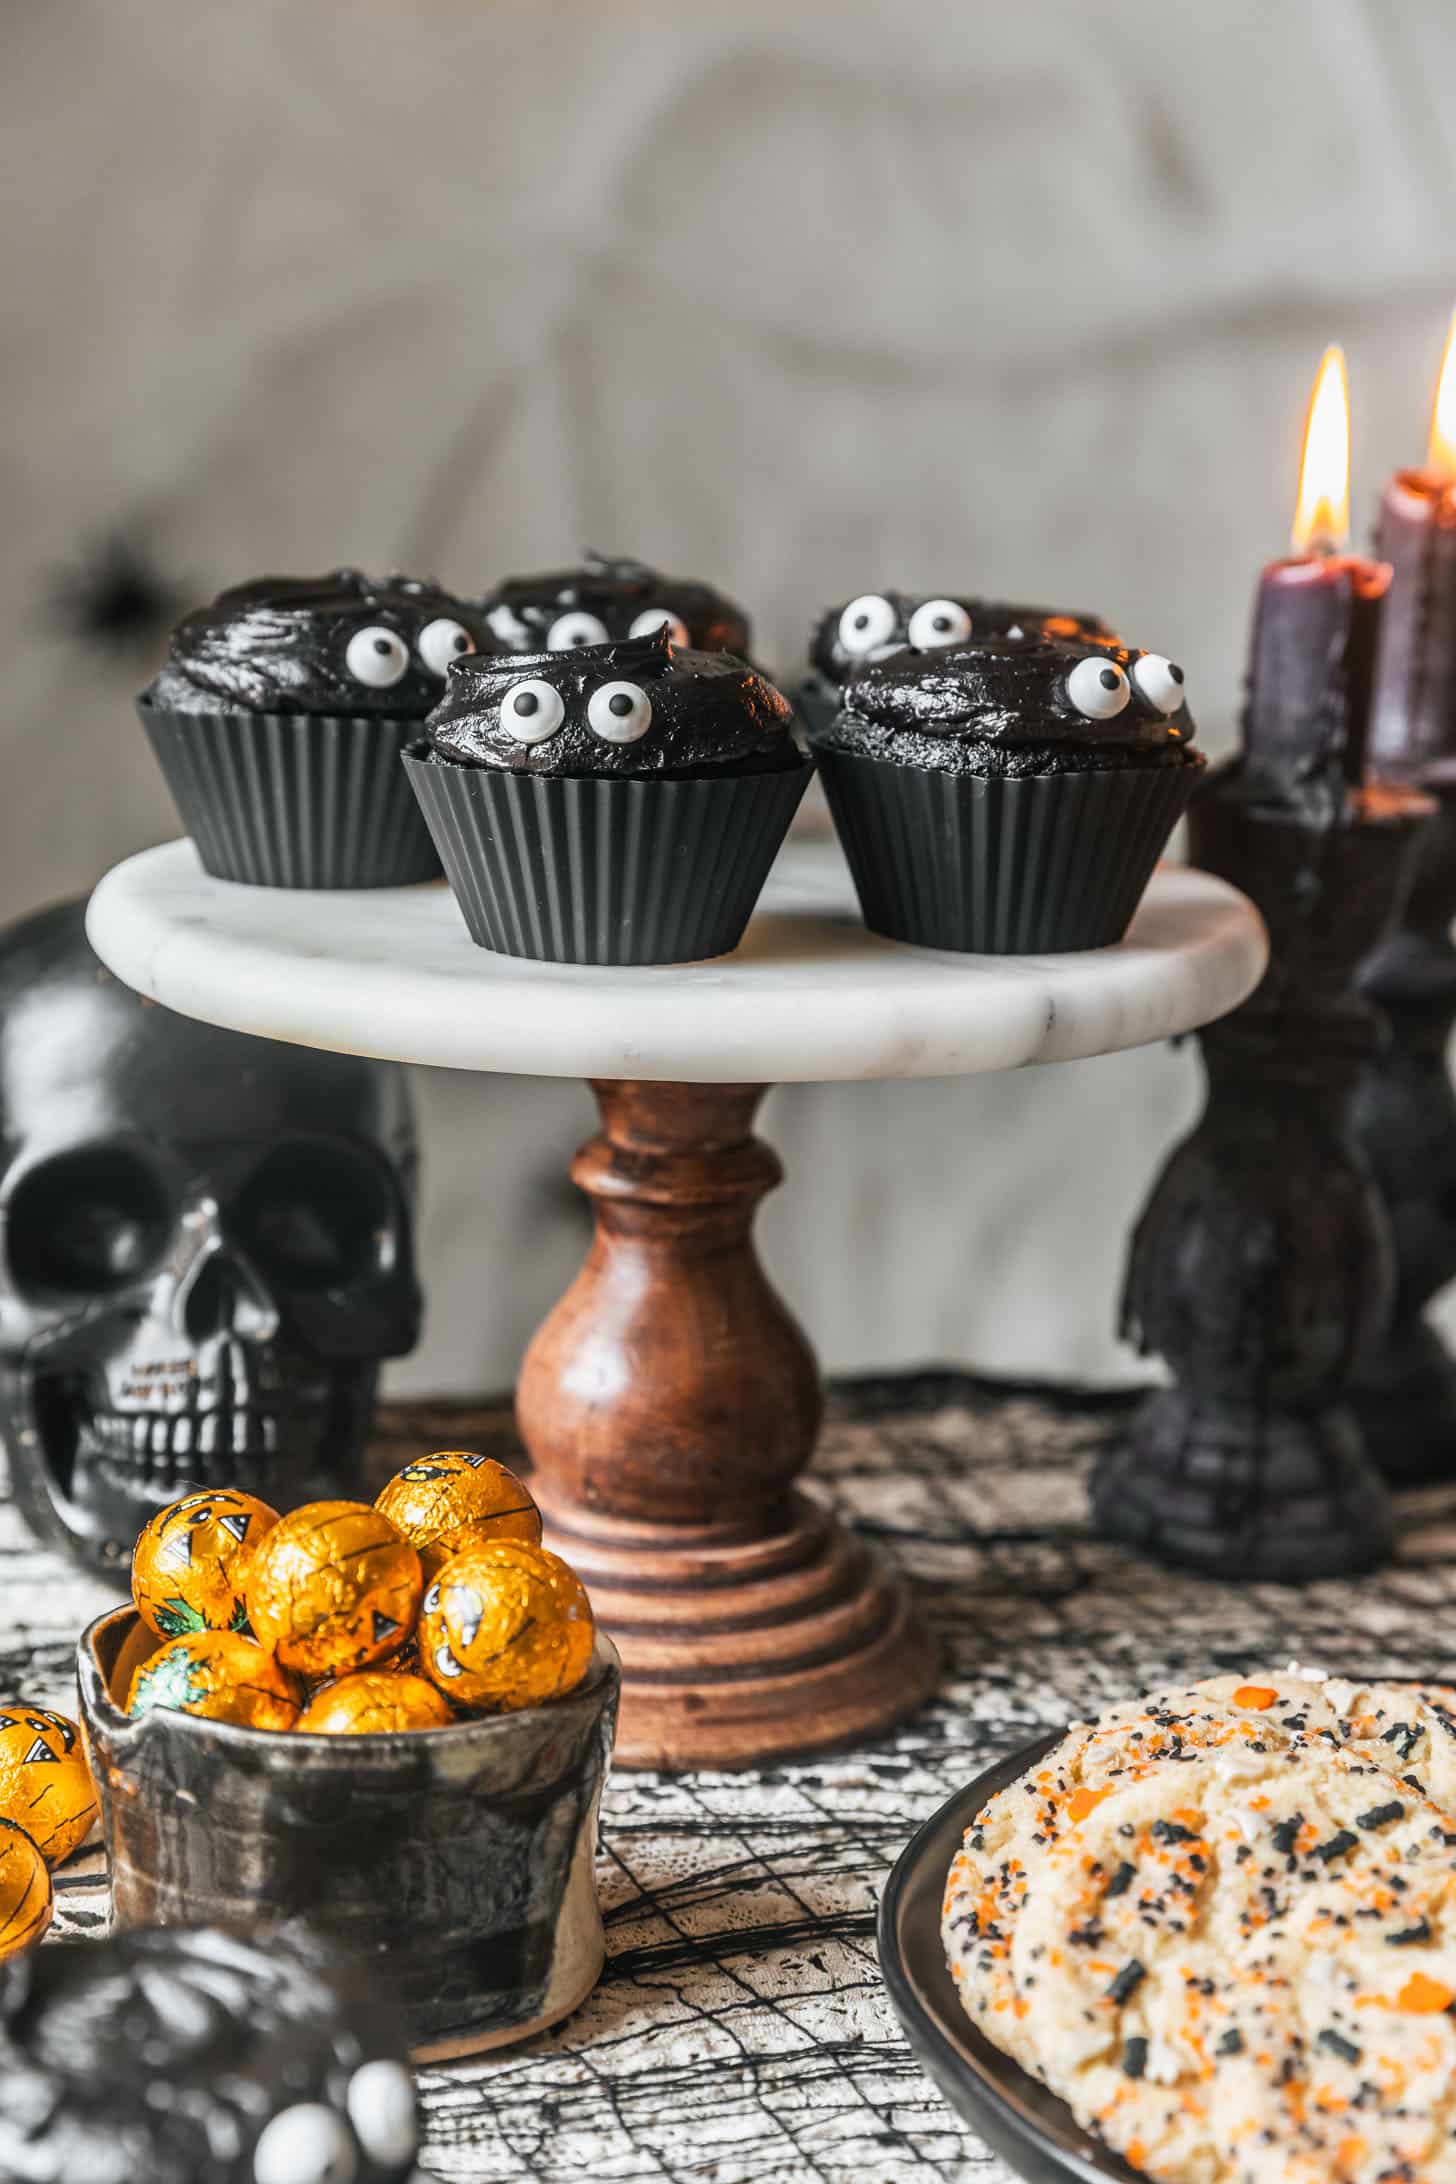
- Cake – witchy black velvet cake or cupcakes or mini chocolate cupcakes
- Cookies – brown butter peanut M&M cookies, mini chocolate chip cookies, or mini pumpkin whoopie pies
- Donuts – baked apple cider donuts with cardamom or chocolate donuts with chai glaze
- Pies/Tarts – chocolate caramel tart with pretzel crust or pumpkin crème brûlée tart
To save a bit of time, sometimes I’ll do a mix of store-bought items and homemade desserts. So, I’ll make cookies but buy donuts. I’ll make a fancy cake but head to the bakery for cookies and brownies. It just depends on how much time I have. Whatever you decide to do, just keep it simple and stress-free.
The drinks
Having a drink option on the dessert table is totally optional, but I usually include one. It’s an easy addition and nice for people who prefer to drink their dessert. (Guilty. Sometimes.)
For alcoholic drinks, witches brew cocktail punch and black Halloween sangria are obvious go-tos. But Cadillac cranberry margaritas, blueberry lemon vodka spritzes, and apple cider bourbon cocktails are other batch drinks that are great for a party!
If you’d rather serve a non-alcoholic option, try apple cider, punch, lemonade, or even strawberry iced tea. A mix of craft sodas would be fun too!
How to set up a dessert table
Now that you’ve picked your desserts, you can start planning out your Halloween grazing table. You can prep it the night before to keep things stress-free! Here’s how I do it:
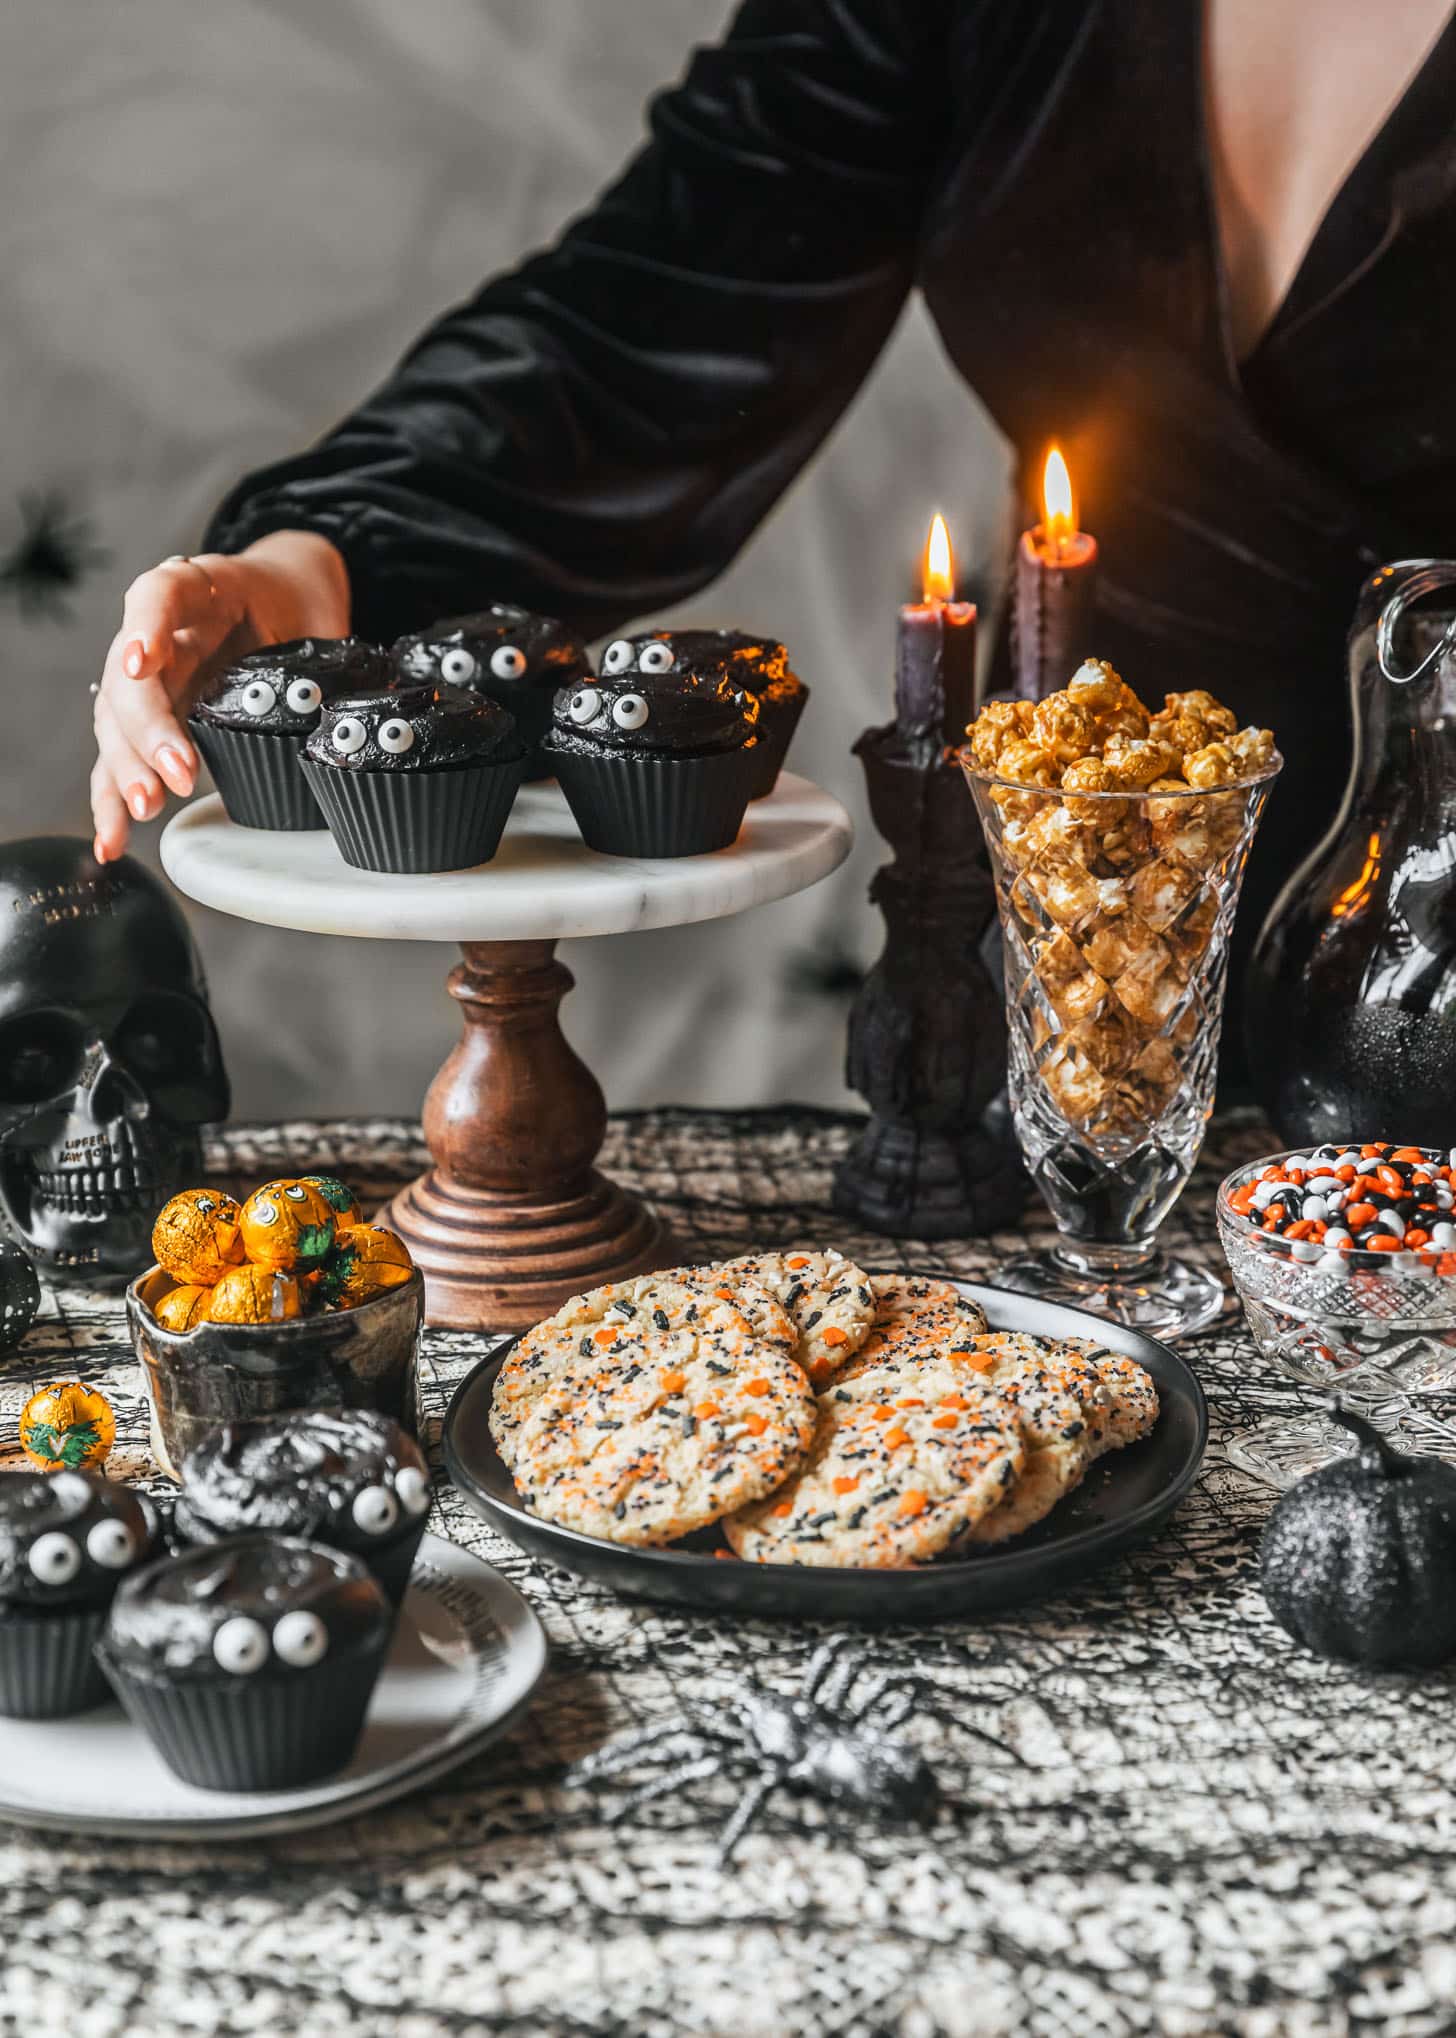
- Start by choosing the serving dishes you want to use. Platters for cookies and brownies, cake stands for cakes and cupcakes, candy dishes, etc. Then, gather your Halloween decorations.
- Now, find a table that will fit everything. You can use your dining table, coffee table, or set up a folding table. I like to use a smaller table so it looks more full.
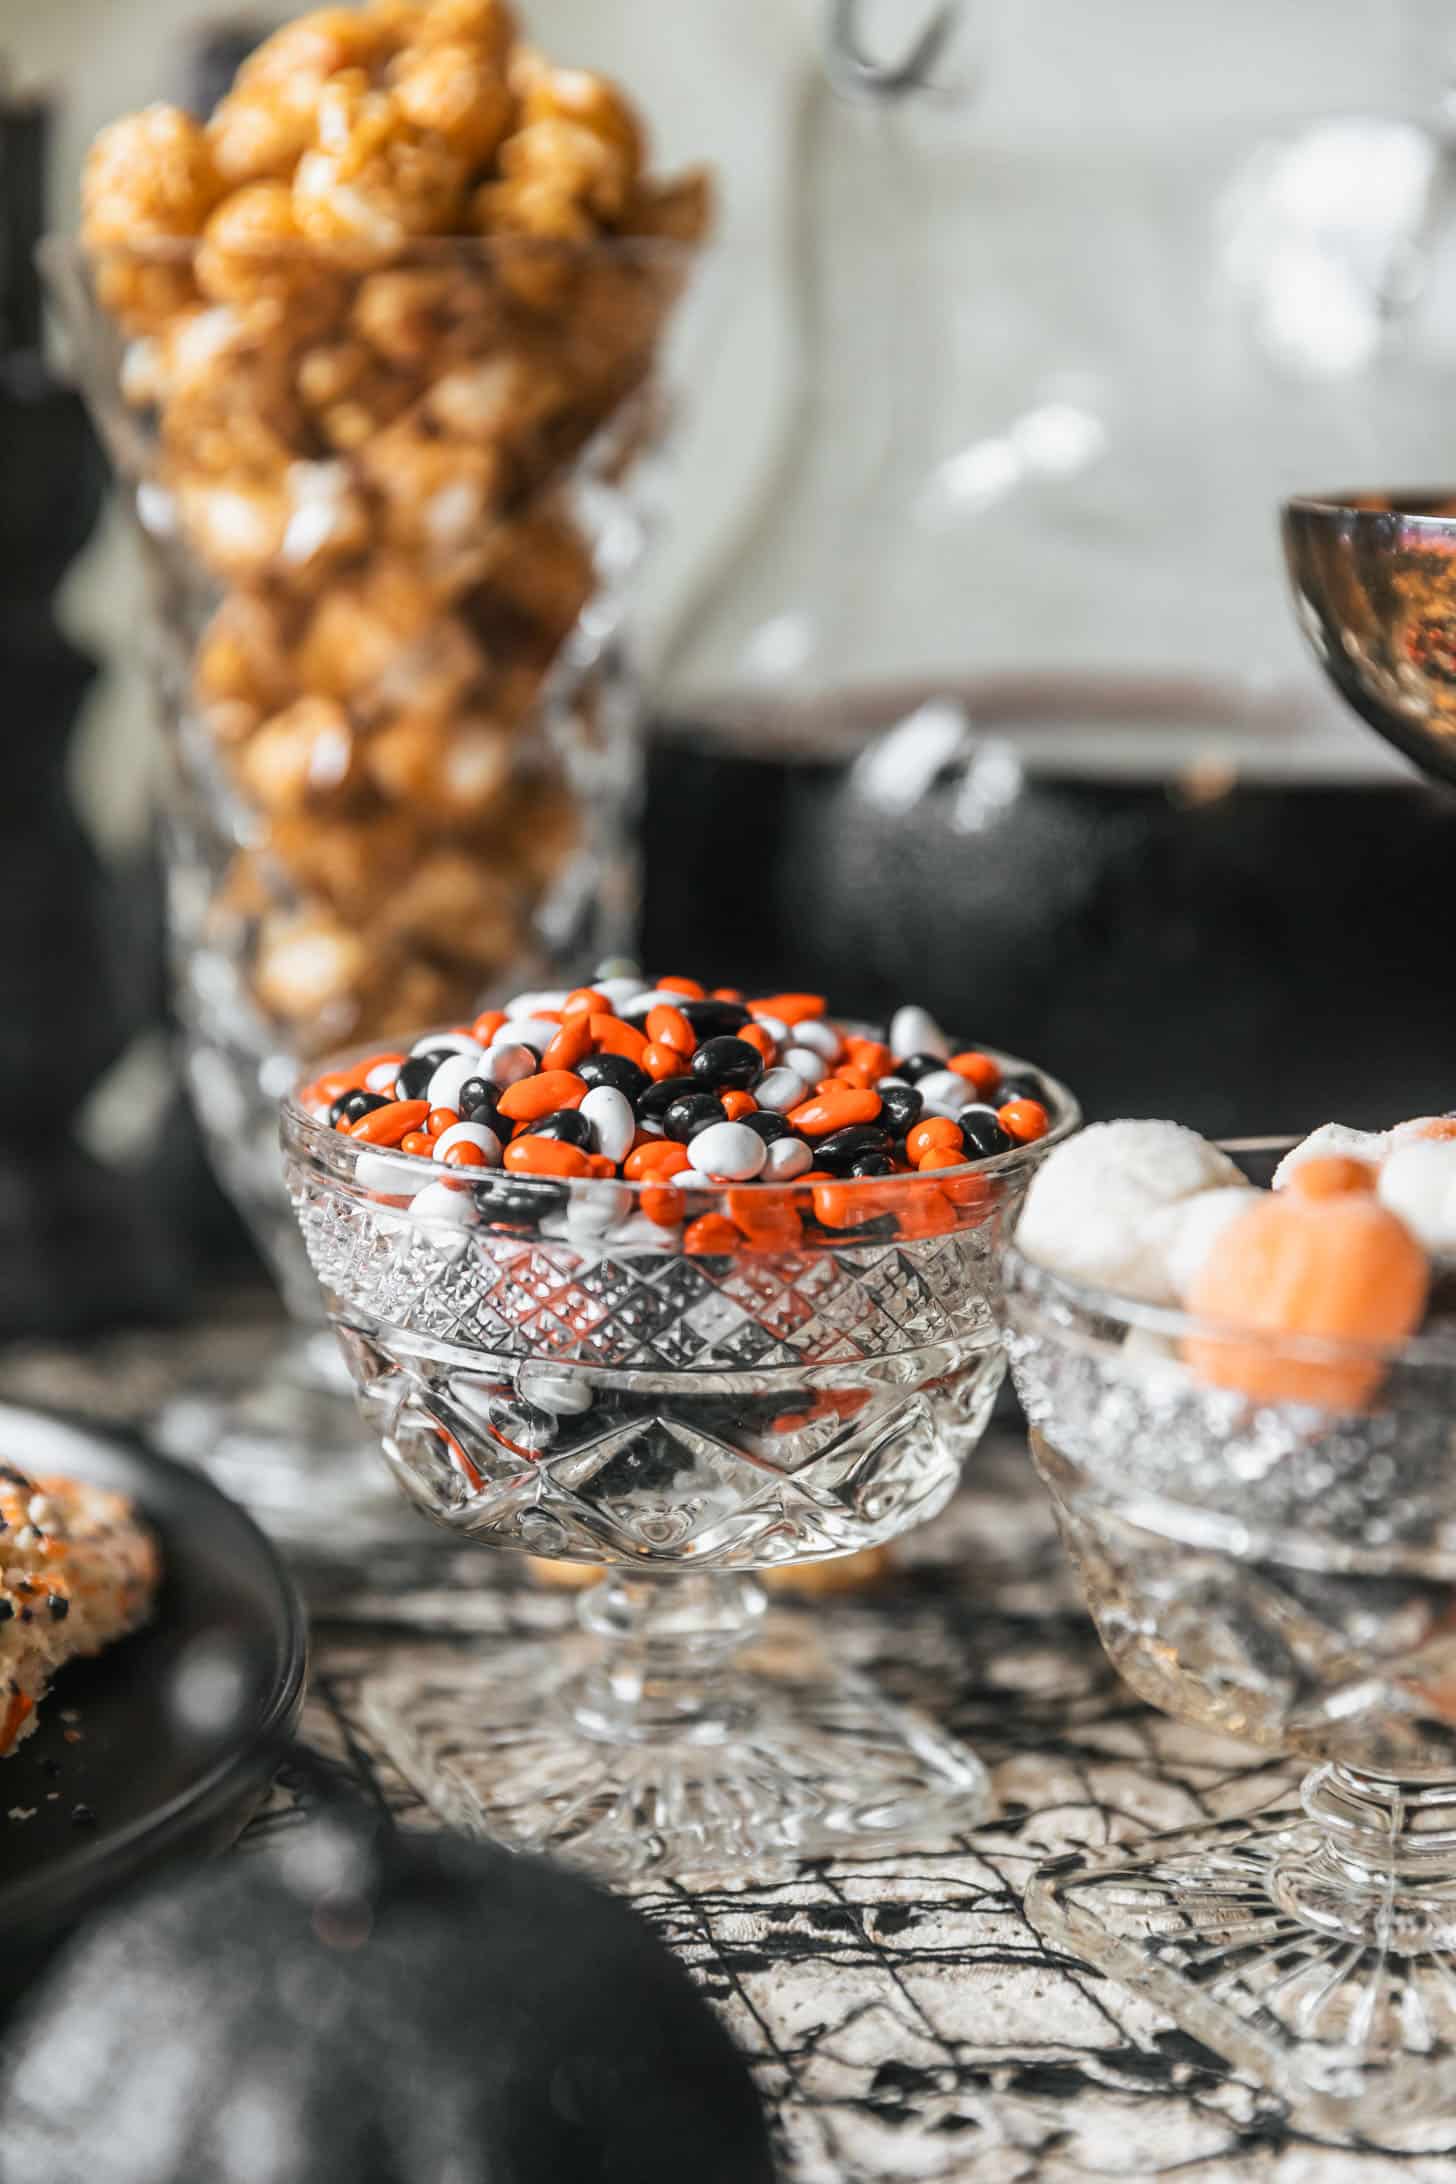
- If you’re using a tablecloth, lay it over the table. Then, set up the serving dishes. Start with the taller items in the center and add the shorter items on the sides. Or, go the opposite direction with taller items on the sides working down to smaller items in the middle. Fill in the table with small serving dishes (like candy bowls).
- Place your decorations around the serving dishes, filling any big gaps. Make sure they aren’t blocking the treats.
- Once you’re ready to party, place the desserts on the serving dishes and fill the snack and candy bowls. Easy!
Supplies you’ll need
Don’t forget a few basic supplies for easy serving! Make sure to pick up:
- Serving dishes (platters, a cake stand, etc.)
- Serving utensils (tongs, spoons, etc.)
- Dessert plates
- Napkins – lots of them
- Ice and cups (if you’re serving drinks)
- Forks or spoons (if you’re making cake, etc.)
- A trash can + bags
When you’re picking serving dishes, choose items in different sizes and heights. You want to vary the height of the items to make everything look balanced and interesting! Start with taller items in the back and play around with adding medium/small items in the front.
Decoration ideas
Here’s a little secret before you go out and buy a million tiny pumpkins like me. Oops. (Who let me into Home Goods?) You won’t need as many decorations as you think, especially once you lay out the serving trays.
You can either use decorations that you already have on hand or buy some depending on the style you’re going for. I chose a skull for my statement piece, added candles for height, and filled in the rest of the table with small pumpkins and spiders. The fake cobwebs were an obvious choice.
You can also add other items like paper bats, black branches, themed signs, ravens, witches, gravestones, or anything else you like. Have fun with it!
To help guide your decorations, try picking a theme or color palette. As I’m sure you noticed, I went with a classic black and white theme with pops of orange. But, you could also have red, green, or purple if you like! Or, go with a specific theme like witches, skulls, spiders, etc. and pick your decorations around the overall vibe.
Pick a centerpiece
If you’re struggling with the design of the table (maybe something just doesn’t look quite right), then just pick a centerpiece. This can be a dessert (like a nice cake or donut wall) or it can be a bigger decoration that you really love. It could also be a gorgeous bouquet of flowers.
Add the centerpiece to the back of the table right in the middle. Then, place your serving dishes and extra decorations around the centerpiece, starting with medium-sized items and working down to smaller items. Use your centerpiece as the guide which will help balance everything out!
Keep it simple
Honestly, this is the best advice I can give you. Just keep it simple. You don’t need to make a bunch of desserts, just a few really good ones. And it’s so easy to go overboard on decorations, so keep the them basic and have fun with it! There’s really no need to stress over having a Pinterest-perfect Halloween grazing table, you know? Here are my general guidelines:
- 2-3 desserts (homemade, store-bought, etc.)
- 2-3 snacks or candies (sweet or salty!)
- 1 drink (totally optional)
- 1-2 statement decorations (bigger skulls, candles, etc.)
- A few smaller decorations (mini pumpkins, fake spiders & cobwebs, etc.)
To make the dessert table look more full, try spacing out the desserts on different serving dishes (even if they’re the same ones). You can see I did this where I put cupcakes both on the cake stand and a little plate! You can also fill in empty areas with bowls of candy, snacks, or decorations.
A few more dessert table tips
- The beauty of a dessert buffet is that you can scale it up or down. Depending on how many people you’re having over, add more desserts, candy, and snacks or serve less for a smaller group.
- For a budget-friendly table, go with more affordable desserts. Chocolate chip cookies, cereal treats, brownies, or blondies are great options!
- You can switch up this table depending on whether you’re serving kiddos or adults. Since our parties are almost always adults, I like to have more elegant options. But if you have kids coming over, try M&M cookies or simple brownies!
- If you have friends with allergies or food restrictions, I would label the desserts. You can write the desserts on little pieces of paper or buy labels online!
- Make sure to have a little garbage can at the end of the table. For people to leave candy wrappers, cupcake liners, etc.
I hope this inspires you to make a dessert table for your spooky party! I would love to see your table, so make sure to tag me on Instagram at @sundaytable.co if you put one together this year. Any questions? Let me know in the comments, I’d love to help!


A dessert table that haunts in the most delicious way! From spectral cupcakes to dripping chocolate cobwebs, every corner is an invitation to dive into spooky sweetness and eerie elegance.
Thank you so much! This was definitely super fun to put together. 🙂